Tài liệu Windows Registry Clean up pptx
Bạn đang xem bản rút gọn của tài liệu. Xem và tải ngay bản đầy đủ của tài liệu tại đây (115.51 KB, 7 trang )
Windows Registry Clean up
A Guide to Cleaning the Windows Registry for Vista, XP, 2000 and Windows 98
Courtesy of Registryrepairtool.net © Copyright 2009 all right reserved .
Terms of Use, Personal-Usage License-This is a free e-book as such you are free to use its
content in anyway as long as you are not selling the content of this e-book for a profit or claiming
ownership. Therefore any use of this content must credit the e-book Windows Registry Clean up
as the source. If you would like a copy of this ebook in html. Visit www.registryrepairtool.net.
Disclaimer- I take no responsibility for what my instructions will do to your computer or
operating system. Follow my instructions carefully and at your own risk.
Preface
Warning this book is not for novice users. If at anytime you are having trouble following my
instructions, click on the following link and read the registry repair tool tutorial for your version
of Windows. These tutorials are designed to walk you through the process using software as an
alternative to the registry editor.
Who should read this book?
…Anyone who would like to learn how to use the Windows Registry Editor to fix issues with
their operating system quickly and safely. And for those who wants to learn how to use registry
repair tools to clean and maintain their Windows Registry. I am going to skip wordy technical
explanations. My tutorials will be short, direct and to the point yet very specific and easy to
understand. Make sure to read my instructions carefully but more importantly take your time.
Remember! Always create a restore point and export a copy of your registry before you begin.
With that said I really hope that after reading this tutorial you will have the basics building blocks
needed to clean and maintain your Windows Registry.
Table of Contents
Chapter 1: Creating a Restore Point and Exporting Your Registry
Chapter 2: How to eliminate start up items
Chapter 3: How to delete unneeded Registry keys old programs leave behind
Chapter 4: Registry Repair Tools-Maintaining your Windows Registry has never been easier
Chapter 5: Registry Hacks- Tips and tricks to customize your Registry
Chapter 1
Creating a system restore point and Exporting your Windows XP/Vista Registry
It is very important to remember to always export a copy of your Windows Registry and create a
restore point before making any attempts to edit your Registry.
Step 1: Windows Vista Users- Creating a System Restore Point
Right Click on my computer and select Properties
Click on System Protection on the tasks menu
You should see a Window with your hard drive/s in it. Your C: should be already checked.
Click on the Create Button
Name your restore point appropriately by date
Now Click on the Create Button
A conformation screen should appear when your restore point is completed
Windows XP Users- Creating a System Restore Point
The best way is to find help and support in your start menu and type: system restore wizard
Find and run the system restore wizard under run tasks
From here it’s the same process as Vista
Step 2: Exporting your Windows Registry (all versions)
Follow these steps for every version of Windows
Click start then run (search in Vista)
Type in regedit
Now select file then export
Name your file appropriately and save
Now you have a system restore point as well as a copy of your registry.
If for some reason you delete or edit the wrong key you can simply repeat the exporting process
and or course select import. In case importing the registry file doesn’t work you can always revert
to the system restore point.
Chapter 2
Removing start-up items from your Windows Registry
Don’t forget to create a system restore point and export a copy of your registry. See chapter 1
for help.
Note: The process of removing start-up programs in your registry is the same in every version of
Windows.
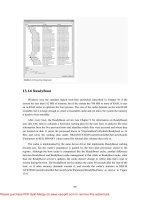
Step 1: open the registry editor
Click start then run (search in Vista) then type in regedit
Step2: Deleting the keys in run the folder
A Quick note on the Registry
Now don’t let yourself get intimidated here. The registry is a huge directory so it can be easy to
get lost but at the same time it’s well organized. On the Left is the directory structure which in
most cases is broken up into 5 folders called hive keys. There are some folders that could be open
so if this is the case scroll up to the top and close the open folder. Now the only Hive we care
about is hkey_ local_machine. Lets go ahead and highlight this key. Now on the Right hand side
are the values for this particular key. It is this pane we will be making our changes. With this in
mind let’s get started
Let’s start with opening hkey_local_machine by clicking the plus sign or triangle. You
should see several folders drop down. We are looking for the software key. Locate the
software key and open it. Now you will see a huge list of folders drop down. Instead of
scrolling through these various folders we are going to click on the very first one and type
in M. This will get you pretty close to the Microsoft key which will be the next key we
need to open. Next using the same technique type in W and find Windows. Make sure
you click on a key in that folder. Open the Windows key and find current version. After
opening current version find and highlight run. Very important to make sure you are in
the right key because at this point we are going to start making some changes. Look at the
contents of the right pane. It shows a column for name, type, and data. If you need to
expand the name column click on the divider and hold while pull it to the right. As far as
deleting these keys here my take. If you’re not sure don’t do it. In all reality you can’t
hurt yourself here but you may want to keep programs such as Virus protections, firewall,
and other vital software running so choose carefully. Most of the time there is quite a bit
of junk you don’t need in here so cleaning this key out most always significantly boosts
your performance. Once you are done just close the registry editor. Your changes will
take place once the system reboots.
Chapter 3
How to delete unneeded Registry keys old programs leave behind
All programs you install modify your registry in some way. Unfortunately most programs don’t
fully clean up after themselves when you uninstall them. This causes your registry to get bigger
which in turn makes your system run slower. It’s rare but some applications will not even remove
themselves from your programs list. I want to start this chapter out by showing you a cool trick
that will wipe old entries in your add remove programs list for good.
First off export a copy of your registry
Before I start….. I want to teach you how to search through your registry. In the registry editor
highlight computer. Select the edit menu option then find. Type in Microsoft and press find next.
You should see a value highlighted. Go ahead and press f3 on your keyboard. Notice how it
found another Microsoft value? The function 3 button will keep repeating the search until it is
completely through your registry. This is why it is very important to have the computer key
highlighted when you search otherwise your search maybe confined to one hive key.
Ok…Lets get rid of those old entries in add/remove programs
Find the key hkey_local_machine\software\microsoft\windows\currentversion\uninstall
You will see a list of hexadecimal values. Now double check to make sure uninstall is highlighted
and Search for the program you want to remove. It is very important that you do not delete the
folder just its contents. After a reboot that entry will be gone.
You are starting to learn what a powerful tool the registry editor is. I am sure you want to learn
some more cool tricks but I want to hold off on that for now. I will be addressing this issue in
chapter 5 Registry Hacks
I recommend doing an inventory of applications and programs you use. Uninstall all programs
you aren’t using and reboot. Once that is complete pull up your list of installed applications and
make sure they are all gone? Use the above hack to get those programs off the list.
Next step is to scan the registry for keys related to these applications you recognize and you know
you don’t use. Start by highlighting the computer icon and keep pressing f3 while deleting all
references to the program. Do this for all your uninstalled programs. This will decrease the size of
your registry and as a result your computer will run faster. I sure by now you’re starting to realize
how tedious this process is. Personally I let a registry cleaner program do all the dirty work for
me. I own registry easy so I can say with confidence that it gets the job done. But I have heard
goods things about Regcure and Registry Mechanic. Actually this is a perfect time to learning
about these registry cleaners and how they work.
Chapter 4
Registry Repair Tools
Repairing and maintaining your Windows Registry has never been easier.
Being a computer technician I find a Registry Repair tool invaluable. For the most part they are
quick, thorough and eliminate the possibility of human error. Editing the registry is a tedious task
that I would gladly hand over to the right tool. I have heard great things about Registry Mechanic
and Regcure. My colleagues have said wonderful things about these tools but I am the type of
person who can’t recommend anything I wouldn’t use myself. So with that said let me shed a
little light on how I approach Registry repair and system optimization as a professional. First off
by the time I get a computer it is in bad shape mainly because the repair shop is always the last
ditch effort before the system goes into the garbage. So I usually have my work cut out for me.
After I have eliminated any viruses or spy-ware I like to use my registry repair tool to clean the
registry. Registry Easy with eliminate all invalid keys and registry errors for me. One other thing
I like is it removes junk files like cookies and temp files. This is a big plus for the less tech savvy
folk. After that I like to use the Internet Explorer tool to restore Internet Explorer. This gets rid of
even more junk. Next I run the system optimizer, internet optimizer and memory tweak. I always
like to check the run key in the registry for unnecessary start up programs. I covered this earlier in
chapter 2. For Windows 2000 and up I like to check the services icon in the control panel for
unneeded services. 9 times out of 10 I am able to save the Windows installation. If you have a
copy of registry easy and want a step by step tutorial visit my website registryrepairtool.net
If you would like to get a copy of my registry cleaner click here