Tài liệu Web Programming with HTML, XHTML, and CSS- P11 ppt
Bạn đang xem bản rút gọn của tài liệu. Xem và tải ngay bản đầy đủ của tài liệu tại đây (964.21 KB, 50 trang )
To give focus to the first text input on a form, simply add an onload event handler to the <body> element
of the document. This handler selects the form control that you want to highlight and uses the
focus()
method of that control to give it focus, as follows (ch12_eg10.html):
<body onload=”document.myForm.myTextBox.focus();”>
When the page loads, the cursor should be flashing in the form control that you have selected, ready for
the user to enter some text See Figure 12-10.
Note that the
onload event fires when the complete page has loaded (not as soon as it is come across in
the order of the page).
Figure 12-10
Auto-Tabbing Between Fields
The focus() method can also be used to pass the focus of one control to another control. For example, if
one of the controls on a form is to provide a date of birth in MM/DD/YYYY format, then you can move
focus between the three boxes as soon as the user enters a month, and then again once the user has entered
a day (
ch12_eg11.html):
<form name=”frmDOB”>
Enter your date of birth:<br />
<input name=”txtMonth” id=”txtMonth” size=”3” maxlength=”2”
onkeyup=”if(this.value.length>=2)
this.form.txtDay.focus();”/>
<input name=”txtDay” id=”txtDay” size=”3” maxlength=”2”
onkeyup=”if(this.value.length>=2)
this.form.txtYear.focus();” />
<input name=”txtYear” id=”txtYear” size=”5” maxlength=”4”
onkeyup=”if(this.value.length>=4)
this.form.submit.focus();” />
<input type=”submit” name=”submit” value=”Send” />
</form>
This example uses the onkeyup event handler to check that the length of the text the user has entered is
equal to or greater than the required number of characters for that field. If the user has entered the required
number of characters, the focus is moved to the next box.
Note how the length of the text input is discovered using
this.value.length. The this keyword indi-
cates the current form control, whereas the
value property indicates the value entered for the control.
471
Chapter 12: Working with JavaScript
59313c12.qxd:WroxPro 3/23/08 1:44 PM Page 471
Please purchase PDF Split-Merge on www.verypdf.com to remove this watermark.
Then the length property returns the length of the value entered for the control. This is a quicker way
of determining the length of the value in the current form control than the full path, which would be, as
follows:
document.fromDOB.txtMonth.value.length
The other advantage of using the this keyword rather than the full path is that the code would work if
you copied and pasted these controls into a different form, as you have not hard-coded the name of the
form in.
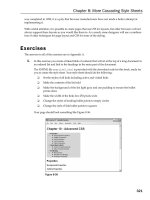
You can see this example in Figure 12-11; the user has entered an appropriate number of digits in one
field so the focus is moved on to the next.
Figure 12-11
You might have noticed that the value of the
size attribute is also one digit larger than the maximum
length of the field to ensure that there is enough space for all of the characters (usually the width of the
control will be slightly too small to see all of the characters at once).
I have seen this technique used to allow users to enter their credit card details using four blocks of four
codes. While 16 digits is the most common length for a credit card number, and they are often printed in
blocks of four digits, some Visa cards, for example, contain 13 digits and some American Express cards
use 15 digits.
Disabling a Text Input
Sometimes you will want to disable a text input until a certain condition has been met — just as the
Submit button was disabled until the user clicked the checkbox to agree to terms and conditions in
Figure 12-9.
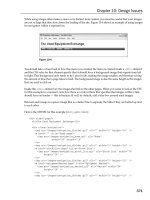
This example features a form that asks users how they heard about the site; radio buttons are used for
several options such as Friend, TV ad, magazine ad, and then an option of Other. If the user selects the
Other option, the text input next to that option allows the user to indicate how they heard about the site.
You can see the form in Figure 12-12.
In this example, it’s not just a case of enabling the text box when the user selects the other radio button;
you really need to check the value of each radio button as it is selected — after all, if the user selects Other
as his or her first choice, but then changes her mind and selects TV or one of the other options, you will
want to disable the text input and change its value again. Therefore, each time the user selects a radio but-
ton, a function in the head of the document is called that is responsible for enabling and disabling the con-
trol and setting values.
472
Chapter 12: Working with JavaScript
59313c12.qxd:WroxPro 3/23/08 1:44 PM Page 472
Please purchase PDF Split-Merge on www.verypdf.com to remove this watermark.
Figure 12-12
First, here is the form that gives users the options (
ch12_eg12.html). Note how the text input is dis-
abled using the
onload event handler of the <body> element and that the text input does not use the
disabled attribute (this is the same as the earlier example with the Submit button).
<body onload=”document.frmReferrer.txtOther.disabled=true;
document.frmReferrer.txtOther.value=’not applicable’ “>
<h2>How did you hear about us?</h2>
<form name=”frmReferrer”>
<input type=”radio” name=”radHear” value=”1”
onclick=”handleOther(this.value);” />From a friend<br />
<input type=”radio” name=”radHear” value=”2”
onclick=”handleOther(this.value);” />TV Ad<br />
<input type=”radio” name=”radHear” value=”3”
onclick=”handleOther(this.value);” />Magazine Ad<br />
<input type=”radio” name=”radHear” value=”4”
onclick=”handleOther(this.value);” />Newspaper Ad<br />
<input type=”radio” name=”radHear” value=”5”
onclick=”handleOther(this.value);” />Internet<br />
<input type=”radio” name=”radHear” value=”other”
onclick=”handleOther(this.value);” />Other Please specify:
<input type=”text” name=”txtOther” />
</form>
As you can see from this form, every time the user selects one of the options on this form, the onclick
event calls a function called handleOther(). This function is passed the value of the form control as a
parameter.
Looking at the function, you can see that it checks whether the value of the form control is equal to the
text
other (remember that checking whether one value is equal to another value uses two equal signs
because the single equal sign is used to set a variable).
function handleOther(strRadio) {
if (strRadio == “other”) {
document.frmReferrer.txtOther.disabled = false;
document.frmReferrer.txtOther.value = “;
}
else {
473
Chapter 12: Working with JavaScript
59313c12.qxd:WroxPro 3/23/08 1:44 PM Page 473
Please purchase PDF Split-Merge on www.verypdf.com to remove this watermark.
document.frmReferrer.txtOther.disabled = true;
document.frmReferrer.txtOther.value = ‘not applicable’;
}
}
Here you can see a simple if else statement that looks at the value of the radio button, which has been
passed in as an argument. If the value is
other, the control is enabled, and the value set to nothing — other-
wise it is disabled and the value is
not applicable.
Case Conversion
There are times when it is helpful to change the case of text a user has entered to make it all uppercase or
all lowercase — in particular because JavaScript is case-sensitive. To change the case of text, there are
two built-in methods of JavaScript’s String object:
❑
toLowerCase()
❑ toUpperCase()
To demonstrate, here is an example of a text input that changes case as focus moves away from the text
input (
ch12_eg13.html):
<form>
<input type=”text” name=”case” size=”20”
onblur=”this.value=this.value.toLowerCase();” />
</form>
If your form data is being sent to a server, it is generally considered better practice to make these
changes on the server because they are less distracting for users — a form that changes letter case
as you use it can appear a little odd to users.
Trimming Spaces from Beginning and End of Fields
You might want to remove spaces (white space) from the beginning or end of a form field for many rea-
sons, even simply because the user did not intend to enter it there. The technique I will demonstrate here
uses the
substring() method of the String object, whose syntax is:
substring(startPosition, endPosition)
This method returns the string from the given points — if no end position is given, then the default is
the end of the string. The start and end positions are zero-based, so the first character is 0. For example,
if you have a string that says
Welcome, then the method substring(0, 1) returns the letter W.
Looking first at removing leading white space from the start of a string, the
substring() method will
be called upon twice.
First you can use the
substring() method to retrieve the value the user has entered into a text control
and just return the first character. You check if this first character returned is a space:
this.value.substring(0,1) == ‘ ‘
474
Chapter 12: Working with JavaScript
59313c12.qxd:WroxPro 3/23/08 1:44 PM Page 474
Please purchase PDF Split-Merge on www.verypdf.com to remove this watermark.
If this character is a space, you call the substring() method a second time to remove the space. This time
it selects the value of the control from the second character to the end of the string (ignoring the first char-
acter). This is set to be the new value for the form control; so you have removed the first character, which
was a space.
this.value = this.value.substring(1, this.value.length);
This whole process of checking whether the first character is a blank, and then removing it if it is, will
be called using the
onblur event handler; so when focus moves away from the form control the process
starts. You can see here that the process uses a
while loop to indicate that for as long as the first character
is a blank then it should be removed using the second call to the
substring() method. This loop makes
sure that the first character is removed if it is a blank until the substring no longer returns a blank as the
first character (
ch12_eg14.html).
<form>
<input type=”text” name=”txtName” size=”100”
value=” Enter text leaving whitespace at start. Then change focus.”
onblur=”while (this.value.substring(0,1) == ‘ ‘)
this.value = this.value.substring(1, this.value.length);” /><br />
</form>
To trim any trailing spaces the process is similar but reversed. The first substring() method collects the
last character of the string, and if it is blank removes it, as follows:
<form>
<input type=”text” name=”txtName” size=”100”
value=”Enter text leaving whitespace at end. Then change focus. “
onblur=”while (this.value.substring
(this.value.length-1,this.value.length) == ‘ ‘)
this.value = this.value.substring(0, this.value.length-1);” /><br />
</form>
As long as you are not targeting browsers as old as Netscape 4 and IE4, you can alternatively use a
Regular Expression to trim the spaces, as follows:
<form>
<input type=”text” name=”removeLeadingAndTrailingSpace” size=”100”
value=” Enter text with white space, then change focus. “
onblur = “this.value = this.value.replace(/^\ \s+/, “).replace(/\s+$/, “);”
/><br />
</form>
This removes both trailing and leading spaces.
Regular Expressions are quite a large topic in themselves. If you want to learn more about them, then you
can refer to Beginning JavaScript 2nd Edition by Paul Wilton (Wrox, 2000).
Selecting All the Content of a Text Area
If you want to allow users to select the entire contents of a text area (so they don’t have to manually select
all the text with the mouse), you can use the
focus() and select() methods.
475
Chapter 12: Working with JavaScript
59313c12.qxd:WroxPro 3/23/08 1:44 PM Page 475
Please purchase PDF Split-Merge on www.verypdf.com to remove this watermark.
In this example, the selectAll() function takes one parameter, the form control that you want to select
the content of (
ch12_eg15.html):
<html>
<head><title>Select whole text area</title>
<script language=”JavaScript”>
function selectAll(strControl) {
strControl.focus();
strControl.select();
}
</script>
</head>
<body>
<form name=”myForm”>
<textarea name=”myTextArea” rows=”5” cols=”20”>This is some text</textarea>
<input type=”button” name=”btnSelectAll” value=”Select all”
onclick=”selectAll(document.myForm.myTextArea);” />
</form>
</body>
</head>
</html>
The button that allows the user to select all has an onclick event handler to call the selectAll() function
and tell it which control it is whose contents should be selected.
The
selectAll() function first gives that form control focus using the focus() method and then selects
its content using the
select() method. The form control must gain focus before it can have its content
selected. The same method would also work on a single-line text input and a password field.
Check and Uncheck All Checkboxes
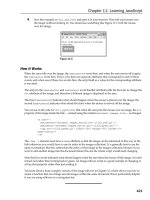
If there are several checkboxes in a group of checkboxes, it can be helpful to allow users to select or dese-
lect a whole group of checkboxes at once. The following are two functions that allow precisely this:
function check(field) {
for (var i = 0; i < field.length; i++) {
field[i].checked = true;}
}
function uncheck(field) {
for (var i = 0; i < field.length; i++) {
field[i].checked = false; }
}
In order for these functions to work, more than one checkbox must be in the group. You then add two
buttons that call the check or uncheck functions, passing in the array of checkbox elements that share
the same name such as the following (
ch12_eg16.html):
<form name=”frmSnacks” action=””>
Your basket order<br />
476
Chapter 12: Working with JavaScript
59313c12.qxd:WroxPro 3/23/08 1:44 PM Page 476
Please purchase PDF Split-Merge on www.verypdf.com to remove this watermark.
<input type=”checkbox” name=”basketItem” value=”1” />Chocolate
cookies<br />
<input type=”checkbox” name=”basketItem” value=”2” />Potato chips<br />
<input type=”checkbox” name=”basketItem” value=”3” />Cola<br />
<input type=”checkbox” name=”basketItem” value=”4” />Cheese<br />
<input type=”checkbox” name=”basketItem” value=”5” />Candy bar<br /><br />
<input type=”button” value=”Select All”
onclick=”check(document.frmSnacks.basketItem);” />
<input type=”button” value=”Deselect All”
onclick=”uncheck(document.frmSnacks.basketItem);” />
</form>
You can see how this form appears in Figure 12-13.
Figure 12-13
This could also be combined into a single function, which could be called from the same button such as
the following:
function checkUncheckAll(field) {
var theForm = field.form, z = 0;
for(z=0; z<theForm.length;z++){
if(theForm[z].type == ‘checkbox’ && theForm[z].name != ‘checkall’){
theForm[z].checked = field.checked;
}
}
}
Try It Out An E-mail Form
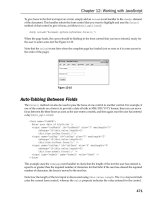
In this exercise you are going to create an e-mail form that has a few interesting features. It uses a Regular
Expression to check the structure of an e-mail address and also checks that all fields have an entry of some
kind. The form includes a quick address book that contains addresses of potential recipients of the e-mail.
Figure 12-14 shows you what the form is going to look like; it also shows the message that appears when
the user tries to submit the e-mail without entering a message.
477
Chapter 12: Working with JavaScript
59313c12.qxd:WroxPro 3/23/08 1:44 PM Page 477
Please purchase PDF Split-Merge on www.verypdf.com to remove this watermark.
Figure 12-14
1. First create a skeleton XHTML document with <head>, <title>, and <body> elements.
2. In the body of the document, add the <form> element and two <div> elements. The first <div>
holds the To, CC, and Subject fields, while the second holds the quick address.
<form name=”frmEmail” onsubmit=”return validate(this)” action=”sendMail.aspx”
method =”post”>
<div id=”toCCsubject”>
<div class=”label”>Send to:</div>
<div class=”input”><input type=”text” size=”70” name=”txtTo” /></div>
<div class=”label”>CC:</div>
<div class=”input”><input type=”text” size=”70” name=”txtCC” /></div>
<div class=”label”>Subject:</div>
<div class=”input”><input type=”text” size=”70” name=
”txtSubject” /></div>
</div>
<div id=”addressBook”>
<! quick address book will go here ></td>
</div>
3. Next you need to add the quick address book into the second <div> element. The address book
uses a multiple select box. Underneath it are two buttons: one to add addresses to the
txtTo
478
Chapter 12: Working with JavaScript
59313c12.qxd:WroxPro 3/23/08 1:44 PM Page 478
Please purchase PDF Split-Merge on www.verypdf.com to remove this watermark.
field and one to add addresses to the txtCC field. Both of these buttons call the add() function
when clicked:
Quick address book:<br />
<select size=”4” name=”selectList1” style=”width:150px”>
<option value=””>Sales</option>
<option value=””>Marketing</option>
<option value=””>Research</option>
<option value=””>Customer Support</option>
<option value=””>IT</option>
</select><br />
<input type=”button” onclick=”add(textTo, document.frmEmail.selectList1);”
value=”Send to” />
<input type=”button” onclick=”add(textCC, document.frmEmail.selectList1);”
value=”CC” />
4. Add the message <textarea> element and a Send E-mail button:
Message:<br />
<textarea name=”message” rows=”20” cols=”115”></textarea><br />
<input type=”submit” value=”Send E-mail” />
5. Now you need to add the validation function and the add() function. First, here is the add()
function that adds e-mail addresses from the address book to the To or CC fields (if there is
already an address in there, the semicolon is added to separate out multiple addresses):
function add(objInput, objList){\{}
var strGroup = objList.options[objList.selectedIndex].value;
if (objInput.value == “”)
{
objInput.value = strGroup
}
else
{
objInput.value += (‘; ‘ + strGroup)
}
}
6. Here is the validate() function, which you can see is quite long:
function validate(form) {
var returnValue = true;
var sendTo = form.txtTo.value;
var cc = form.txtCC.value;
var subject = form.txtSubject.value;
var message = form.txtMessage.value;
if (sendTo == "")
{
returnValue = false;
alert("There are no email addresses in the To field");
form.txtTo.focus();
}
479
Chapter 12: Working with JavaScript
59313c12.qxd:WroxPro 3/23/08 1:44 PM Page 479
Please purchase PDF Split-Merge on www.verypdf.com to remove this watermark.
if (subject == "")
{
returnValue = false;
alert("There is no subject line for this e-mail");
form.txtSubject.focus();
}
if (message=="")
{
returnValue = false;
alert("There is no message to this e-mail");
form.txtMessage.focus();
}
var arrTo = sendTo.split("; ");
var rxEmail=/\^\w(\.?[\w-])*@\w(\.?[\w-])*\.[a-z]{2,6}(\.[a-z]{2})?$/i;
for (var i=0; i<(arrTo.length); i++) {
if (!rxEmail.test(arrTo[i]))
{
returnValue = false;
alert("The e-mail address "+ arrTo[i] +" does not appear to be valid");
}
}
var arrCC = cc.split("; ");
for (var i=0; i<(arrCC.length); i++) {
if (!rxEmail.test(arrCC[i]))
{
returnValue = false;
alert("The e-mail address "+ arrCC[i] +" does not appear to be valid");
}
}
return returnValue;
}
7. Save the file as emailform.html, and when you open it up in the browser window it should
resemble the example you saw in Figure 12-14.
How It Works
The form in this example contains two functions. The first is the add() function, which passes the e-mail
addresses from the select box to the
To or CC fields. The add() function is very simple and takes two
parameters:
❑
objInput: The field that the selected address is being sent to
❑
objList: The select list that contains the e-mail addresses
This function starts by collecting the value of the selected item, using the
selectedIndex property of the
select list and placing it in a variable called
strGroup. Next it checks whether the form field the address is
being added to is empty; if it is, the e-mail address stored in the
strGroup attribute is added to the field.
If the
To or CC field is not empty, a semicolon and a space will be added before the e-mail address because
this is the usual delimiter for multiple e-mail addresses:
function add(objInput, objList){
var strGroup = objList.options[objList.selectedIndex].value;
if (objInput.value == “”)
{
480
Chapter 12: Working with JavaScript
59313c12.qxd:WroxPro 3/23/08 1:44 PM Page 480
Please purchase PDF Split-Merge on www.verypdf.com to remove this watermark.
objInput.value = strGroup
}
else
{
objInput.value += (‘; ‘ + strGroup)
}
}
The validate() function is slightly more complex, starting off by setting a returnValue variable to
true and collecting the form’s values into variables.
function validate(form) {
var returnValue = true;
var sendTo = form.txtTo.value;
var cc = form.txtCC.value;
var subject = form.txtSubject.value;
var message = form.txtMessage.value;
It checks to see if the To, Subject line, and Message body fields are empty, and if so sets the returnValue
attribute to false, and indicates to the user that something must be added for that field using an alert
box — this is very similar to the examples you saw earlier in the chapter:
if (sendTo == “”)
{
returnValue = false;
alert(“There are no e-mail addresses in the To field”);
form.txtTo.focus();
}
The validate function gets more interesting when it comes to checking that valid e-mail addresses have
been entered into the form. First, the Regular Expression that’s used to check the e-mail addresses needs
to be stored in a variable — this time called
rxEmail:
var rxEmail=/\^\w(\.?[\w-])*@\w(\.?[\w-])*\.[a-z]{2,6}(\.[a-z]{2})?$/i;
Next, the To field gets split into an array using the split() method of the String object. This function
will take a string and split it into separate values whenever it comes across a specified character or set
of characters. In this case, the method looks for any instances of a semicolon followed by a space, and
wherever it finds these it creates a new item in the array.
var arrTo = sendTo.split(“; “);
Imagine having the following e-mail addresses (note that this is just to illustrate the split() method; it
is not part of the code):
; ;
These would be split into the following array (again, this is not part of the code from the example):
arrTo[0] = “”
arrTo[1] = “”
arrTo[2] = “”
481
Chapter 12: Working with JavaScript
59313c12.qxd:WroxPro 3/23/08 1:44 PM Page 481
Please purchase PDF Split-Merge on www.verypdf.com to remove this watermark.
So now there has to be a for loop in the code that will go through each e-mail address in the array and
check that it follows the pattern described in the Regular Expression. The
for loop has three parame-
ters; the first sets a counter called
i to be 0, checks that the counter is less than the number of items in
the array, and finally increments the counter. Inside the loop is an
if statement that checks whether the
e-mail address matches the Regular Expression using the
test() method; if it does not, it will set the
returnValue to false and alert the user that the value does not seem to be a valid e-mail address:
for (var i=0; i<(arrTo.length); i++) {
if (!rxEmail.test(arrTo[i]))
{
returnValue = false;
alert(“The email address “+ arrTo[i] +” does not appear to be valid”);
}
}
After this you can see a similar setup for the CC field.
var arrCC = cc.split(“; “);
for (var i=0; i<(arrCC.length); i++) {
if (!rxEmail.test(arrCC[i]))
{
returnValue = false;
alert(“The e-mail address “+ arrCC[i] +” does not appear to be valid”);
}
}
return returnValue;
}
Now you have an example of a form that has more than one function. It uses JavaScript to create a quick
address book and validates the entries to stop the user from trying to send an e-mail address that is not
valid.
Image Rollovers
You met a simple example of an image rollover in the last chapter, but in this chapter you will meet a
function that allows you to change several images on the same page. This function can then be used
with all pages rather than repeating the same script in several pages.
To create a rollover image you need two different versions of an image:
❑ The normal image that the user sees when the mouse is not hovering over the image.
❑ The other image that appears when the user rolls the mouse over the image.
In the last chapter, you saw a very simple image rollover script that was added to an
<a> element that
contained the image. When the user rolls the mouse over the link (containing the image) an
onmouseover
event fires and the src property of the image object is changed to the mouseover image. When the mouse
moves off the image the
onmouseout event changes the image’s src property back to the original image.
482
Chapter 12: Working with JavaScript
59313c12.qxd:WroxPro 3/23/08 1:44 PM Page 482
Please purchase PDF Split-Merge on www.verypdf.com to remove this watermark.
(If only one of these events were monitored, the image would simply change, not go back to its initial
state, so it’s important to monitor both.)
You can see that this image’s
name attribute has a value of button, which is used to identify the image
in the event handler:
<a href=””
onmouseover=”document.images.button.src=’click_red.gif’;”
onmouseout=”document.images.button.src=’click_green.gif’”>
<img src=”click_green.gif” width=”100” height=”50” border=”0” name=”button” />
</a>
Remember that each image in the document has its own corresponding object in the DOM, and one of
the properties of the
image object is the src property. The src property is the location for the image,
which corresponds to the value specified in the
src attribute on the <img> element in the document.
When creating rollover images that contain text, you should generally use the same size and weight of
text on both images. Text that suddenly appears larger or bold can be hard to read. Changing the back-
ground color slightly tends to be a better option.
Creating an image rollover function is the logical next step when you want to use the same rollover
images on several pages — for example if you are creating a navigation bar that changes color as users
move their mouse over each item. Figure 12-15 shows you a navigation bar that does just that.
Figure 12-15
Each image in this navigation bar is contained in a link, and each image must have a different name. As
with the last example, it is the
<a> element that carries the event handlers. When the user places the
mouse over the link, an
onmouseover event calls the changeImages() function, and when the mouse
moves off the link an
onmouseout event calls the same function but passes in values to indicate that the
original image should be shown again.
The
changeImages() function has two arguments — the first is the name of the image, the second is the
name of a variable that holds the URL of the image that will replace the current one. Note how the value
of the image’s
name attribute corresponds with the parameters being passed when the onmouseover and
onmouseout events fire (ch12_eg17.html):
<a href=”index.html”
onmouseover=”changeImages(‘image1’, ‘image1on’)”
onmouseout=”changeImages(‘image1’, ‘image1off’)”>
<img name=”image1” src=”images/home.gif” width=”99” height=”20”
border=”0” alt=”home”>
</a>
483
Chapter 12: Working with JavaScript
59313c12.qxd:WroxPro 3/23/08 1:44 PM Page 483
Please purchase PDF Split-Merge on www.verypdf.com to remove this watermark.
This script that does the real work lives in the scripts folder and is in a file called rollover.js. This
script can be included in any page that is going to include a rollover.
Remember that there are two images for each rollover — when the mouse is over the image it is “on,”
and when the mouse is off the image it is “off.”
Each image is assigned two variables, one for when the mouse is over it and one for when it is off it. The
variables hold an image object whose src property is the URL for the image. First you see the images
used when there are rollovers and then the images used in the normal state:
if (document.images) {
image1on = new Image();
image1on.src = “images/nav_home_on.gif”;
image2on = new Image();
image2on.src = “images/nav_products_on.gif”;
image3on = new Image();
image3on.src = “images/nav_services_on.gif”;
Next come the variables holding the image objects that have the src property set for when the image
is “off.”
image1off = new Image();
image1off.src = “images/nav_home.gif”;
image2off = new Image();
image2off.src = “images/nav_products.gif”;
image3off = new Image();
image3off.src = “images/nav_services.gif”;
}
Now, here’s the function; it loops through the images and takes the arguments passed into the function:
function changeImages() {
if (document.images) {
for (var i=0; i<changeImages.arguments.length; i+=2) {
document[changeImages.arguments[i]].src =
eval(changeImages.arguments[i+1] + “.src”);
}
}
}
The lines that are doing the real work here are the ones in the middle. If the user has moved his or her
mouse over the first image, the function will be called like this:
onsubmit=”changeImages(image1, image1on)”
The first value being passed in is the value of the name property on the image. So the following line in the
function tells the browser to take the first argument of the
changeImages() function (which is image1)
and change the
src property of this element:
document[changeImages.arguments[i]].src =
484
Chapter 12: Working with JavaScript
59313c12.qxd:WroxPro 3/23/08 1:44 PM Page 484
Please purchase PDF Split-Merge on www.verypdf.com to remove this watermark.
The last thing on this line is the equal (=) sign. This property still has to be set, and the code on the next
line is the code that actually provides the value. This next line is saying the property should be given the
value of the second argument in the function:
eval(changeImages.arguments[i+1] + “.src”);
You may remember from the last chapter that the for loop takes the following three arguments:
❑ The first argument runs only once and in this case sets the value of the counter to be 0 (
i-0).
❑ The second argument indicates whether the loop should run again. In this case, if the counter is
less than the number of arguments passed to the
changeImages() function, it should run again.
❑ The third argument increments the counter by two.
This means that the
changeImages() function can be used to change more than one image, because you
can call the function with different sets of parameters.
Random Script Generator
There are times when it is helpful to use a script to select a random value. The following script can be
used to select a random piece of content from a predefined array. You might like to use it to add ran-
dom quotes or tips, or you could use it to rotate advertisements or images. The script contains a func-
tion called
randomContent() that includes the content that will be selected at random.
The content is added to an array called
arrContent and the array contains the data you want to appear
randomly:
<script language=”JavaScript”>
function randomContent(){
var arrContent=new Array()
arrContent[0]=’This is the first message.’
arrContent[1]=’This is the second message.’
arrContent[2]=’This is the third message.’
arrContent[3]=’This is the fourth message.’
arrContent[4]=’This is the fifth message.’
A variable called i is then set to a random value between 0 and the number of items in the array. In order
to generate this random number, you need to call two methods of the Math object. The
random() method
generates a random number between 0 and 1 and this is multiplied by the number of elements in the array.
The number is then rounded to the nearest integer (whole number) equal to or less than the number gener-
ated using the
floor() method.
The
floor() method is used rather than the round() method because you could end up with a number
higher than the number of items in the array if you used the
round() method.
var i=Math.floor(Math.random()*arrContent.length)
document.write(arrContent[i])
}
</script>
485
Chapter 12: Working with JavaScript
59313c12.qxd:WroxPro 3/23/08 1:44 PM Page 485
Please purchase PDF Split-Merge on www.verypdf.com to remove this watermark.
Wherever you want to include the random content, you just call that function:
<script type=”text/JavaScript”>
randomContent();
</script>
You can see the result here in Figure 12-16.
Figure 12-16
If you wanted the random content to appear on several pages, then you could simply place the function
in an external file.
Pop-Up Windows
Pop-up windows have a bad name. People associate them with pop-up ads that appear when pages of
a site load, and they often feature advertisements or unwanted information. There are, however, some
very legitimate uses for pop-up windows. For example, you might just want to keep users on the current
page while allowing them to provide some other information in a pop-up, or you might want to open
something from your site (such as an image) in a new window without the user losing his or her place.
Of course, you can create a normal link and make the page open in a new window by adding the
target=
”_new”
attribute, but when you create a pop-up in JavaScript you can control the dimensions of the win-
dow, indicate whether it can be resized or not, and whether it has scrollbars (
ch12_eg19.html).
<a
href=” />onclick=”window.open(this.href, ‘search’,
‘width=400,height=300,scrollbars,resizable’);
return false;”
>
Click here for the link to open in a popup window.
</a>
You can see that the open() method of the window object can take several parameters; the syntax is as
follows:
open(url, ‘windowname’, ‘features’)
486
Chapter 12: Working with JavaScript
59313c12.qxd:WroxPro 3/23/08 1:44 PM Page 486
Please purchase PDF Split-Merge on www.verypdf.com to remove this watermark.
You can list several features after the window name, and the following table shows you those available.
As you can see, they allow you to control several properties of the window including size and position
and whether the screen has scrollbars or not — but remember that users with different resolution might
require scrollbars even if you do not.
You should be aware that some pop-up blocking software might prevent functions like this from work-
ing. You should also avoid using words such as “pop-up” (or “popup”) in your filenames even when
creating pop-up windows because some pop-up window blockers look for words like these in your file-
names and will not open files containing them.
You can create pop-up windows in JavaScript in several ways, but I strongly recommend that you use
this approach if you choose to create them with JavaScript because many other methods prevent a user
from right-clicking the link and opening it in a new window themselves. More experienced web browsers
often enable you to open a link in a new window with the right mouse button, and some methods of creat-
ing pop-ups mean that users who take this approach (choosing to open the link in a new window them-
selves) will just get a blank window. This approach solves the problem.
JavaScript Libraries
The examples you have seen so far in this chapter have been designed to give you a better understanding
of how JavaScript works with your XHTML documents. Now you are going to take a look at some exam-
ples that work with some of the popular free JavaScript libraries that you can download via the Web.
Feature Value Sets
width Number The width of the new window in pixels
height Number The height of the new window in pixels
left Number The location where the left side of the window should appear
top Number The location where the top of the window should appear
location
yes/no
Controls whether the browser should display the browser location
toolbar
menubar
yes/no
Controls whether the browser should display the menu bar
resizable
yes/no
Allows the user to resize the browser window
scrollbars
yes/no
Controls whether horizontal or vertical scrollbars are shown
status
yes/no
Controls the display of the status bar (the area at the bottom of the
browser)
toolbar
yes/no
Controls whether the browser should display the buttons toolbar
487
Chapter 12: Working with JavaScript
59313c12.qxd:WroxPro 3/23/08 1:44 PM Page 487
Please purchase PDF Split-Merge on www.verypdf.com to remove this watermark.
JavaScript libraries are simply JavaScript files that contain code that helps programmers perform tasks
commonly used in web pages with just a few lines of code. You will be looking at examples that allow
you to do the following:
❑ Create animated effects, such as fading out text, or shrinking boxes
❑ Re-order items in a bulleted list
❑ Sort tables
❑ Create calendars
❑ Auto-complete text fields
There are many JavaScript libraries that you can download from the Web; however, in this chapter you will
be looking at Scriptaculous (which is actually built on top of another JavaScript library called Prototype),
MochiKit, and Yahoo User Interface (also known as YUI).
I have included versions of each of these libraries with the code download for this chapter. If you look in
the code folder for Chapter 12, you will see inside the scripts folder that there are folders called scriptac-
ulous, mochikit, and yui (each folder corresponding to the three libraries you will be using).
Animated Effects using Scriptaculous
Scriptaculous can help you with many kinds of tasks: animation, drag-and-drop functionality, editing tools,
and autocompleting of text inputs, as well as utilities to help create DOM fragments. In this section, you
look at some of the animation effects.
As I’ve already mentioned, Scriptaculous was built on top of another JavaScript library called Prototype.
I have included a copy of Scriptaculous 1.8.0 and Prototype 1.6.0 with the code download for this chap-
ter; however, you can check for more recent versions and download your own copy of these files from
/>Scriptaculous contains functions that help you create several different types of animations. this example
is going to demonstrate just four of the animated effects you can achieve with Scriptaculous, but this will
be enough to demonstrate the flexibility of these effects, and how easily you can integrate them into your
pages. You can see what this page will look like in Figure 12-17, although you really need to try the exam-
ple out to see the animation effects in
ch12_eg20.html.
In order to use the Scriptaculous library, you need to create references to both
prototype.js library,
which is in the lib folder inside the scriptaculous folder, and the
scriptaculous.js library, which is in
the src folder inside the scriptaculous folder (if you look in the src folder there are several other scripts
that this JavaScript file loads).
<script src=”scripts/scriptaculous/lib/prototype.js”
type=”text/javascript”></script>
<script src=”scripts/scriptaculous/src/scriptaculous.js”
type=”text/javascript”></script>
488
Chapter 12: Working with JavaScript
59313c12.qxd:WroxPro 3/23/08 1:44 PM Page 488
Please purchase PDF Split-Merge on www.verypdf.com to remove this watermark.
Figure 12-17
You then have four
<div> elements to demonstrate the four effects you will be looking at. The outer <div>
element is used to separate each of the four effects you will be looking at; inside the second <div> element
is the name of the function you are demonstrating:
<div class=”container”>
<div class=”demo”>
Effect.Fade
</div>
</div>
It is the second line of each of these elements that you need to look at. Each <div> element whose class
attribute has a value of demo creates one of the boxes, and on this element you add an id attribute that
will be used to identify this element within the script, while the
onclick attribute calls the Scriptaculous
library to create the effect:
<div class=”container”>
<div class=”demo” id=”demo-effect-shake” onclick=”new Effect.Shake(this)”>
Effect.Shake
</div>
</div>
<div class=”container”>
<div class=”demo” id=”demo-effect-shrink” onclick=”new Effect.Shrink(this);
window.setTimeout(‘Effect.Appear(\’demo-effect-shrink\’,
{duration:.3})’,2500);”>
Effect.Shrink
</div>
</div>
<div class=”clear”></div>
<div class=”container”>
489
Chapter 12: Working with JavaScript
59313c12.qxd:WroxPro 3/23/08 1:44 PM Page 489
Please purchase PDF Split-Merge on www.verypdf.com to remove this watermark.
<div class=”demo” id=”demo-effect-fade” onclick=”new Effect.Fade(this);
window.setTimeout(‘Effect.Appear(\’demo-effect-fade\’, {duration:.3})’,2500);”>
Effect.Fade
</div>
</div>
<div class=”container”>
<div class=”demo” id=”demo-effect-puff” onclick=”new Effect.Puff(this);
window.setTimeout(‘Effect.Appear(\’demo-effect-puff\’, {duration:.3})’,2500);”>
Effect.Puff
</div>
</div>
You do not need to know how the Script creates these effects; all you need to know is that to access the effects
you create an Effect object (using
new Effect), and then the syntax of the method that calls each effect.
Let’s start by looking at the first box, which uses a shake effect to move it left and right:
<div class=”container”>
<div class=”demo” id=”demo-effect-shake” onclick=”new Effect.Shake(this)”>
Effect.Shake
</div>
</div>
All you need to do with this element is add the onclick attribute, and in here you create a new Effect
object, and call its
Shake() method. As you have seen when validating a form using the onsubmit prop-
erty of the
<form> element, you can tell a method that you are passing the current element (and any con-
tents) using the
this keyword. So, the onclick attribute in this example is simply telling the Scriptaculous
library to create a new Effect object to shake this element when the element is clicked.
You might have noticed that the next three elements contain a second line after the effect has been called.
This is because each of the other effects makes the box disappear. So the
Appear() method is called after
a fixed duration so you can try the example again (and it is the
Appear() method that is using the value
of the
id attribute to indicate which element needs to re-appear); but the other effects are still called using
Effect.methodname(this).
<div class=”container”>
<div class=”demo” id=”demo-effect-shrink” onclick=”new Effect.Shrink(this);
window.setTimeout(‘Effect.Appear(\’demo-effect-shrink\’,
{duration:.3})’,2500);”>
Effect.Shrink
</div>
</div>
As you can see, this is a very simple way of creating animated effects using JavaScript.
Drag-and-Drop Sortable Lists Using Scriptaculous
The second of the two tasks you will look at using Scriptaculous is creating drag-and-drop lists. You may
have seen some sites where you can re-order lists (such as to do lists or top 10 lists) just by dragging and
dropping the elements.
490
Chapter 12: Working with JavaScript
59313c12.qxd:WroxPro 3/23/08 1:44 PM Page 490
Please purchase PDF Split-Merge on www.verypdf.com to remove this watermark.
You can see the example you are going to build in Figure 12-18; when the page loaded, the boxes were in
numerical order. However, they have now been dragged and dropped to a different order.
Figure 12-18
In this example (
ch12_eg21.html), you need to include the Scriptaculous and Prototype libraries again.
Then you have a simple unordered list (there are some CSS rules in the head of the document that control
the presentation of the list to make it appear like boxes).
<script src=”scripts/prototype.js” type=”text/javascript”></script>
<script src=”scripts/scriptaculous.js” type=”text/javascript”></script>
<style type=”text/css”>
li {border;1px solid #000000; padding:10px; margin-top:10px;
font-family:arial, verdana, sans-serif;background-color:#d6d6d6;
list-style-type:none; width:150px;}
</style>
</head>
<body>
<ul id=”items_list”>
<li id=”item_1”>Item 1</li>
<li id=”item_2”>Item 2</li>
<li id=”item_3”>Item 3</li>
<li id=”item_4”>Item 4</li>
</ul>
Then you just need to add one <script> element after the list so that it can be re-ordered:
<script type=”text/javascript” language=”javascript”>
Sortable.create(“items_list”,{ dropOnEmpty:true,constraint:false});
</script>
Here you are creating a Sortable object using the create() method of the Sortable object. This takes the
following two parameters:
❑ The first is the value for the
id attribute of the unordered list element.
491
Chapter 12: Working with JavaScript
59313c12.qxd:WroxPro 3/23/08 1:44 PM Page 491
Please purchase PDF Split-Merge on www.verypdf.com to remove this watermark.
❑ The second are options that describe how the sortable list should work. The first is dropOnEmpty
with a value of true to indicate that element should only be dropped between elements, not on
top of another one, and the
constraint property which is set to false (if this were left off or
true, it would only allow items to be moved along a vertical axis).
In order for this kind of drag-and-drop list to be of use to people, such lists are often tied into some code
that will update a database, such as ASP.Net, PHP, JSP, or Ruby on Rails code. However, this example
does demonstrate something that is achieved very easily with just a few lines of code, thanks to the
Scriptaculous library.
Sortable Tables with MochiKit
In this example, you are going to look at another JavaScript library — MochiKit. By looking at a few dif-
ferent examples, you can see how easy different libraries (which offer different functionality) are to plug
into your pages. You can download the latest version of MochiKit from
www.mochikit.com/, although I
have included version 1.3.1 with the download code for this chapter.
In this example you will create a table, whereby you can sort the contents of the table by clicking on the
header of any of the columns of the table in order to sort the data by that column. You can see in Figure 12-19
how the table heading Date Started has an up arrow next to it, indicating that the table’s contents are being
ordered by the date the employee started (in ascending order).
Figure 12-19
In order to create a sortable table, you again need to include two scripts; the first is for the
MochiKit.js
JavaScript library, and the second is for the sortable_tables.js file that comes with the MochiKit
download (
ch12_eg22.html).
<script type=”text/javascript”
src=”scripts/MochiKit/lib/MochiKit/MochiKit.js”></script>
<script type=”text/javascript”
src=”scripts/MochiKit/examples/sortable_tables/sortable_tables.js”></script>
Next I have added a couple of CSS styles to distinguish the headers from the columns and to set the
font used:
<style type=”text/css”>
th, td {font-family:arial, verdana, sans-serif;}
th {background-color:#000000;width:200px;color:#ffffff;}
</style>
492
Chapter 12: Working with JavaScript
59313c12.qxd:WroxPro 3/23/08 1:44 PM Page 492
Please purchase PDF Split-Merge on www.verypdf.com to remove this watermark.
The interesting part for you is the table, and how you make that integrate with the MochiKit scripts. Three
parts of the page need to be identified to work with the scripts:
The
<table> element needs an id attribute whose value is sortable_table.
The <th> (table heading) elements need to have an attribute called mochi:sortcolumn, whose value is
a unique id for that column, followed by a space, followed by the datatype for that column (which can
be a
str for a string or isoDate for a date in the format shown).
The first row of
<td> elements needs to have mochi:content attributes whose value is the keyword
item, followed by a period, followed by the unique id for the column that was specified in the
mochi:sortcolumn attribute in the corresponding header.
<table id=”sortable_table” class=”datagrid”>
<thead>
<tr>
<th mochi:sortcolumn=”name str”>Name</th>
<th mochi:sortcolumn=”department str”>Department</th>
<th mochi:sortcolumn=”datestarted isoDate”>Date started</th>
<th mochi:sortcolumn=”extension str”>Employee ID</th>
</tr>
</thead>
<tbody>
<tr mochi:repeat=”item domains”>
<td mochi:content=”item.name”>Tim Smith</td>
<td mochi:content=”item.department”>IT</td>
<td mochi:content=”item.datestarted”>2007-02-10</td>
<td mochi:content=”item.extension”>12</td>
</tr>
<tr>
<td>Claire Waters</td>
<td>Finance</td>
<td>2006-09-24</td>
<td>24</td>
</tr>
<tr>
<td>Hetal Patel</td>
<td>HR</td>
<td>2006-01-10</td>
<td>05</td>
</tr>
<tr>
<td>Mark Whitehouse</td>
<td>Sales</td>
<td>2007-03-28</td>
<td>09</td>
</tr>
</tbody>
</table>
As you can see, this is another example of how easy it can be to add quite complex functionality to a
table — creating an effect similar to the Sort Data options in Excel, which are useful when dealing with
large amounts of data.
493
Chapter 12: Working with JavaScript
59313c12.qxd:WroxPro 3/23/08 1:44 PM Page 493
Please purchase PDF Split-Merge on www.verypdf.com to remove this watermark.
Creating Calendars with YUI
The third and final JavaScript library you will be looking at is the Yahoo User Interface library. This is
created by Yahoo, and is the largest of the three libraries, with all kinds of functionality. I have included
version 2.4.0 with the code download for this chapter; however, you can download the latest example
from
/>You will start by looking at how you can easily drop a calendar onto a web page using this framework. You
can see what the calendar will look like in Figure 12-20.
Figure 12-20
To start, you have to include two JavaScript files from the YUI library — first the
yahoo-dom-event.js
script, and secondly the calendar.js script which is specific to the calendar (ch12_eg23.html).
<script type=”text/javascript”
src=”scripts/yui/build/yahoo-dom-event/yahoo-dom-event.js”></script>
<script type=”text/javascript”
src=”scripts/yui/build/calendar/calendar.js”></script>
For this example, you will also include a couple of CSS files that are included with the YUI download:
<link rel=”stylesheet” type=”text/css”
href=”scripts/yui/build/fonts/fonts-min.css” />
<link rel=”stylesheet” type=”text/css”
href=”scripts/yui/build/calendar/assets/calendar.css” />
Next you add a <div> element, which will be populated by the calendar.
<div id=”cal1Container”></div>
Finally, you add in the script which calls the YUI library, and fills the <div> element with the calendar.
<script type=”text/javascript”>
YAHOO.namespace(“example.calendar”);
YAHOO.example.calendar.init = function() {
494
Chapter 12: Working with JavaScript
59313c12.qxd:WroxPro 3/23/08 1:44 PM Page 494
Please purchase PDF Split-Merge on www.verypdf.com to remove this watermark.
YAHOO.example.calendar.cal1 = new YAHOO.widget.Calendar(“cal1”,”cal1Container”);
YAHOO.example.calendar.cal1.render();
}
YAHOO.util.Event.onDOMReady(YAHOO.example.calendar.init);
</script>
Rather like some of the other examples in this section, this is likely to be tied into some other kind of
functionality, such as a holiday booking form where you are specifying dates you want to travel or an
events list where you are looking at what is happening on a particular date. But this does demonstrate
how libraries can be used to add significant functionality to your pages with ease.
Auto-Completing Text Inputs with YUI
The final example you will look at in this section is the ability to create text inputs where you make sug-
gestions as to what the users are trying to type. The example allows you to enter the name of a U.S. state,
and will make suggestions as to which state you are trying to enter.
You can see what the input will look like in Figure 12-21.
Figure 12-21
To start with in this example (
ch12_eg24.html), you include three JavaScript files:
<script type=”text/javascript”
src=”scripts/yui/build/yahoo-dom-event/yahoo-dom-event.js”></script>
<script type=”text/javascript”
src=”scripts/yui/build/animation/animation.js”></script>
<script type=”text/javascript”
src=”scripts/yui/build/autocomplete/autocomplete.js”></script>
Then, in the body of the page, you add the text input and a <div> that will contain the suggestions of
what you are trying to type in.
Select a US state:
<input id=”statesinput” type=”text”>
<div id=”statescontainer”></div>
495
Chapter 12: Working with JavaScript
59313c12.qxd:WroxPro 3/23/08 1:44 PM Page 495
Please purchase PDF Split-Merge on www.verypdf.com to remove this watermark.