Adobe Dreamweaver CS3 Unleashed- P31 ppsx
Bạn đang xem bản rút gọn của tài liệu. Xem và tải ngay bản đầy đủ của tài liệu tại đây (483.38 KB, 50 trang )
<br />
<table width="467" border="0" cellpadding="0" cellspacing="0"
summary="Friday night was Vecta Corp's annual Concert at the
Park. If you missed the band Spitalfield play, read the
song lyrics for songs they sang live!">
<tr>
<td>
<div align="left"><img src="Images/subheader_companyevents.gif"
width="172" height="27" alt="Company Events"/></div><br />
</td>
</tr>
<tr>
<td valign="top">
<p align="left">
Friday night was VectaCorp's annual "Concert at the
Park". For those employees who missed the headlining
band Spitalfield, below is a sample of what you missed.
</p>
<p align="left">
<a href="Media/spitalfield.mp3" class="style1">
Listen to audio clip (531 KB)
</a><br />
<a href="spitalfield.html" class="style1">
Read the song lyrics</a>
</p>
</td>
</tr>
</table>
<br /><br />
<p>
Brought to you by the distinguished Marketing department<br />
<a href="mailto:" class="style1">
Question or comments?
</a>
</p>
</div>
</body>
</html>
You'll notice that several new attributes such as alt, longdesc, and summary have been added.
Furthermore, a transcript link was placed after the audio file link.
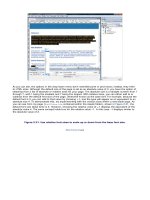
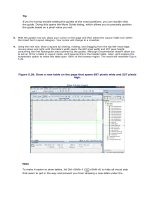
The revised page is shown in Figure A.3 in Lynx. Although the changes aren't dramatic, they are enough to
allow a broader group of users to access the page.
Figure A.3. Lynx can now view the page without errors, as can many users with varying
disabilities.
[View full size image]
Apply Standards to New Designs
It's always easiest to make a web page or website accessible from the start and not have to spend time
going back and redoing it from scratch. The effort of retrofitting is much harder than doing it right the first
time.
Dreamweaver makes it easier to build accessible websites by providing accessible templates and by
prompting you for necessary information when adding new HTML elements.
Accessible Design Templates
Dreamweaver comes with a default set of page designs; unfortunately, the basic page designs weren't
created with accessibility in mind. Fortunately, an additional set of page designs were provided that include
accessibility features such as <label> tags and variable font sizes, which enable you to easily set up an
accessible page.
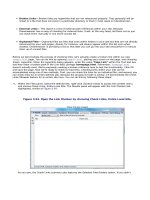
To use one of these templates, choose File, New. When the New Document dialog appears, select the Page
from Sample category, select the Start Page (Basic) folder from the Sample Folder list, and then select a
page from the Same Page list. Notice that the Description pane in the New Document dialog outlines all the
prebuilt templates in this category as accessible. Select one from the Page Designs list as shown in Figure
A.4, open it up, and you're ready to start.
Figure A.4. Choose an accessible template as a starting point for a new web page.
[View full size image]
Caution
Merely using an accessible template does not guarantee that the final result will be accessible. You'll
need to use the Accessibility checker, described later in this appendix, for a more thorough result.
Accessibility Dialog Boxes
Dreamweaver also uses dialog boxes to prompt automatically for required accessibility information. As you
have probably noticed, these dialogs are turned on by default. You can turn them on or off from the
Preferences dialog by following these steps:
1.
Open the Preferences dialog by choosing Edit, Preferences (Dreamweaver, Preferences on the Mac).
2.
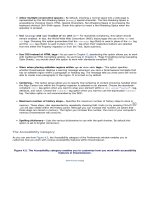
Choose the Accessibility category to see the various accessibility options, shown in Figure A.5.
Figure A.5. Setting the accessibility options turns on/off accessibility dialog boxes.
[View full size image]
3.
Each of the four options—Form Objects, Frames, Media, and Images—turns on a different dialog box.
When you insert one of those elements into your page, the dialog box appears and prompts you for
information. For example, if you try to add an image, you'll see the dialog pictured in Figure A.6.
Figure A.6. The accessibility prompt for images requests alt and longdesc attributes.
4.
Each dialog requests a different set of accessibility-related attributes or information. These are shown
in Table A.1.
Table A.1. Accessibility Dialogs Are Activated by Setting Accessibility Options
Option (HTML Tag)
Accessibility Attributes
Image (<img>)
Alternative text (alt), Long Description
(longdesc)
Frame (<frame>)
Frame Title (title)
Form (<input>, <textarea>)
Label (<label>), Style (nesting of <label>),
Position (location of <label>), Access Key
(accesskey), Tab Index (tabindex)
Media (<object>)
Title (title), Access Key (accesskey), Tab Index
(tabindex)
Table (<table>)
Caption (<caption>), Align Caption (<caption
align>), Summary (summary), Header (scope)
You're probably already familiar with the alt attribute; this is a text replacement for the image. An alt
attribute isn't a description of the image, but a functional replacement for it. If the image has no
function beyond decoration, the alt value should be alt="" (if the alt attribute is left blank, the name
of the image is repeated to the user). For little bullet icons, use alt="*", not alt="red circle". And
definitely don't use the name of the graphic, such as alt="redbullt.jpg" (users with disabilities don't
care what the name of the image is; they want the description of it).
The longdesc attribute is used to provide a description of an image; unlike alt, longdesc is not a text
value, but the URL of a page that describes the image in text. A longdesc should be used if the image
contains information that isn't shown by the alt text, such as a chart or a graph. It can also be used to
describe the contents of photographs or paintings.
The title attribute is a name or short description of a frame or object that is meant to be read to a
human. A frame usually has a name attribute, but this is used by the browser to identify the frame and
isn't necessarily written to make sense to the user. For example, name="mnnav" is confusing. The title
should be clear and understandable and describe the function of the frame or object, such as
name="Main Navigation Panel".
The accesskey and tabindex attributes are used to enable improved keyboard navigation. The
accesskey attribute designates a specific key that can be pressed in conjunction with the modifier
key—usually the control or alt key—to activate a link or object. The tabindex key sets an order for
tabbing through links and objects; pressing the Tab key advances you through the page in order of the
tabindex attributes.
The <label> tag provides a text label for form controls, such as text fields or check boxes. You can
determine the position of the label tags using the label settings on the dialog box. The <label> is
important for screen-reader users who need to know what each form field does when they can't rely on
visual layout clues.
5.
Tables have a number of attributes, such as scope and summary. In general, the summary attribute is
used to describe the contents of the table as a whole, whereas the scope attribute is used to describe
the relationship between the table header and the contents of the table cells. In addition, the
<caption> tag can be used to add a caption to the table.
Tip
For more information on HTML tags and attributes used to make pages more accessible,
be sure to visit the excellent accessibility tutorials at the Web Accessibility In Mind
(WebAIM) site, www.webaim.org.
6.
Finally, as you saw in Chapter 4, "Defining Preferences," Windows users can use the last two check
boxes in the Preferences dialog to maintain focus on the Accessibility panel when a specific object such
as a form object, frame, media element, or image is inserted. Furthermore, you can disable the
Offscreen Rendering check box if your page isn't displaying properly within a screen reader.
Apply Standards to Existing Sites
As noted earlier, it's more efficient to build a site that's accessible from the beginning. However, you may be
dealing with older sites that need to be updated or even sites that you didn't design and have inherited
responsibility for.
Dreamweaver assists you in bringing these existing pages up to compliance with accessibility standards
through accessibility reports that analyze your page and look for specific problems. You can even run reports
on all pages in one folder on your hard drive or on the entire website.
Check Accessibility
The accessibility report built into Dreamweaver is set to check against both WCAG and Section 508
standards. The WCAG standard is checked against Single-A and Double-A level accessibility; Triple-A
checkpoints aren't tested.
To check the accessibility of a page you're working on, first save the page. Then select File, Check Page,
Accessibility. Selecting this option will generate an accessibility report on your existing page.
Note
The Check Accessibility command can be used only after you've saved the file you're working on. If
you don't save before checking, the accessibility report won't reflect any recent changes.
An example of the output of an accessibility report can be seen in Figure A.7. This report was run on the
web page in Listing A.2, the corrected CompanyEvents web page.
Figure A.7. The accessibility report identifies problems and potential problems.
[View full size image]
The accessibility check function runs an analysis of each part of your web page, testing it against certain
criteria called accessibility checks. For each one, it gives one of three results: pass, fail, or can't determine.
If your page fails a check, you'll need to correct that to improve the accessibility of the page. A failed test is
represented by a red X in the accessibility report.
Caution
An automated checking program can do only so much; there's no perfect way to make software fix
web pages. It's possible for a page to pass every automated test and still be inaccessible. For this
reason, read up on accessibility techniques at the W3C's Web Accessibility Initiative site
(www.w3.org/WAI/) and consider acquiring for your own testing purposes one of the programs used
by people with disabilities.
Even with the accessibility features that we did add to the page, you can see that the checking program still
found errors. To make the page fully accessible, it would be wise to review each feature and correct it
accordingly.
Manual Checks
If the accessibility report has a question mark for the result of a test, it usually means that human judgment
is needed to determine whether a test was passed. This is known as a manual check.
A good example of a manual check is the alt attribute for an image. The computer can tell if the <img> tag
has an alt attribute, but it isn't able to determine whether the alt attribute is accurate. The purpose of the
question mark is to tell you to evaluate the question yourself to determine whether accessibility issues occur
on the page based on a judgment call you make.
Sitewide Accessibility Reports
To test a large number of web pages, you don't have to individually load each one and run an accessibility
report. Instead, you can use the site report function. This lets you select whether to run an accessibility
report on the current page, the entire website you're working with, selected files in that site, or all the web
files in a folder.
To use the site reports, choose Site, Reports. You'll see the choices shown in Figure A.8. Be sure to check
the box for Accessibility and choose the appropriate files to test from the pull-down menu.
Figure A.8. You can test an entire site or a folder of HTML pages at once using the site reports
function.
As you saw in Chapter 13, "Enhancing Workflow," in addition to specifying the files to be checked, you can
also set report parameters to include or exclude certain accessibility checks. By default, the accessibility
report checks both the WCAG Single-A (also known as Priority 1) and Double-A (also known as Priority 2)
standards and the Section 508 standard. To change this, highlight the accessibility report option by clicking
the word Accessibility, and then click the Report Settings button.
This action calls up the Accessibility options shown in Figure A.9. You can toggle open the list of options by
clicking the (+) icons beside each category. Using the Enable or Disable buttons, you can customize your
report to check only the tests, or groups of tests, that matter to you. You can also set the report to list all
checks performed, not just those that were failed or that need human judgment.
Figure A.9. You can turn off or on specific accessibility tests in the report options.
[View full size image]
Tip
If you need more advanced accessibility evaluation and repair features, you may want to look at
automation software provided by a group of third-party organizations such as UsableNet. For a list of
these companies and the automated accessibility software they offer, visit
www.adobe.com/macromedia/accessibility/usablenet.html.
Accessibility Reference
The rest of this appendix is a reference to the checks performed by the accessibility checker in
Dreamweaver. Each test is identified by a short title, but it's not always clear what each title means; the list
that follows will clarify the meaning of the test titles.
Note
Dreamweaver comes with a built-in reference that is useful for understanding accessibility guidelines.
To access this reference, open the Reference panel from the Window menu and load the UsableNet
Accessibility reference.
Image Tests
Images, because they're visual, can present serious obstacles to users who can't see. There is also some
danger that a strobing image could trigger seizures in photo-epileptic users. The tests that are run on
images are shown in Table A.2.
Table A.2. Accessibility Checks Performed on Images
WCAG
Section 508
Accessibility Test
1.1
1194.22(a)
Spacer IMG with valid ALT
1.1
1194.22(a)
No LONGDESC for spacer IMG
1.1
1194.22(a)
Non spacer IMG with valid ALT
1.1
1194.22(a)
Non spacer IMG with equivalent ALT
1.1
1194.22(a)
Non spacer IMG with valid LONGDESC
1.1
1194.22(a)
Non spacer IMG needs LONGDESC
1.1
1194.22(a)
Image OBJECT with valid CONTENT
1.1
1194.22(a)
Image OBJECT with equivalent CONTENT
7.1
1194.22(j)
GIFs do not cause the screen to flicker
A spacer image is one that serves only to lay out the page and doesn't contain any useful information itself.
Most of these are blank or transparent images. Any purely decorative image such as a spacer image should
have an alt attribute value of alt="".
In the preceding table, some of these tests seem to be repeated with just a subtle change; for example, Non
spacer IMG with valid ALT and Non spacer IMG with equivalent ALT. A valid alt attribute is simply
one that exists. If you leave off the alt attribute and give no value at all, it's not valid.
However, a valid alt attribute is not necessarily an equivalent alt attribute. Consider the top banner, which
contained the text Welcome to the Vecta Corporation. If the alt value was alt="Welcome", this would be a
valid alt attribute, but it would not be an equivalent value. An equivalent value in this case would be
alt="Welcome to the Vecta Corporation".
An automatic program, such as the accessibility checker in Dreamweaver, can check to see whether an alt
attribute is valid—but only human judgment can determine whether the value is equivalent. For this reason,
there is a manual check that goes with some automatic checks. The longdesc attribute is another
example—only a human can determine whether additional information is needed to convey the image
content.
Caution
You might begin to think that images are the enemy of accessibility and should be avoided. Nothing
could be further from the truth! Images, when given appropriate alt and longdesc attributes, are
not an accessibility problem. In fact, lack of images can introduce accessibility hurdles for some
people, including those with problems reading because of cognitive disabilities. A good illustration
really is worth a thousand words, so don't be afraid to use images!
Imagemap Tests
Imagemaps share all the possible pitfalls that could accompany images and introduce several potential
problems of their own. The special checks done on imagemaps are shown in Table A.3.
Table A.3. Accessibility Checks Performed on Imagemaps
WCAG
Section 508
Accessibility Test
1.1
1194.22(a)
AREA with valid ALT
1.1
1194.22(a)
AREA with equivalent ALT
1.2
1194.22
Links are needed for server-side imagemap
9.1
1194.22
No server-side image maps should be used
There are two types of imagemaps in HTML—client-side imagemaps that use <area> tags to define shapes
and server-side imagemaps that require scripts to determine the outcome of a map click.
Of the two, client-side maps are much more accessible because assistive technology programs can read the
<area> tags and create a menu instead of an image with hotspots. However, each <area> must be marked
with an appropriate alt attribute.
Server-side imagemaps present serious accessibility problems for users who can't see images, and thus
should be avoided whenever possible. If you do use a server-side imagemap, you should make sure to
provide equivalent text links for every hotspot on the imagemap.
Color and Style Tests
As shown in the CompanyEvents web page example, the use of color can create accessibility problems when
used carelessly. Contrast is important as well; blue links on light blue backgrounds are hard to see. Style
sheets are almost always visual and might have many of the same problems as color when used to convey
specific information. The checks for color and style sheets are shown on Table A.4.
Table A.4. Accessibility Checks Related to Colors and Style Sheets
WCAG
Section 508
Accessibility Test
2.1
1194.22
Color is not essential
2.2
1194.22
Colors are visible
6.1
1194.22
Style sheets should not be necessary
Please keep in mind that these checks are not saying "don't use color" or "don't use CSS." In fact, you most
assuredly should use both of them—and use them regularly. Color provides many usability and
comprehension benefits, and style sheets are a boon to accessibility. These tests merely ask you to ensure
that the vital information of the page isn't conveyed only by a style or color choice and is shown on the page
in some other manner.
Form and Scripting Tests
Forms and scripts can present problems to assistive technology programs such as screen readers. The
checks done for forms and scripts are shown in Table A.5.
Table A.5. Accessibility Checks for Forms and Scripts
WCAG
Section 508
Accessibility Test
1.1
1194.22(a)
INPUT with valid ALT
1.1
1194.22(a)
INPUT with equivalent ALT
1.1
1194.22(a)
SCRIPT with valid NOSCRIPT
1.1
1194.22(a)
SCRIPT with equivalent NOSCRIPT
1194.22(l)
Scripts are accessible
6.5
No JavaScript links are used
7.4
1194.22(p)
No auto refresh is used
The requirement for <input> tags to have alt attributes applies only to image Submit buttons—those
<input> tags with type="image".
Scripts that have an effect, such as presenting new content, should have an equivalent <noscript> tag that
either provides access to the content or links to a page or server-side program that has the same effect.
Scripts that validate input or produce cosmetic effects such as mouseovers aren't required to have
<noscript> tags.
Links that are purely JavaScript actions—or pull-down menus that change the current location without a
Submit button being pressed—can be very difficult for assistive technologies and should be avoided. Also,
pages that automatically refresh based on <meta> tags can disrupt screen readers; instead, use HTTP
redirects in the server configuration or .htaccess file.
Table and Frame Tests
Tables and frames are visual ways of presenting content in specific locations. When used injudiciously, they
can introduce serious accessibility errors for people with visual disabilities who may not be able to see the
page at all or who may be using a screen magnifier and can't see the entire layout at once. The tests for
tables and frames are listed in Table A.6.
Table A.6. Accessibility Checks Performed on Tables and Frames
WCAG
Section 508
Accessibility Test
5.1
1194.22(g)
Data table should have headers
5.1
1194.22(g)
Cell of data table should refer to headers
5.1
1194.22(g)
Data tables should be defined by TABLE tag
5.1
1194.22(g)
Multiple headers should be marked in data tables
WCAG
Section 508
Accessibility Test
12.1 1194.22(i) FRAME with valid TITLE
12.1 1194.22(i) IFRAME with valid TITLE
The tests listed for tables apply to data tables—tables that have been inserted to display tabular columns of
information, such as a bus schedule. Web accessibility standards distinguish between data tables and layout
tables, which are tables used to lay out web pages in two dimensions on the screen. Only data tables require
special coding for headers, and then only when the table is complex.
As mentioned earlier, a title attribute is meant to be a human-understandable name, such as
title="Navigation Frame" or title="Banner Ad Frame". Avoid naming your tables by their location;
alt="Left Frame" is useless because it doesn't describe the function, just the location.
Caution
Should you even use tables and frames for layout? Tables used to be a more serious accessibility
problem when screen readers would read across line by line, cutting cells in strange places. Current
screen readers have improved this, and all you have to do is make sure that your table cells make
sense when read in the order they appear in the source code.
Frames are more problematic. As you read in Chapter 8, "Working with Frames and Framesets,"
apart from potential accessibility hurdles, frames can introduce problems with book marking and
usability. However, if labeled correctly, and if an appropriate <noframes> tag is provided, frames can
be made accessible as well.
This doesn't mean that they're the best solution—often, a nonframed design with CSS for layout can
accomplish as much as tables or frames and has even greater accessibility. Use tables and frames
with care, if you decide to use them at all.
Multimedia and Applet Tests
Multimedia, as used here, refers both to video and audio; embedded objects can include Java applets, Flash
animations, and more. The tests for these types of content are shown in Table A.7.
Table A.7. Accessibility Checks for Multimedia Files and Applets
WCAG Section 508 Accessibility Test
1.1 1194.22(a) Audio/video OBJECT with valid CONTENT
1.1 1194.22(a) Audio/video OBJECT with equivalent CONTENT
1.1 1194.22(a) OBJECT with valid CONTENT
1.1 1194.22(a) OBJECT with equivalent CONTENT
1.4 1194.22(b) Multimedia with synchronized alternative
1.3 1194.22(b) Multimedia with equivalent audio description
1.1 1194.22(a) Linked AUDIO with equivalent CONTENT
1194.22(m) Link to plug-in is present
1.1 1194.22(a) APPLET with valid ALT
12.1
1194.22(i)
FRAME with valid TITLE
12.1
1194.22(i)
IFRAME with valid TITLE
The tests listed for tables apply to data tables—tables that have been inserted to display tabular columns of
information, such as a bus schedule. Web accessibility standards distinguish between data tables and layout
tables, which are tables used to lay out web pages in two dimensions on the screen. Only data tables require
special coding for headers, and then only when the table is complex.
As mentioned earlier, a title attribute is meant to be a human-understandable name, such as
title="Navigation Frame" or title="Banner Ad Frame". Avoid naming your tables by their location;
alt="Left Frame" is useless because it doesn't describe the function, just the location.
Caution
Should you even use tables and frames for layout? Tables used to be a more serious accessibility
problem when screen readers would read across line by line, cutting cells in strange places. Current
screen readers have improved this, and all you have to do is make sure that your table cells make
sense when read in the order they appear in the source code.
Frames are more problematic. As you read in Chapter 8, "Working with Frames and Framesets,"
apart from potential accessibility hurdles, frames can introduce problems with book marking and
usability. However, if labeled correctly, and if an appropriate <noframes> tag is provided, frames can
be made accessible as well.
This doesn't mean that they're the best solution—often, a nonframed design with CSS for layout can
accomplish as much as tables or frames and has even greater accessibility. Use tables and frames
with care, if you decide to use them at all.
Multimedia and Applet Tests
Multimedia, as used here, refers both to video and audio; embedded objects can include Java applets, Flash
animations, and more. The tests for these types of content are shown in Table A.7.
Table A.7. Accessibility Checks for Multimedia Files and Applets
WCAG
Section 508
Accessibility Test
1.1
1194.22(a)
Audio/video OBJECT with valid CONTENT
1.1
1194.22(a)
Audio/video OBJECT with equivalent CONTENT
1.1
1194.22(a)
OBJECT with valid CONTENT
1.1
1194.22(a)
OBJECT with equivalent CONTENT
1.4
1194.22(b)
Multimedia with synchronized alternative
1.3
1194.22(b)
Multimedia with equivalent audio description
1.1
1194.22(a)
Linked AUDIO with equivalent CONTENT
1194.22(m)
Link to plug-in is present
WCAG
Section 508
Accessibility Test
1.1 1194.22(a) APPLET with valid ALT
1.1 1194.22(a) APPLET with valid CONTENT
1.1 1194.22(a) APPLET with equivalent ALT
In general, the easiest way to deal with multimedia is to provide a text transcript of the information. In
addition to the dialog, action and events must be described. A synchronized alternative is a text or audio
version that plays at the same time as the video, such as a caption or an audio description. The
synchronization is usually accomplished by using the Synchronized Multimedia Integration Language (SMIL).
Tip
To learn more about SMIL, visit the W3C's multimedia page at www.w3.org/AudioVideo on the Web.
Other Accessibility Tests
Several other accessibility checks that are performed don't fall into separate categories, but nevertheless
are very important for ensuring the accessibility of your site. These are shown in Table A.8.
Table A.8. Additional Accessibility Checks Performed by Dreamweaver
WCAG Section 508 Accessibility Test
13.6 1194.22(o) Skip repetitive links
7.1 1194.22(j) Avoid causing the screen to flicker
14.1 Use clear language for site's content
4.1 Clarify natural language usage Proprietary tags
are used
6.2 1194.22(k) Text-only equivalent page may be needed
Repetitive links are the pet peeves of many screen reader users. When a visual browser loads a web page, a
sighted user can instantly scan it in a glance, jumping to the content—usually in the middle of the
page—and ignoring the navigation bars. Screen reader users don't have this luxury; they have to listen to all
the links, on every page, again and again before reaching the content. For this reason, the web accessibility
standards suggest a Skip Navigation link at the top of the page that takes the user directly to the main
content, bypassing the navigation bars.
Note
For a great tutorial on creating skip navigation functionality, visit Jim Thatcher's Skip Navigation
tutorial at www.jimthatcher.com/skipnav.htm.
In accessibility standards terminology, a natural language is any language that a human being speaks or
1.1
1194.22(a)
APPLET with valid ALT
1.1
1194.22(a)
APPLET with valid CONTENT
1.1
1194.22(a)
APPLET with equivalent ALT
In general, the easiest way to deal with multimedia is to provide a text transcript of the information. In
addition to the dialog, action and events must be described. A synchronized alternative is a text or audio
version that plays at the same time as the video, such as a caption or an audio description. The
synchronization is usually accomplished by using the Synchronized Multimedia Integration Language (SMIL).
Tip
To learn more about SMIL, visit the W3C's multimedia page at www.w3.org/AudioVideo on the Web.
Other Accessibility Tests
Several other accessibility checks that are performed don't fall into separate categories, but nevertheless
are very important for ensuring the accessibility of your site. These are shown in Table A.8.
Table A.8. Additional Accessibility Checks Performed by Dreamweaver
WCAG
Section 508
Accessibility Test
13.6
1194.22(o)
Skip repetitive links
7.1
1194.22(j)
Avoid causing the screen to flicker
14.1
Use clear language for site's content
4.1
Clarify natural language usage Proprietary tags
are used
6.2
1194.22(k)
Text-only equivalent page may be needed
Repetitive links are the pet peeves of many screen reader users. When a visual browser loads a web page, a
sighted user can instantly scan it in a glance, jumping to the content—usually in the middle of the
page—and ignoring the navigation bars. Screen reader users don't have this luxury; they have to listen to all
the links, on every page, again and again before reaching the content. For this reason, the web accessibility
standards suggest a Skip Navigation link at the top of the page that takes the user directly to the main
content, bypassing the navigation bars.
Note
For a great tutorial on creating skip navigation functionality, visit Jim Thatcher's Skip Navigation
tutorial at www.jimthatcher.com/skipnav.htm.
In accessibility standards terminology, a natural language is any language that a human being speaks or
writes. When part of a page is written in a different language, this could confuse screen readers or
automatic translation software; therefore, changes in natural language should be shown in the HTML tags.
Use the lang attribute (and xml:lang in XHTML) to indicate changes in language, such as this:
<p>I counted to three:
<span lang="es">Uno, dos, tres.</span>
</p>
If you've tried everything and you can't make a web page accessible, you can make an equivalent page that
is simpler and presents the same information in a straightforward markup language. This is often called a
text-only page, but in general, a text-only page isn't necessary. Nearly any page can be made accessible by
adding a few extra tags and attributes.
Summary
By employing the techniques of accessible web design, you can ensure that your users with disabilities won't
be shut out from accessing your website. These techniques are described in the web accessibility standards.
The World Wide Web Consortium's Web Content Accessibility Guidelines define the technical considerations
for creating accessible websites. The WCAG checkpoints provide you with a blueprint for your accessible
website and have been adopted (in modified form) by the United States government in the form of the
Section 508 requirements.
Dreamweaver enables you to apply these accessibility standards to your new web designs or to existing
websites. Accessible templates and prompts for accessibility attributes let you design for accessibility from
the start, and integrated site reports can spot accessibility problems in one HTML document or on an entire
site. A complete reference to accessibility rules is available at any time through Dreamweaver's Reference
panel.
Creating an accessible website shouldn't be an extra chore—it should be part and parcel of your good web
design practices. The special accessibility functions of Dreamweaver help make these important practices
quick and easy to apply.
Appendix B. Extending Dreamweaver
IN THIS APPENDIX
Working with Objects
Working with Behaviors
Sharing Extensions Through the Adobe Exchange
The Server Behavior Builder
The beauty in Dreamweaver doesn't lie solely in the fact that you can build large-scale websites and
applications; it also lies in its interface. Interface, you ask? Dreamweaver, unlike many applications on the
market today that force you to purchase costly third-party extensions and work in a rigid menu-driven
environment, allows for complete customization and control by the user. A relatively new concept in
software development, Dreamweaver was developed with user workflow and task achievement in mind,
regardless of how you prefer to work.
Because Dreamweaver's menus, dialogs, objects, and commands are built on a JavaScript/HTML/XML
foundation, all are completely customizable with just a little knowledge of the markup and scripting
languages. This appendix focuses on extending Dreamweaver's integrated development environment (IDE)
by allowing you to customize your workflow and produce the following:
Custom objects
Custom client-side behaviors
Your own public extensions
Custom server behaviors
Working with Objects
Part of the customization initiative are objects. Objects are HTML files that use JavaScript to insert a string
of HTML code into the user's workspace. As you may have already noticed, Dreamweaver comes installed
with a host of predeveloped objects, completely ready for you to take advantage of. Ranging from tables to
frames, forms to head content, and scripts to characters, objects make adding code to your workspace as
easy as clicking a button. As you'll see throughout this chapter, the process is relatively straightforward.
Essentially, you construct an object using HTML, JavaScript, and a bit of XML, package it up as an installer
file (MXP), and install it into Dreamweaver. Then you can use the functionality that you build by referencing
the object from the Insert menu. The next few sections will walk you through the process of understanding
and working with custom-built objects.
Understanding Objects
As previously mentioned, Dreamweaver comes preinstalled with ready-to-use objects. Those objects, like
most of Dreamweaver's configuration files, are located within the Configuration folder of the Adobe program
directory, or in most cases in C:\Program Files\Adobe\Adobe Dreamweaver CS3\Configuration\
(/Applications/Adobe Dreamweaver CS3/Configuration/). From that folder you can navigate to and
open the Objects folder. The Objects folder contains a list of subfolders corresponding to the specific tab
within the Insert bar.
As you add folders, more tabs are added to the Insert bar. Within the sections are three files that make up
the structure of an object:
The HTML file— The HTML file is the front end for what the object will do. It's the interface for the
functionality of the object.
The JavaScript file— The JavaScript file contains all the client logic that the HTML page will use when
the button is pressed from the Insert bar. It is optional to use the JavaScript file because the code
could be contained within the <head> tag of the HTML file. However, a separate JavaScript file is
always easier to maintain in the long run.
The Image file— The image file is a standard GIF image that you can customize and place in your
Custom Objects folder along with the HTML and JavaScript files. The GIF image (which must be named
the same as the HTML and JavaScript file) resides in the appropriate section in the Insert bar and
represents a clickable link to your object. A default GIF image (generic.gif, located in the root of the
Objects folder) is available for you to customize using your favorite image editor.
Dreamweaver objects range from fairly simple to complex. You can make it so that when users click the
object (either from the Insert bar or the Insert menu), Dreamweaver inserts plain HTML text, or you can
make it so that when users click the object, Dreamweaver prompts them with a dialog allowing them to
input data. Either way, objects streamline the way you work with Dreamweaver.
Objects are composed of five key elements:
The Files— As you saw in the previous bullet points, objects consist of an HTML page, an image file,
and an optional external .js file that contains all the client logic. Note, however, that the three files
must be named the same. If you have object.html, you must have object.js and object.gif for
the custom object to work correctly.
Location— Objects reside in their corresponding folder in the Objects folder. Depending on which tab
you want your object in, you move all the files to that folder. As I've mentioned, though, you can
create your own folder within the Objects folder as well. Doing this adds a new tab to the Insert bar.
Page Title— The page title is the name of the object as it appears when your mouse rolls over the
corresponding object's image icon within the Insert bar.
objectTag() Function— The objectTag() function returns the value of what is to be inserted into the
page. This function is one of many functions that you can use when designing custom object
functionality, also known as the extensions API.
User Interface— The user interface (UI) resides within the <body> tag of the object and generally
uses a <form> tag along with a text box control to capture user input.
Tip
API stands for Application Programming Interface. APIs are the building blocks for programs, and
they are what developers program against in almost all software development environments,
including Dreamweaver.
The Simple <sup> Tag Object
Now that you have a basic understanding of how objects are constructed, let's put everything to work by
creating a simple object that inserts the <sup> tag into your HTML.
If you've worked with special characters (the trademark symbol, for instance), you know that whenever they
are inserted, they always end up looking like part of the text rather than superscripted. To alleviate that
problem, a simple object could be created that allows the user to superscript a special character like the
trademark symbol. To create this functionality as an object, follow these steps:
1.
Begin by making a copy of generic.gif (located in the root of the Objects folder) and place it into the
Text folder. Rename the GIF file sup.gif.
Note
The <sup> tag is a text-level formatting element. Because of this, it is placed into the
Text folder. However, as noted previously, you could just as easily create your own
folder, in which case a new tab is created along with the custom object within the Insert
bar. For simplicity's sake, we'll add our custom object into the existing Text folder.
2.
Create a new HTML document in Dreamweaver and write the following code:
<html>
<head>
<title>SUP</title>
<script language="JavaScript">
function objectTag() {
return "<sup></sup>";
}
</script>
</head>
<body>
</body>
</html>
3.
Save the file into the Text folder, naming it sup.html.
4.
Hold down the Ctrl/Option key, and choose Reload Extensions from the Insert bar's category list,
similar to Figure B.1.
Figure B.1. Select the Reload Extensions option from the Insert bar's category list.
[View full size image]
5.
Create a new page in Dreamweaver by choosing File, New. Choose the HTML option from the Blank
Page category, select the <none> option from the Layout list, and click Create. Immediately save the
file as sample.html.
6.
Choose the Text option from the Insert bar's category submenu. Note that the new SUP option appears
within the Text category of the Insert bar, similar to Figure B.2.
Figure B.2. The new SUP object appears within the Text category of the Insert bar.
[View full size image]
7.
Switch to Code view and click the new object. Figure B.3 shows how clicking the object inserts the
correct tags that you specified within the objectTag() function outlined in step 2.w
Figure B.3. Selecting the new object inserts the appropriate tags.
[View full size image]
Now it's just a matter of adding text in between the <sup> tags. Dreamweaver superscripts the text
between the tags.
The Advanced <sup> Tag Object
After you've gotten past the excitement of creating your first object, you'll quickly find that the object does
no more than insert a simple tag into the body of the document. Even if you wanted to place some text
within that tag, it would still be necessary to switch to Code view and type it in; by that time, the whole tag
could have been written manually without the use of a custom object.
The power behind customized objects is that they can receive user input. By modifying the body tag to
contain some HTML code (in the form of form objects) that defines the UI, your object can also receive user
input. To add this functionality, follow these steps:
1.
Open sup.html and rewrite the <body> tag to contain the following code:
<body>
<form name="supForm">
<p>What text would you like to superscript?</p>
<p><input type="text" size="10" name=";supText"></p>
</form>
</body>
2.
Modify the objectTag() function so that it concatenates the value of the text box to the opening and
closing <sup> tags:
function objectTag() {
var supText = document.supForm.supText.value;
return '<sup>' + supText + '</sup>';
}
3.
Save the file, close it, and then reload the extensions in Dreamweaver.
4.
Open (or switch to) sample.html, switch to Design view, and immediately add the text Copyright
2007 Vecta Corporation within the page.
5.
Place your cursor just after the Vecta Corp text and select the SUP object from the Insert bar. This
time, rather than simply inserting the <sup></sup> markup in the code editor, a dialog similar to the
one shown in Figure B.4 appears.
Figure B.4. Selecting the new object launches a dialog that allows you to enter
custom text to superscript.
6.
Type the text TM into the text box and click OK. The trademark symbol appears as superscripted in the
Document window just to the right of the Vecta Corp text.
Appendix B. Extending Dreamweaver
IN THIS APPENDIX
Working with Objects
Working with Behaviors
Sharing Extensions Through the Adobe Exchange
The Server Behavior Builder
The beauty in Dreamweaver doesn't lie solely in the fact that you can build large-scale websites and
applications; it also lies in its interface. Interface, you ask? Dreamweaver, unlike many applications on the
market today that force you to purchase costly third-party extensions and work in a rigid menu-driven
environment, allows for complete customization and control by the user. A relatively new concept in
software development, Dreamweaver was developed with user workflow and task achievement in mind,
regardless of how you prefer to work.
Because Dreamweaver's menus, dialogs, objects, and commands are built on a JavaScript/HTML/XML
foundation, all are completely customizable with just a little knowledge of the markup and scripting
languages. This appendix focuses on extending Dreamweaver's integrated development environment (IDE)
by allowing you to customize your workflow and produce the following:
Custom objects
Custom client-side behaviors
Your own public extensions
Custom server behaviors
Working with Objects
Part of the customization initiative are objects. Objects are HTML files that use JavaScript to insert a string
of HTML code into the user's workspace. As you may have already noticed, Dreamweaver comes installed
with a host of predeveloped objects, completely ready for you to take advantage of. Ranging from tables to
frames, forms to head content, and scripts to characters, objects make adding code to your workspace as
easy as clicking a button. As you'll see throughout this chapter, the process is relatively straightforward.
Essentially, you construct an object using HTML, JavaScript, and a bit of XML, package it up as an installer
file (MXP), and install it into Dreamweaver. Then you can use the functionality that you build by referencing
the object from the Insert menu. The next few sections will walk you through the process of understanding
and working with custom-built objects.
Understanding Objects
As previously mentioned, Dreamweaver comes preinstalled with ready-to-use objects. Those objects, like
most of Dreamweaver's configuration files, are located within the Configuration folder of the Adobe program
directory, or in most cases in C:\Program Files\Adobe\Adobe Dreamweaver CS3\Configuration\
(/Applications/Adobe Dreamweaver CS3/Configuration/). From that folder you can navigate to and
open the Objects folder. The Objects folder contains a list of subfolders corresponding to the specific tab
within the Insert bar.
As you add folders, more tabs are added to the Insert bar. Within the sections are three files that make up
the structure of an object:
The HTML file— The HTML file is the front end for what the object will do. It's the interface for the
functionality of the object.
The JavaScript file— The JavaScript file contains all the client logic that the HTML page will use when
the button is pressed from the Insert bar. It is optional to use the JavaScript file because the code
could be contained within the <head> tag of the HTML file. However, a separate JavaScript file is
always easier to maintain in the long run.
The Image file— The image file is a standard GIF image that you can customize and place in your
Custom Objects folder along with the HTML and JavaScript files. The GIF image (which must be named
the same as the HTML and JavaScript file) resides in the appropriate section in the Insert bar and
represents a clickable link to your object. A default GIF image (generic.gif, located in the root of the
Objects folder) is available for you to customize using your favorite image editor.
Dreamweaver objects range from fairly simple to complex. You can make it so that when users click the
object (either from the Insert bar or the Insert menu), Dreamweaver inserts plain HTML text, or you can
make it so that when users click the object, Dreamweaver prompts them with a dialog allowing them to
input data. Either way, objects streamline the way you work with Dreamweaver.
Objects are composed of five key elements:
The Files— As you saw in the previous bullet points, objects consist of an HTML page, an image file,
and an optional external .js file that contains all the client logic. Note, however, that the three files
must be named the same. If you have object.html, you must have object.js and object.gif for
the custom object to work correctly.
Location— Objects reside in their corresponding folder in the Objects folder. Depending on which tab
you want your object in, you move all the files to that folder. As I've mentioned, though, you can
create your own folder within the Objects folder as well. Doing this adds a new tab to the Insert bar.
Page Title— The page title is the name of the object as it appears when your mouse rolls over the
corresponding object's image icon within the Insert bar.
objectTag() Function— The objectTag() function returns the value of what is to be inserted into the
page. This function is one of many functions that you can use when designing custom object
functionality, also known as the extensions API.
User Interface— The user interface (UI) resides within the <body> tag of the object and generally
uses a <form> tag along with a text box control to capture user input.
Tip