Sử dụng photoshop cs5 part 11 pps
Bạn đang xem bản rút gọn của tài liệu. Xem và tải ngay bản đầy đủ của tài liệu tại đây (965.2 KB, 7 trang )
ptg
Camera Raw 65
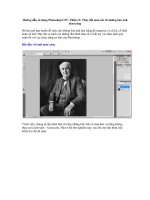
You can also straighten a photo before opening it
into Photoshop.
To straighten a crooked photo:
1. Choose the Straighten tool (A).
2. In the preview, drag along an edge in the photo
that you want to align to the horizontal or ver-
tical axis.
B
A crop marquee will display, aligned
to the angle you drew.
C
When you open the
image into Photoshop, that edge will be aligned
with the document window.
D
➤ To preview the crop results, press Enter/Return
or click another tool.
➤ To redisplay a crop (or straighten) marquee
after using another tool, choose the Crop (or
Straighten) tool again. To remove it, press Esc.
Cropping and straightening photos
With the Crop tool, you can control which portion
of a photo opens in Photoshop. You can readjust
the crop marquee at any time, and it will remain
available even after you click Save, Done, or Open.
All the raw pixels are preserved.
To crop a photo:
1. Open a photo into Camera Raw (see page 63).
Choose the Crop tool (C).
2. Drag a marquee on the preview image.
A
To
move the marquee, drag inside it; to resize
it, drag a handle. Only the area within the
marquee will import into Photoshop.
3. To preview the crop results, press Enter/Return
or click another tool.
D
We opened the straightened image
into Photoshop.
C
A marquee displays in Camera Raw.
B
With the Straighten tool, we are
dragging along an edge that we want to
align to the vertical or horizontal axis.
A
With the Crop tool,
drag a marquee in
the preview window.
ptg
66 Chapter 4
Via the Workow Options dialog, you can change
the color space, dimensions, bit depth, and resolu-
tion of a photo before opening it into Photoshop
— without altering the original digital le. Your
choices will become the new default settings.
To choose default workflow settings:
1. Open a photo into Camera Raw, then at the
bottom of the dialog, click the underlined link
that lists the color space, bit depth, etc. e
Workflow Options dialog opens.
A
2. From the Space menu, choose a color prole
to be used for converting the raw le to RGB:
Adobe RGB (1998), ColorMatch RGB, ProPhoto
RGB, or sRGB IEC61966-2.1 (or “sRGB,” for
short). In Chapter 1, you assigned Adobe RGB
as the default color space for color manage-
ment, so we suggest choosing it here, too.
3.
From the Depth menu, choose a color depth of
8 Bits/Channel or 16 Bits/Channel (see page
19). If you have a large hard drive and a fast
system with a lot of RAM, choose 16 Bits/
Channel. With the extra pixels, more of the
original tonal levels in your photo will be
preserved when it’s edited in Photoshop.
4.
If you need to resize the image, from the Size
menu, choose a preset size (in megapixels) that
matches the proportions of the raw image.
(e default size is the one without a minus
sign – or plus sign +.) Resampling will occur
if you choose a larger size than the original.
Avoid choosing the largest size, to help prevent
pixelization. (Experts disagree on whether it’s
better to resample an image in Camera Raw or
in Photoshop. Until a consensus is reached, you
can decide for yourself.) Note: If a crop mar-
quee is present, the Size menu will be labeled
Crop Size, and it will list the current crop size.
5.
Enter a Resolution. is value aects only the
print output size. (For instance, a resolution of
240–300 ppi would be appropriate for an image
that is 2000 x 3000 pixels or larger, for output
to an inkjet printer or a commercial press.)
6.
Optional: From the Sharpen For menu, choose
None, Screen, Glossy Paper, or Matte Paper to
apply predened output sharpening to your
photo for the chosen medium. Also choose the
desired amount of sharpening from the Amount
menu (Standard is usually a good choice).
Note: e sharpening values that are applied
via this dialog aren’t listed anywhere. For
greater control over capture sharpening, choose
None from the Sharpen For menu here and
use the sliders in the Detail tab instead (see
page 76).
7.
Click OK. e new workow settings will be
listed below the preview. ey will be applied to
the current photo and to photos that you sub-
sequently open into Camera Raw.
➤ To have future photos open from Camera
Raw into Photoshop as a Smart Object layer
when you click Open Object, check Open in
Photoshop as Smart Objects in the Workow
Options dialog (see page 86). Turn this feature
on only if it suits your normal workow.
A
Use the Workow Options dialog to choose color space, bit depth, size (dimensions), and
resolution settings for the current photo, and to establish the default settings for future photos.
Choosing default workflow settings
ptg
Camera Raw 67
Detail tab: Apply capture
sharpening and reduce noise
(see pages 76–77).
HSL/Grayscale tab: Adjust
individual colors (see pages
74–75).
B
In Camera Raw, we perform most of our correction work in the four tabs that are shown above.
exposure (see pages 72–73).
Tone Curve tab: Fine-tune the Basic tab: Adjust the white
balance and exposure (see
pages 68–71).
A
Click a tab icon to
access the specialized
options it has to oer.
Basic Detail Split Toning Eects
Tone Curve
Camera Calibration
HSL/Grayscale Presets Snapshots
Lens
Corrections
Using the Camera Raw tabs
To restore the default settings to sliders in
the Camera Raw tabs:
Double-click a slider to restore the default value
to just that slider.
Shift-double-click a slider to restore the Auto
setting to just that slider.
Click Default in the Basic or HSL/Grayscale tab
to reset the sliders in just the current tab to their
default values (that is, to remove any custom
settings).
Choose Camera Raw Defaults from the Camera
Raw Settings menu to reset all the sliders in
all the tabs to the default settings for the camera
model that was used to take the photo.
Learn about the Camera Raw Settings menu on
the next page.
Hold down Alt/Option and click Reset (Cancel
becomes Reset) to restore the dialog settings that
were in place when the dialog was opened.
TOGGLING THE PREVIEW
Check Preview (P) at the top of
the Camera Raw dialog to preview
changes made in all the tabs; or
uncheck Preview to view the result of
changes made in all the tabs except
the current one, so you will be able
to evaluate the most recent changes.
ptg
68 Chapter 4
When you open a photo into Camera Raw, by
default, it’s adjusted according to the built-in pro-
le for your camera model. To assign a dierent
collection of settings to your le or to restore the
original settings, see the choices listed below.
To restore settings via the Camera Raw
Settings menu:
Choose one of these settings from the Camera
Raw Settings menu:
A
Image Settings to restore the settings that
were attached to the le from either the initial
photo shoot or a prior Camera Raw session.
When you rst open a photo, these settings
will match the Camera Raw Defaults settings.
Camera Raw Defaults to remove any custom
settings and reapply the default settings for
your camera model, your specic camera, or the
ISO setting that was used to take the photo.
Previous Conversion to apply the settings
from the prior image that was adjusted in
Camera Raw.
Custom Settings to reapply any custom set-
tings that were chosen since the Camera Raw
dialog was opened.
If a user-saved preset is currently applied to the
photo, that preset will be listed (see page 83).
Using the Basic tab
When you rst open a JPEG photo into Camera
Raw, all the sliders in the Basic tab are reset to
zero automatically, whereas when you open a raw
le into Camera Raw, the sliders are set to the
default settings for your camera model. e rst
step is to use the Basic tab to make any needed
corrections to the white balance (see the sidebar at
right), exposure, contrast, and saturation. For this
rst round of adjustments, we recommend using
the sliders in the order in which they’re listed. e
good news is that they cause far less destruction
than the adjustment controls in Photoshop do.
As you perform adjustments in the Basic tab,
keep your eye on the histogram (in the dialog) so
you can monitor how tonal values are being redis-
tributed in the photo.
B
Red, green, and blue pixels
are superimposed upon one another at each tonal
level in the graph, with shadow pixels on the left
and highlight pixels on the right. e white areas
indicate where the three colors overlap.
B
e C a m e r a R a w h i s t o g r a m c h a r t s t h e n u m b e r o f p i x e l s
at each tonal level in your photo.
WHITE BALANCE, IN PHOTOGRAPHY
The color temperature of the lighting in which a photo
is shot, whether that lighting is natural or artifi cial,
affects the relative amounts of red, green, and blue
that a digital camera records. The camera attempts
to balance those three colors to produce an accurate
white, and then uses the balanced white to make
other colors in the photo more accurate. You can
refi ne the white balance of a photo in Camera Raw.
Note: In the Camera Raw dialog, you could adjust
the white balance that was produced by your camera
with the White Balance tool (you click a gray-
ish white area in a photo that contains some detail,
to be used by the tool as a sample area). However,
deciding which area to click can be tricky, so we
recommend using the Temperature and Tint sliders
instead, as described on the next page.
A
Use the Camera Raw Settings menu to reapply
the default settings or the previous settings.
ptg
Camera Raw 69
B
When a photo is opened into Camera Raw for the
rst time, the setting on the White Balance menu in the
Basic tab is As Shot.
C
A lower Temperature value makes the photo cooler.
Now there is a noticeable blue cast in the metal and grass.
D
A higher Temperature value makes the photo warmer
(note the metal and grass again).
To apply white balance adjustments using
the Basic tab:
1. Click the Basic tab,
A–B
and double-click the
Hand tool to t the photo in the preview.
2.
e white balance (color temperature) should
be adjusted rst, because this setting aects the
overall photo. Do either of the following:
From the White Balance menu, choose a preset
that best describes the lighting conditions in
which the photo was taken (this is for a raw le
only). Choose As Shot at any time to restore the
original camera settings.
To correct the color temperature manually, lower
the Temperature value to add blue and make
the image cooler,
C
or raise it to add yellow and
make the image warmer.
D
To ne-tune the tem-
perature correction, move the Tint slider slightly
to the left to add green or to the right to add
magenta. e listing on the White Balance menu
will change to Custom.
A
e s e a r e t h e A s S h o t s e t t i n g s f o r t h e p h o t o
shown in
B
.
ptg
70 Chapter 4
To apply tonal adjustments using the
Basic tab:
1. When the Camera Raw dialog opens, the tonal
sliders in the Basic tab — Exposure, Recovery,
Fill Light, Blacks, Brightness, and Contrast —
are set to their default values, and the word
“Default” is dimmed. For the heck of it, click
Auto to see which settings Camera Raw deems
appropriate for your photo. Next, for better
results, click Default to restore the default
values, and follow the remaining steps.
2.
e histogram reects the current Camera
Raw settings and redraws as you change them.
Study the graph to see if any highlight or
shadow pixels are being pushed to the edge
(are being clipped). Clipping occurs if the tonal
range of a scene is wider than the range the
camera can capture. Your goal will be to bring
the pixels into the range of your chosen RGB
color space, in order to minimize clipping. (In
our setup, we have chosen the Adobe RGB color
space for our camera; we have also chosen it for
Camera Raw via the Workow Options dialog.)
3.
To minimize the clipping of highlight and
shadow pixels, do the following:
In the top left corner of the histogram, click
the Shadow Clipping Warning button (U) to
display a representation of shadow clipping
as blue in the preview. In the top right corner,
click the Highlight Clipping Warning button
(O) to display highlight clipping as red
A
(and
A
, next page). Monitor this display of clipping
as you apply corrections to your photo.
To bring out details in the highlights, use the
Exposure and Recovery sliders as a duo. For
an overexposed photo, move the Exposure
slider to the left and the Recovery slider far to
the right until only a trace remains of the red
highlight warning color (you can use either the
sliders or the scrubby sliders) (
B
, next page).
To bring out shadow details, use the Blacks and
Fill Light sliders as a duo. For an underexposed
photo, move the Fill Light slider slightly to the
right. For a raw photo, also move the Blacks
slider to the left until only a trace remains of
the blue shadow warning color (
C
, next page).
To minimize clipping another way, Alt-drag/
Option-drag the Exposure and/or Recovery
sliders and release the mouse when small
amounts of white (representing all three color
channels) display in the black preview. Alt-
drag/ Option-drag the Blacks slider and release
the mouse when small amounts of color or
black display in the white preview. e color
areas represent clipping in those channels.
4. Optional: Adjust the Brightness to enhance
details in the midtones, and the Contrast to
increase or decrease contrast (
D
, next page).
Note: For an even better way to adjust the
midtones in a photo, see page 72.
Finally, you can use the Clarity slider in the Basic
tab to adjust the edge contrast and the Vibrance
slider to adjust the color saturation. Note: Although
both the Vibrance and Saturation sliders aect
color saturation, the latter can cause oversatura-
tion and highlight clipping, whereas the former is
much less likely to (move the Saturation slider to
the far right, and you’ll see what we mean). Even at
a moderately high setting, Vibrance doesn’t cause
oversaturation of skin tones.
To adjust edge contrast and color
saturation using the Basic tab:
1. To add depth by adjusting the edge contrast
in the midtones, increase the Clarity value, or
reduce this value if you want to deliberately
soften a photo, such as a portrait or landscape.
2.
Adjust the Vibrance value to increase or reduce
the color saturation (
E
, next page).
3.
Turn o the Clipping Warnings by pressing U,
then O.
➤ To adjust the saturation of specic colors, see
pages 74–75.
A
Activate the Clipping Warning buttons above
the histogram (when a warning is on, it has a
white border). is is the histogram for the original
photo, which is shown in
A
on the next page. Most of
the pixels are clustered at the left edge of the graph,
which indicates that the image is underexposed.
Shadow Clipping
Warning button
Highlight Clipping
Warning button
ptg
Camera Raw 71
CORRECTING AN UNDEREXPOSED PHOTO
A
e o r i g i n a l p h o t o i s u n d e r e x p o s e d , a s y o u c a n s e e b y
the blue and red clipping warning colors in the preview.
B
We raised the Exposure value in the Basic tab to lighten
and recover details in the highlights and midtones.* We
also raised the Recovery value to recover some details
in the bright, metallic highlights, but left some clipping
because we want some of those highlights to remain pure
white, with no details.
D
We increased the Brightness value to recover more
details in the midtones; we also increased the Contrast
value, which had the eect of intensifying the shadows.
C
We used the Fill Light and Blacks sliders to recover
details in the shadows (the lower front area of the car
and in the grass). e blue and red clipping warning areas
have now been minimized.
E
Finally, we increased the
Clarity value to enhance the
edge contrast and increased
the Vibrance value to boost
the color saturation. Now
this classic MG really shines!
* e settings on this page were applied to a raw photo. If
you downloaded and are working on the JPEG version of
this photo, choose a Recovery value of 90, a Fill Light value
of 20, a Blacks value of 0, and a Brightness value of +28.