Photoshop cs5 cho nhiếp ảnh gia part 8 pptx
Bạn đang xem bản rút gọn của tài liệu. Xem và tải ngay bản đầy đủ của tài liệu tại đây (1.36 MB, 9 trang )
37
■ STORAGE CONSIDERATIONS
streamlined in some cases (such as emailing photos). Lightroom has the advantage,
though, of being available for both PC and Mac, whereas Aperture is a Mac-only
application. One of the main disadvantages of Lightroom, in our opinion, is the need
to change modules depending on what task you’re doing. That makes the initial edit
through your images slower.
If you opt to adopt Aperture or Lightroom as the basis of your workflow, you’ll
find that you make many or all the global exposure and color changes we discuss in
this book in those programs. You’ll still find it advantageous to work in Photoshop
for some tasks. For example, if you use Lightroom, it’s likely that you’ll still use Pho-
toshop for most of your cloning. We also use Photoshop at times when we want to
make a change to part of the image and not have it affect the rest of the image—which
means when we’d like to use a layer mask. In earlier versions of Photoshop, we used
layer masks a lot. With the latest raw converters offering localized controls, we don’t
use layer masks quite as often as we did in the past, but we most assuredly still use
them. The ability to make a change and have it affect only the targeted area gives you
precise control over the final appearance of your images. We also use Photoshop when
we want to use any of its filters as well as for all types of creative ventures, including
creating composites of all types. Even if you use Aperture or Lightroom, it’s worth-
while having a solid understanding of Photoshop. That way, if you encounter a diffi-
cult image, you’ll have more tools available to you to work with it.
Storage Considerations
A comprehensive discussion of storage media is beyond the scope of this book. We’ll
cover only a few aspects here, which are especially pertinent for nature photographers.
Many nature photographers often do at least some of their photography away
from home. We know one photographer who buys enough memory cards so that he
can use a new one when needed rather than having to download and/or edit images
while on the road. Although the cost of compact flash cards has come down consid-
erably in the past few years, for most photographers, this is not a practical solution.
Even if you can justify it monetarily, it’s impractical because it means you will have
all your editing to do when you get home, and that can be overwhelming. In addition,
it eliminates one of the major advantages of digital shooting—the ability to review
the shots you took during the day and to learn from what went right and what went
wrong so you can adjust your shooting the next day accordingly. Being able to view
your images, preferably reasonably large, allows you to fine-tune your shooting skills
and experiment with new techniques while still on location. That way, you can return
to a location if necessary or build upon a creative approach you tried.
When we’re on a photographic trip, we prefer to take a laptop along and make
certain that it has plenty of space on its hard drive. That way, we can download our
images and view them at a reasonable size. (In addition, having the computer enables
us to have email access while on the road.) Also, we take small external portable hard
drives along. These drives are the size of a deck of cards. We back up all the images
we store on our computer on this hard drive. That way if something happens to the
computer, we still have a copy of all the files. If we’re on a long trip that will involve a
607343c01.indd 37 4/11/10 11:02:51 PM
38
c h a p t e r 1: THINKING DIGITALLY ■
lot of shooting and not much time for editing, we may bring along a second external
portable hard drive for overflow images when the computer’s hard drive becomes full.
Ordinarily we recommend doing at least a first pass of editing each day to delete the
images you are certain you don’t want, but sometimes that’s not possible. When we
return home, we transfer the images to our main computer for further editing and
archival storage.
Other people prefer to use a self-contained backup device such as the Hyper-
Drive COLORSPACE UDMA (
www.hypershop.com). Such all-in-one units contain a
hard drive, card reader (often multiple card readers for different formats), and screen
so that you can download your images without a computer, providing an extra mea-
sure of security in case your computer fails in the field. The COLORSPACE UDMA is
particularly nice because it’s available without a hard drive so that you can purchase a
different, faster or larger hard drive and easily install it yourself.
After editing our images, we establish a “Best Of” folder for each shoot con-
taining the images we want to keep. We store that folder on a RAID (Redundant
Array of Independent Disks) system. A RAID system consists of two or more hard
drives that function together. There are several different types of RAID devices, but
we use RAID-5 (one of the most popular implementations). When you back up to a
RAID-5 hard drive, the data is automatically copied to all the drives. If one hard drive
develops an error, it uses the information on one of the other drives to correct it.
We currently use a particular type of RAID device called a Drobo from Data
Robotics Drobo device (
www.drobo.com). The advantage of the Drobo is that you fill it
with hard drives as needed to give you as much storage as you need. It calculates how
much space is available and acts accordingly. If you insert a single hard drive, it acts as
a single hard drive. If you put in three or four drives, even if they have different capac-
ities, it configures them automatically as a RAID-5 type of device. You can swap out
one of the existing drives for a new one if a drive develops problems or if you simply
want to increase the storage capacity. We find that RAID systems help guard against
data loss if/when a hard drive fails, and Drobo makes the entire process of backup far
easier than earlier RAID systems.
Some photographers opt to back their images up on individual external hard
drives. The problem with this approach is that since all hard drives will eventually
fail, it is quite possible that one day, without warning, you suddenly won’t be able to
access your images. If you opt to go this route, we strongly encourage you to copy
your files to two different external devices. That way when one of them fails, the other
will most likely still work, and you can re-create a duplicate backup. It makes sense to
always have copies of your images in at least two places in case of a natural disaster,
such as a fire, too.
Some photographers still prefer to use DVDs or CDs. If you have a lot of
images, the volume of DVDs and/or CDs will become unwieldy unless you have a
clear-cut system for storing and identifying the discs. In addition, it’s imperative to
use gold discs, which are archival and are reported to last 100 years or so. On the
relatively rare occasions that we use DVDs for storage, we use the gold discs that are
available from Delkin Devices. DVDs and CDs that are not gold may become unread-
607343c01.indd 38 4/11/10 11:02:52 PM
39
■ STORAGE CONSIDERATIONS
able in as little as one year! If you have been using regular DVDs or CDs to archive
your images, we urge you to copy them to a gold disc.
Another relatively new option is online storage services such as Apple’s MobileMe
iDisk (
www.apple.com/mobileme, available for both PC and Mac operating systems)
act essentially as an online hard drive. You pay a certain amount per year for a set
amount of storage and can increase it according to your needs, although the maxi-
mum at the time of writing this book for MobileMe is 60GB. Companies, such as
PhotoShelter (
www.photoshelter.com) offer photo-specific online storage and have the
capacity to store larger quantities of images. In addition, some allow you to showcase
your work and may even serve as stock agencies. The advantage of online storage is
that you maintain copies of your images in a location that’s physically separate from
your main storage. The potential disadvantages are cost, image-transfer time, and
issues if the company providing the storage goes out of business. Nonetheless, it is a
good option to consider in conjunction with your other storage.
Note: Whatever storage system you adopt, be consistent so that you protect your images and can
locate them easily when you need them. You never know when “disaster” will strike. Having backup
copies of your images readily available may save the day!
607343c01.indd 39 4/11/10 11:02:52 PM
2
Ph ot o by EllEn Ano n
607343c02.indd 40 4/11/10 11:03:07 PM
41
■ BRIDGE
2
Bridge
After you’re done photographing, you need
an easy way to get your images from the
memory cards onto your computer and to
see how the pictures look. Although you
may be eager to start optimizing them right
away, first you need to sort through them
and decide which files to keep and which
to delete. Adobe Bridge, a stand-alone
application that comes with Photoshop and
Elements, and Organizer in the PC version
of Elements, have a lot of features to help
with this task. We’ll show you how to take
advantage of these features to make this part
of your workflow as efficient as possible.
Chapter Contents
Customizing Bridge
Downloading Images
Bridge Views and Workspaces
Sorting and Editing
Additional Features
MiniBridge
Organizer
607343c02.indd 41 4/11/10 11:03:07 PM
42
c ha p t er 2: BR ID GE ■
Customizing Bridge
Bridge is a program designed to be customized for each user’s individual needs. It’s
used not only by photographers, but also by graphic artists and others using any of the
programs packaged in the Adobe Creative Suite series. Bridge’s interface is designed to
make its features very discoverable. However, the default views and behaviors may not
match your workflow needs, so it’s worth spending a little time learning to set it up in
the most convenient way for you. We’ll take you through the program step by step and
make recommendations about what works best for us. That way, you can customize
your version according to your needs.
Note: Bridge is aptly named because it is the “connector,” or “bridge,” between the various
applications that make up Creative Suite 5, such as Adobe InDesign, Illustrator, GoLive, Version Cue, and
so on, as well as Photoshop. It enables files created in one application to be viewed and opened in one
or more of the other applications.
For Photoshop Elements Users: Bridge and Organizer
Mac Elements users can follow along with the Bridge descriptions for Photoshop, as the Mac
version of Elements includes the full, but older, version of Bridge from Photoshop CS4. For PC
Elements users, there’s a separate sidebar devoted to Organizer at the end of the chapter.
Setting Bridge Preferences
Bridge includes a Preferences dialog box where you can set a wide variety of options to
adjust the behavior of Bridge to your liking. Access the dialog box by selecting Edit
>
Preferences (Bridge
> Preferences on Macs) from the menu in Bridge. Because there are
so many settings and many of them are a matter of personal preference, we’ll simply
highlight the major settings:
General This section (see Figure 2.1) contains general settings related to the appear-
ance and behavior of Bridge. Use the sliders in the Appearance section to control the
background of the user interface as well as the backdrop for your images. The Accent
Color drop-down menu enables you to choose a color and style for the highlight in the
user interface. We find that the default settings work well, but this is largely a matter
of personal preference.
The Behavior section includes three options. The first automatically launches Adobe
Photo Downloader. Unless you are specifically using another program, such as
Aperture or Lightroom, for your image importing (which we’ll discuss later in this
chapter), check the option to launch Adobe Photo Downloader when a camera is con-
nected. This will launch the downloader when a memory card is connected and will
save you time.
For Photoshop Elements Users: Bridge and Organizer
Mac Elements users can follow along with the Bridge descriptions for Photoshop, as the Mac
version of Elements includes the full, but older, version of Bridge from Photoshop CS4. For PC
Elements users, there’s a separate sidebar devoted to Organizer at the end of the chapter.
607343c02.indd 42 4/11/10 11:03:07 PM
43
■ CUSTOMIZING BRIDGE
Figure 2.1 The General section of the Bridge Preferences contains settings related to the
display of images within Bridge.
Note: If you opt to experiment with the Appearance sliders, be aware that there is no way to
automatically return to the default settings.
We recommend checking the option Double-Click Edits Camera Raw Settings in
Bridge. When this check box is cleared, raw files open into ACR hosted by Photoshop.
When you check the box, the ACR dialog box opens without launching Photoshop.
This may seem like a subtle distinction, but it may enable you to adjust settings more
rapidly than you otherwise could; for example, you could be working in Photoshop
while Bridge processes a large number of raw files in the background. In addition, it
may allow you to process a larger volume of images at once.
The option Control+click/F+click Opens the Loupe When Previewing or Reviewing is
a personal preference. If you’re annoyed that you’re accidentally eliciting the loupe by
clicking while navigating around the interface, then check this option. By doing so, a
single click will no longer call forth the loupe; instead you’ll have to add the modifier
key (Ctrl or F) as well. We prefer to keep this checked.
The Favorite Items section allows you to choose the image sources to be included on
the Favorites tab. The Reset button at the bottom of this section allows you to reset the
warning dialog boxes so that all are shown, even if you have previously checked the box
to not show a particular message.
607343c02.indd 43 4/11/10 11:03:07 PM
44
c ha p t er 2: BR ID GE ■
For Photoshop Elements Users: Elements, Bridge, and Camera RAW
Using ACR with the version of Bridge that ships with Elements is a little confusing because
Bridge actually contains two versions of ACR: the limited Elements version and a stand-alone
copy of the full-featured CS4 version. If you right-click on an image (RAW, JPEG, or TIF) and
choose Open with Camera Raw, you will see the full version of ACR, but it lacks an Open button.
Instead you can Save the image or click Done. Similarly, if you check the Double-Click Edits Cam-
era Raw Settings in Bridge option, you will get the full-featured version of ACR but it also lacks
a Done button.
If you leave the Double-Click Edits Camera Raw Settings in Bridge option unchecked and instead
double-click an image or right-click on an image and choose Open with
> Photoshop Elements 8,
you will see the limited version of ACR. In that case there’s an Open button so that you can open
the image in Elements. The limited version of ACR will read all the adjustments you made to a
RAW file in the full version of ACR, and it will show them in Elements. However, if you modify a
TIF file using the full version of ACR and want to open that TIF in Elements, you need to save a
copy of the TIF with your adjustments (by clicking the Save button) from the full version of ACR
before opening the result in Elements.
Thumbnails The Thumbnails section (Figure 2.2) includes options for the appearance of
the associated metadata as well as for file handling.
First is the Do Not Process Files Larger Than option, which determines the size, in
megabytes, above which Bridge will not generate a thumbnail for the image. It can be
useful to create such a limit (the default is now 1000MB), because building thumb-
nails for such large images can be time-consuming, resulting in reduced system per-
formance. However, for photographers who frequently produce extremely large files,
such as panoramas, setting such a limit can be a source of frustration, because they
aren’t able to see thumbnails for many of their images. Consider this setting based on
the relative advantages of placing a limit on the building of thumbnails for large files.
Four check boxes with drop-down menus allow you to specify additional information
about the image to be displayed below the thumbnail. Again, it’s a matter of personal
preference and what information you want to have at your fingertips about each file.
As shown in Figure 2.2, we opt to show the date created, dimensions, depth, and
document (file) type. With that information we can easily identify at a glance which
version of an image we want.
The Show Tooltips check box determines whether information about the image is
displayed as a pop-up tooltip when you hold the mouse over a thumbnail. We gener-
ally leave this off because we find it distracting, but you could opt to use this feature
rather than display the additional lines of thumbnail metadata information.
For Photoshop Elements Users: Elements, Bridge, and Camera RAW
Using ACR with the version of Bridge that ships with Elements is a little confusing because
Bridge actually contains two versions of ACR: the limited Elements version and a stand-alone
copy of the full-featured CS4 version. If you right-click on an image (RAW, JPEG, or TIF) and
choose Open with Camera Raw, you will see the full version of ACR, but it lacks an Open button.
Instead you can Save the image or click Done. Similarly, if you check the Double-Click Edits Cam
-
era Raw Settings in Bridge option, you will get the full-featured version of ACR but it also lacks
a Done button.
If you leave the Double-Click Edits Camera Raw Settings in Bridge option unchecked and instead
double-click an image or right-click on an image and choose Open with
>
Photoshop Elements 8,
you will see the limited version of ACR. In that case there’s an Open button so that you can open
the image in Elements. The limited version of ACR will read all the adjustments you made to a
RAW file in the full version of ACR, and it will show them in Elements. However, if you modify a
TIF file using the full version of ACR and want to open that TIF in Elements, you need to save a
copy of the TIF with your adjustments (by clicking the Save button) from the full version of ACR
before opening the result in Elements.
607343c02.indd 44 4/11/10 11:03:08 PM
45
■ CUSTOMIZING BRIDGE
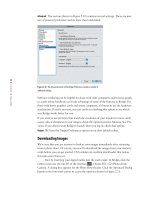
Figure 2.2 The Thumbnails section
of Preferences contains settings to
control what metadata is displayed
with the thumbnails.
Note: In CS5 the preferences for quality of thumbnails are accessible from the icon located
on the Path Bar. (If the Path Bar is not visible, toggle it on by going to Window > Path Bar.) We recom-
mend High Quality on Demand, which limits the high-quality previews to those images you’re viewing
and those immediately following them. Alternatively, you may prefer Always High Quality, but that
takes longer initially and there’s a delay before you can view your images.
Playback With video becoming more and more popular in digital cameras, the Playback
preferences (Figure 2.3) have become more important. However we leave these options
at their default settings.
Figure 2.3 Playback Preferences
are important now that more nature
photographers are taking videos with
their cameras.
607343c02.indd 45 4/11/10 11:03:08 PM
