Photoshop cs5 cho nhiếp ảnh gia part 16 potx
Bạn đang xem bản rút gọn của tài liệu. Xem và tải ngay bản đầy đủ của tài liệu tại đây (941.1 KB, 7 trang )
91
■ ADOBE CAMERA RAW
3
Adobe Camera Raw
When shooting in RAW you need software
to convert the information captured by the
sensor into a visible form. Adobe Camera Raw
(ACR) began as a basic RAW converter, but
has evolved into a comprehensive interface
to optimize images. It enables you to modify
the algorithms used to convert the images
as well as to apply numerous adjustments
both globally and locally. In fact, with many
images we make most of our adjustments
within ACR, in its powerful and easy-to-use
interface. What’s more, we can even use ACR
to adjust TIFF or JPEG files. We’ll show you
how to use ACR to adjust your images so that
you’re starting with the best possible files!
Chapter Contents
Using the ACR Interface
Using the Basic Tab
Setting the Other Tabs
Making Localized Adjustments
Setting ACR Workflow Options and Saving Files
Batch-Converting Multiple Images
607343c03.indd 91 4/12/10 11:48:21 PM
92
c h a p t e r 3: ADOBE CAMERA RAW ■
Using the ACR Interface
The ACR interface packs a lot of features and controls into its intuitive and easy-to-
use interface. You can choose to make only basic corrections to your image or per-
form some quite sophisticated adjustments, including targeted adjustments. We’ll go
through the interface step by step so you’ll know precisely where to find each control.
Note: It’s worth mentioning that ACR is different from the converter supplied by your camera
manufacturer. The one that came with your camera may be able to take advantage of some proprietary
information captured by your camera, and this can, in a small percentage of cases, result in better
image quality in the conversion. However, there is a huge convenience factor in using the very user-
friendly converter included within Photoshop. You’ll rarely, if ever, encounter a problem by using ACR.
For Photoshop Elements Users: The Elements Version of Camera Raw
The Elements version of ACR is quite similar, although more limited, as seen here. It has only
three tabs and lacks some of the more sophisticated tools of the Photoshop version.
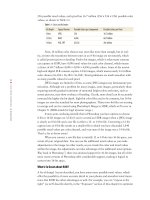
Seeing Your Image within ACR
By default when ACR opens, the image is sized so that you see your entire image
within the workspace. As shown in Figure 3.1, the small box in the lower left of the
dialog box gives the current magnification of your image. To zoom in or out, click
607343c03.indd 92 4/12/10 11:48:21 PM
93
■ USING THE ACR INTERFACE
the – or + box there, or click the arrows next to the number to get a drop-down menu
revealing a variety of common magnifications. To check for critical sharpness within
your image, zoom to 100%. To return to the original view, select Fit in View from the
drop-down menu, or use the keyboard shortcut Ctrl+0/F+0.
Figure 3.1 You have the option of seeing your entire image or zooming in to closely examine parts of the image.
Ph oto by EllE n An on
When you are zoomed in beyond the Fit in View size, you can click the hand
icon in the strip of icons at the top left of the ACR window and then click within the
preview and drag to inspect various parts of the image. Alternatively, you can simply
hold down the spacebar while clicking and dragging within the preview. Note that
you can also click the magnifying-glass icon in that same strip of icons to zoom into
your image and hold down the Alt/Option key while clicking to zoom out. Many other
important tools are available from this strip of icons, as indicated in Figure 3.2. We’ll
discuss them in more depth throughout the chapter.
If your image needs to be rotated, click one of the Rotate tools
, or press
the R key to rotate the image 90° to the right (clockwise) or the L key to rotate it 90°
to the left (counterclockwise).
607343c03.indd 93 4/12/10 11:48:22 PM
94
c h a p t e r 3: ADOBE CAMERA RAW ■
Zoom tool
Hand tool
White Balance tool
Color Sample
tool
Crop tool
Spot Removal
tool
Adjustment Brush
ACR Preferences
Targeted
Adjustment tool
Red-Eye
Removal tool
Straighten tool
Rotate tools
Graduated Filter
Figure 3.2 This strip of icons allows you easy, one-click access to a
number of important features in ACR.
Use the Preview check box to toggle between a preview of the file with and
without your changes. The preview is continuously updated. The
icon toggles the
ACR interface between a full-screen version and a smaller adjustable size. Usually we
prefer the full-screen version so we can see the image in more detail.
In the upper-right corner of the interface is the histogram. It shows a graph
for each color channel with the white luminosity histogram superimposed on top. In
the upper corners of the histogram, as shown in Figure 3.3, you’ll see two triangles.
Clicking these triangles toggles the clipping previews on and off. When they are on,
any highlights that are being clipped will appear solid bright red, and any shadows
being clipped will appear solid vivid blue. This way, you can readily see when you
may have made an adjustment that would lead to accidentally throwing away detail
in your highlights or shadows. With this obvious warning enabled, it’s easy to modify
your settings to retain as much detail as possible within your image. In addition, the
triangles change colors to indicate which channels are being clipped. When there is no
clipping, the triangles are black.
Note: Clipping means forcing pixels above or below a certain value to become pure black or pure
white, thus losing detail in either your highlights or shadows.
As your cursor hovers over any point in your image preview, a readout of that
point’s RGB values appears beneath the histogram. In addition, some basic informa-
tion about your lens, ISO, aperture, and shutter speed appears there.
Cropping and Rotating within ACR
Photoshop CS5 offers the ability to crop and rotate within ACR. Since you can embed
your raw file in your image file as a Smart Object (see Chapter 5, “Workflows and
First Steps,” for more details), you can crop nondestructively using the cropping tool
in ACR. By nondestructively, we mean that you can change your mind at some future
time and change the crop without any loss of image quality. (Obviously when you
crop, you’re eliminating certain pixels from your final file.)
607343c03.indd 94 4/12/10 11:48:23 PM
95
■ USING THE ACR INTERFACE
Figure 3.3 Checking the Preview box and the clipping triangles in the histogram allows you to see whether there is any clipping in
your image, either from the way it was captured or because of the changes you make within ACR.
To use the Crop tool, simply click its icon or press C on your keyboard, then
click a beginning point in the image preview and drag diagonally across the image. You
can refine your selection by clicking any one of the small boxes appearing on the bound-
aries of the image and dragging them inward or outward as desired. You can move
the crop around on the image by placing the cursor within the center of the area to be
cropped and then clicking and dragging. To apply the crop, press Enter.
If you click and hold on the Crop tool, you’ll see a drop-down menu listing
various preset cropping options, so you can crop the image to an aspect ratio of your
choosing (see Figure 3.4). You can even create custom settings for other aspect ratios
that you use frequently, such as 8
× 10. To do this, simply click the Custom option to
reveal a Custom Crop dialog box. Fill in the boxes with the appropriate numbers, and
click OK. To remove a crop, press Esc while the Crop tool is still selected, or choose
Clear Crop from the Crop drop-down menu.
As you set the crop to the desired size, notice that the size listed in the center
bottom in the Workflow Options has changed and reflects the size of the image after
the crop. We’ll talk more about the Workflow Options later in this chapter.
607343c03.indd 95 4/12/10 11:48:23 PM
96
c h a p t e r 3: ADOBE CAMERA RAW ■
Figure 3.4 You can crop to a preset size or to a custom size within ACR. The Size menu will reect
the cropped le size.
Ph oto by EllE n An on
ACR also enables you to easily straighten horizons. To do so, click the Straighten
icon
, or press the letter A. Then click at the beginning of the horizon, or area that
should be straight, and drag across to the opposite side. You are telling ACR what
part of your image should be a straight horizontal or vertical line. When you release
the cursor, you will see the preview rotated, and automatic crop lines will have been
set, as illustrated in Figure 3.5. The Crop tool icon will automatically be highlighted
or selected. To apply the rotation and crop, press Enter. To quickly reset your image to
its original position, in the event that the straightening didn’t work as planned, press
Ctrl+Z/F+Z, or select Clear Crop from the Crop tool drop-down menu.
One potential drawback to cropping and rotating within the converter is that
ACR limits your crop to the boundaries of the image, meaning you cannot rotate and
crop in such a way that the boundaries extend beyond the pixel information at any
point. If the placement of your subject matter dictates that you need to clone in addi-
tional background area after straightening the image, wait to crop and straighten the
image within Photoshop.
Try It! Open the raw image named ConvertRaw on this book’s companion website,
www.sybex.com/go/photoshopnature, or one of your own, and practice cropping and rotating it.
607343c03.indd 96 4/12/10 11:48:24 PM
97
■ USING THE ACR INTERFACE
Using the Spot Removal Tool
The Spot Removal tool is similar to the Clone and Healing Brush tools in Pho-
toshop, although not quite as powerful. The Spot Removal tool is particularly well
suited to removing the dust that plagues most digital photographers. Unfortunately,
since retouching in ACR is limited to circular spots, it is not well suited for object
removal. That type of retouching is best done later in Photoshop.
If you are using a Smart Object–based flexible workflow (see Chapter 5), it’s
helpful to do as much of your dust removal as possible in ACR. That way, anytime you
change the Smart Object, your retouching will automatically change as well. If you use
the flexible workflow but do your cleanup in Photoshop, some changes you may make
later to the Smart Object (your background layer with the raw file) may force you to
have to redo the cleanup layer. For instance, if you make tonal or color corrections to
the raw file, any cloning and healing that was based on the previous settings will no
longer match.
To use the Spot Removal tool, follow these steps:
1. Zoom into your image to 100% magnification.
2. Begin at one corner and systematically work your way through the image.
Figure 3.5 The Straighten tool automatically crops
and straightens your image.
607343c03.indd 97 4/12/10 11:48:25 PM