jQuery in Action phần 8 doc
Bạn đang xem bản rút gọn của tài liệu. Xem và tải ngay bản đầy đủ của tài liệu tại đây (1.8 MB, 37 trang )
Manipulating JavaScript objects and collections 177
A pattern for mimicking inheritance in JavaScript is to extend an object by
copying the properties of a base object into the new object, extending the new
object with the capabilities of the base.
NOTE If you’re an aficionado of object-oriented JavaScript, you’ll no doubt be
familiar with extending not only object instances but also their blueprints
via the
prototype property of object constructors. $.extend() can be
used to effect such constructor-based inheritance by extending
proto-
type
, as well as object-based inheritance by extending existing object
instances. Because understanding such advanced topics isn’t a require-
ment in order to use jQuery effectively, this is a subject—albeit an impor-
tant one—that’s beyond the scope of this book.
It’s fairly easy to write JavaScript code to perform this extension by copy, but as
with so many other procedures, jQuery anticipates this need and provides a
ready-made utility function to help us out. As we’ll see in the next chapter, this
function is useful for much more than extending an object, but even so its name is
$.extend()
. Its syntax is as follows:
Function syntax: $.extend
$.extend(target,source1,source2, sourceN)
Extends the object passed as
target
with the properties of the remaining passed objects.
Parameters
target (Object) The object whose properties are augmented with the
properties of the source objects. This object is directly modi-
fied with the new properties before being returned as the value
of the function.
Any properties with the same name as properties in any of the
source elements are overridden with the values from the
source elements.
source1 sourceN (Object) One or more objects whose properties are added to
the
target
object.
When more than one source is provided and properties with
the same name exist in the sources, sources later in the argu-
ment list take precedence over those earlier in the list.
Returns
The extended target object.
178 CHAPTER 6
jQuery utility functions
Let’s take a look at this function doing its thing. Examine the code of listing 6.4,
which can also be found in the file chapter6/$.extend.html.
<html>
<head>
<title>$.extend Example</title>
<link rel="stylesheet" type="text/css" href=" /common.css">
<script type="text/javascript"
src=" /scripts/jquery-1.2.1.js"></script>
<script type="text/javascript"
src=" /scripts/support.labs.js"></script>
<script type="text/javascript">
var target = { a: 1, b: 2, c: 3 };
var source1 = { c: 4, d: 5, e: 6 };
var source2 = { e: 7, f: 8, g: 9 };
$(function(){
$('#targetBeforeDisplay').html($.toSource(target));
$('#source1Display').html($.toSource(source1));
$('#source2Display').html($.toSource(source2));
$.extend(target,source1,source2);
$('#targetAfterDisplay').html($.toSource(target));
});
</script>
<style type="text/
css">
label { float: left; width: 108px; text-align: right; }
p { clear: both; }
label + span { margin-left: 6px; }
</style>
</head>
<body>
<fieldset>
<legend>$.extend() Example</legend>
<p>
<label>target (before) =</label>
<span id="targetBeforeDisplay"></span>
</p>
<p>
<label>source1 =</label>
<span id="source1Display"></span>
</p>
<p>
<label>source2 =</label>
<span id="source2Display"></span>
</p>
Listing 6.4 Putting the $.extend function to the test
Defines
test
objects
b
Displays
before
state of
objects
c
Displays after state
of target object
e
Extends target object
with source objects
d
Defines HTML
elements for display
f
Manipulating JavaScript objects and collections 179
<p>
<label>target (after) =</label>
<span id="targetAfterDisplay"></span>
</p>
</fieldset>
</body>
</html>
In this simple example, we define three objects: a target and two source objects
b
. We’ll use these objects to demonstrate what happens to the target when
$.extend
is used to merge the two sources into it.
After declaring the objects, we define a ready handler in which we’ll operate
on them. Even though the objects are available immediately, we are going to dis-
play results on the page, so we need to wait until the
HTML elements
f
have
been rendered to start playing around.
Within the ready handler, we display the state of the three objects in
<span>
ele-
ments defined to hold the results
c
. (If you’re interested in how the
$.toSource()
function works, its definition can be found in the support.labs.js file. We’ll address
adding such utility functions to our repertoire in the next chapter.)
We extend the target object with the two source objects
d
using the following:
$.extend(target,source1,source2);
This merges the properties from objects
source1
and
source2
into the
target
object. The
target
object is returned as the value of the function; but, because the
target
is modified in place, we don’t need to create a variable to hold its refer-
ence. The fact that the
target
is returned is significant when using this function
as part of a statement chain.
Then, we display the values for the modified
target
e
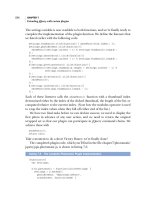
. The results are as
shown in figure 6.5.
As we can see, all properties of the source objects have been merged into the
target
object. But note the following important nuances:
■
Both the
target
and
source1
contain a property named
c
. The value of
c
in
source1
replaces the value in the original target.
■
Both
source1
and
source2
contain a property named
e
. Note that the value
of
e
within
source2
takes precedence over the value within
source1
when
merged into
target
, demonstrating how objects later in the list of argu-
ments take precedence over those earlier in the list.
180 CHAPTER 6
jQuery utility functions
Although it’s evident that this utility function can be useful in many scenarios
where one object must be extended with properties from another object (or set of
objects), we’ll see a concrete and common use of this feature when learning how
to define utility functions of our own in the next chapter.
But before we get to that, let’s wrap up our investigation of the utility functions
with one that we can use to dynamically load new script into our pages.
6.4 Dynamically loading scripts
Most of the time—perhaps, almost always—we’ll load the external scripts our
page needs from script files when the page loads via
<script>
tags in the
<head>
of the page. But every now and again, we might want to load some script after the
fact under script control.
We might do this because we don’t know if the script will be needed until after
some specific user activity has taken place but don’t want to include the script
unless absolutely needed, or perhaps, we might need to use some information not
available at load time to make a conditional choice between various scripts.
Regardless of why we might want to dynamically load new script into the page,
jQuery provides the
$.getScript()
utility function to make it easy.
Figure 6.5 Using $.extend to merge object results in all source properties being
copied into the
target object.
Dynamically loading scripts 181
Under its covers, this function uses jQuery’s built-in Ajax mechanisms to fetch the
script file. We’ll be covering these Ajax facilities in great detail in chapter 8, but
we don’t need to know anything about Ajax to use this function.
After fetching, the script in the file is evaluated; any inline script is executed,
and any defined variables or functions become available.
WARNING In Safari, the script definitions loaded from the fetched file don’t become
available right away, even in the callback to the function. Any dynamically
loaded script elements don’t became available until after the script block
within which it is loaded relinquishes control back to the browser. If your
pages are going to support Safari, plan accordingly!
Let’s see this in action. Consider the following script file (available in chapter6/
new.stuff.js):
alert("I'm inline!");
var someVariable = 'Value of someVariable';
function someFunction(value) {
alert(value);
}
This trivial script file contains an inline statement (which issues an alert that
leaves no doubt as to when the statement gets executed), a variable declaration,
and a declaration for a function that issues an alert containing whatever value
is passed to it when executed. Now let’s write a page to include this script
Function syntax: $.getScript
$.getScript(url,callback)
Fetches the script specified by the
url
parameter using a GET request to the specified
server, optionally invoking a callback upon success.
Parameters
url (String) The URL of the script file to fetch.
callback (Function) An optional function invoked after the script resource has been
loaded and evaluated.
The following parameters are passed:
■
The text loaded from the resource
■
The string success
Returns
The XHR instance used to fetch the script.
182 CHAPTER 6
jQuery utility functions
file dynamically. The page is shown in listing 6.5 and can be found in the file
chapter6/$.getScript.html.
<html>
<head>
<title>$.getScript Example</title>
<link rel="stylesheet" type="text/css" href=" /common.css">
<script type="text/javascript"
src=" /scripts/jquery-1.2.1.js"></script>
<script type="text/javascript">
$(function(){
$('#loadButton').click(function(){
$.getScript(
'new.stuff.js'//,function(){$('#inspectButton').click()}
);
});
$('#inspectButton').click(function(){
someFunction(someVariable);
});
});
</script>
</head>
<body>
<button type="button" id="loadButton">Load</button>
<button type="button" id="inspectButton">Inspect</button>
</body>
</html>
This page defines two buttons
d
that we use to trigger the activity of the exam-
ple. The first button, labeled Load, causes the new.stuff.js file to be dynamically
loaded through use of the
$.getScript()
function
b
. Note that, initially, the sec-
ond parameter (the callback) is commented out—we’ll get to that in a moment.
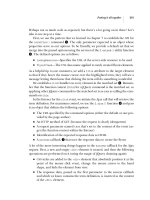
On clicking that button, the new.stuff.js file is loaded, and its content is evalu-
ated. As expected, the inline statement within the file triggers an alert message as
shown in figure 6.6.
Clicking the Inspect button executes its
click
handler
c
, which executes the
dynamically loaded
someFunction()
function passing the value of the dynamically
loaded
someVariable
variable. If the alert appears as shown in figure 6.7, we know
that both the variable and function are loaded correctly.
If you’d like to observe the behavior of Safari that we warned you about ear-
lier, make a copy of the
HTML file of listing 6.5, and uncomment the callback
Listing 6.5 Dynamically loading a script file and examining the results
Fetches the script on
clicking the Load button
b
Displays result on clicking
the Inspect button
c
Defines the
buttons
d
Dynamically loading scripts 183
parameter to the
$.getScript()
function. This callback executes the
click
han-
dler for the Inspect button, calling the dynamically loaded function with the
loaded variable as its parameter.
In browsers other than Safari, the function and variable loaded dynamically
from the script are available within the callback function. But when executed on
Safari, nothing happens! We need to take heed of this divergence of functionality
when using the
$.getScript()
function.
Figure 6.6 The dynamic loading and evaluation of the script file results in the inline
alert statement being executed.
Figure 6.7 The appearance of the alert shows that the dynamic function is loaded
correctly, and the correctly displayed value shows that the variable was
dynamically loaded.
184 CHAPTER 6
jQuery utility functions
6.5 Summary
In this chapter we surveyed the features that jQuery provides outside of the meth-
ods that operate upon a wrapped set of matched
DOM elements. These included
an assortment of functions, as well as a set of flags, defined directly on the
jQuery
top-level name (as well as its
$
alias).
When we need to resort to browser detection to account for differences in
browser capabilites and operation, the
$.browser
set of flags lets us determine
within which browser family the page is being displayed. Browser detection
should be used only as a last resort when it’s impossible to write the code in a
browser-independent fashion, and the preferred approach of object detection
can’t be employed.
The
$.boxModel
flag tells us which of the two box models is being used to ren-
der the page, and the
$.styleFloat
flag lets us reference the style property of the
float
style in a browser-independent manner.
Recognizing that page authors may sometimes wish to use other libraries in
conjunction with jQuery, jQuery provides
$.noConflict()
, which allows other
libraries to use the
$
alias. After calling this function, all jQuery operations must
use the
jQuery
name rather than
$
.
$.trim()
exists to fill the gap left by the native JavaScript
String
class for trim-
ming whitespace from the beginning and end of string values.
jQuery also provides a set of functions that are useful for dealing with data sets
in arrays.
$.each()
makes it easy to traverse through every item in an array;
$.grep()
allows us to create new arrays by filtering through the data of a source
array using whatever filtering criteria we would like to use; and
$.map()
allows us
to easily apply our own transformations to a source array to produce a corre-
sponding new array with the transformed values.
To merge objects, perhaps even to mimic a sort of inheritance scheme, jQuery
also provides the
$.extend()
function. This function allows us to unite the prop-
erties and any number of source objects into a target object.
And for those times when we want to load a script file dynamically, jQuery
defines
$.getScript()
, which can load and evaluate a script file at any point in
the execution of other page script.
With these additional tools safely tucked away in our toolbox, we’re ready to
tackle how to add our own extensions to jQuery. Let’s get to it in the next chapter.
185
Extending jQuery
with custom plugins
This chapter covers
■
Why to extend jQuery with custom code
■
The rules for effectively extending jQuery
■
Writing custom utility functions
■
Writing custom wrapper methods
186 CHAPTER 7
Extending jQuery with custom plugins
Over the course of the previous chapters, we’ve seen that jQuery gives us a large
toolset of useful commands and functions; we’ve also seen that we can easily tie
these tools together to give our pages whatever behavior we choose. Sometimes that
code follows common patterns we want to use again and again. When such patterns
emerge, it makes sense to capture these repeated operations as reusable tools that
we can add to our original toolset. In this chapter, we explore how to capture these
reusable fragments of code as extensions to jQuery.
But before any of that, let’s discuss why we’d want to pattern our own code as
extensions to jQuery in the first place.
7.1 Why extend?
If you’ve been paying attention at all while reading through this book, as well as
to the code examples presented within it, you undoubtedly have noted that
adopting jQuery for use in our pages has a profound effect on how script is writ-
ten within a page.
The use of jQuery promotes a certain style for a page’s code, frequently in the
guise of forming a wrapped set of elements and then applying a jQuery com-
mand, or chain of commands, to that set. When writing our own code, we can
write it however we please, but most experienced developers agree that having all
of the code on a site, or at least the great majority of it, adhere to a consistent style
is a good practice.
So one good reason to pattern our code as jQuery extensions is to help main-
tain a consistent code style throughout the site.
Not reason enough? Need more? The whole point of jQuery is to provide a set
of reusable tools and
APIs. The creators of jQuery carefully planned the design of
the library and the philosophy of how the tools are arranged to promote reusabil-
ity. By following the precedent set by the design of these tools, we automatically
reap the benefit of the planning that went into these designs—a compelling sec-
ond reason to write our code as jQuery extensions.
Still not convinced? The final reason we’ll consider (though it’s quite possible
others could list even more reasons) is that, by extending jQuery, we can leverage
the existing code base that jQuery makes available to us. For example, by creating
new jQuery commands (wrapper methods), we automatically inherit the use of
jQuery’s powerful selector mechanism. Why would we write everything from
scratch when we can layer upon the powerful tools jQuery already provides?
Given these reasons, it’s easy to see that writing our reusable components as
jQuery extensions is a good practice and a smart way of working. In the remainder
The jQuery plugin authoring guidelines 187
of this chapter, we’ll examine the guidelines and patterns that allow us to create
jQuery plugins and we’ll create a few of our own. In the following chapter, which
covers a completely different subject (Ajax), we’ll see even more evidence that cre-
ating our own reusable components as jQuery plugins in real-world scenarios
helps to keep the code consistent and makes it a whole lot easier to write those
components in the first place.
But first, the rules…
7.2 The jQuery plugin authoring guidelines
Sign! Sign! Everywhere a sign! Blocking out the scenery, breaking my mind. Do this!
Don’t do that! Can’t you read the sign?
—Five Man Electric Band, 1971
Although the Five Man Electric Band may have lyrically asserted an anti-
establishment stance against rules back in 1971, sometimes rules are a good
thing. Without any, chaos would reign.
Such it is with the rules—more like common sensical guidelines—governing
how to successfully extend jQuery with our own plugin code. These guidelines
help us ensure, not only that our new code will plug into the jQuery architecture
properly, but also that it will work and play well with other jQuery plugins and
even other JavaScript libraries.
Extending jQuery takes one of two forms:
■
Utility functions defined directly on
$
(an alias for
jQuery
)
■
Methods to operate on a jQuery wrapped set (so-called jQuery commands)
In the remainder of this section, we’ll go over some guidelines common to both
types of extensions. Then in the following sections, we’ll tackle the guidelines and
techniques specific to writing each type of plugin element.
7.2.1 Naming files and functions
To Te l l t h e Tr u t h was an American game show, first airing in the 1950’s, in which
multiple contestants claimed to be the same person with the same name, and a
panel of celebrities was tasked with determining which person was whom they
claimed to be. Although fun for a television audience, name collisions are not fun at
all when it comes to programming.
188 CHAPTER 7
Extending jQuery with custom plugins
We’ll discuss avoiding name collisions within our plugins, but first let’s address
naming the files within which we’ll write our plugins so that they do not conflict
with other files.
The guideline recommended by the jQuery team is simple but effective, advo-
cating the following format:
■
Prefix the filename with jquery.
■
Follow that with the name of the plugin.
■
Conclude with .js.
For example, if we write a plugin that we want to name Fred, our JavaScript file-
name for this plugin is
jquery.fred.js
The use of the jquery. prefix eliminates any possible name collisions with files
intended for use with other libraries. After all, anyone writing non-jQuery plu-
gins has no business using the jquery. prefix.
But that leaves the plugin name itself still open for contention within the
jQuery community.
When we’re writing plugins for our own use, all we need to do is avoid conflicts
with any other plugins that we plan to use. But when writing plugins that we plan
to publish for others to use, we need to avoid conflicts with any other plugin that’s
already published.
The best way to avoid conflicts is to stay in tune with the goings-on within the
jQuery community. A good starting point is the page at />Plugins; but, beyond being aware of what’s already out there, there are other pre-
cautions we can take.
One way to ensure that our plugin filenames are unlikely to conflict with oth-
ers is to sub-prefix them with a name that’s unique to us or our organization. For
example, all of the plugins developed in this book use the filename prefix
jquery.jqia (jqia being short for jQuery in Action) to help make sure that they won’t
conflict with anyone else’s plugin filenames should anyone wish to use them in
their own web applications. Likewise, the files for the jQuery Form Plugin begin
with the prefix jquery.form. Not all plugins follow this convention, but as the
number of plugins increases, it will become more and more important to follow
such conventions.
Similar considerations need to be taken with the names we give to our func-
tions, whether they’re new utility functions or methods on the jQuery wrappers.
The jQuery plugin authoring guidelines 189
When creating plugins for our own use, we’re usually aware of what other plu-
gins we’ll use; it’s an easy matter to avoid any naming collisions. But what if we’re
creating our plugins for public consumption? Or what if our plugins, that we ini-
tially intended to use privately, turn out to be so useful that we want to share them
with the rest of the community?
Once again, familiarity with the plugins that already exist will go a long way in
avoiding
API collisions, but we also encourage gathering collections of related
functions under a common prefix (similar to the proposal for filenames) to avoid
cluttering the namespace.
Now, what about conflicts with that
$
?
7.2.2 Beware the $
“Will the real
$
please stand up?”
Having written a fair amount of jQuery code, we’ve seen how handy it is to use
the
$
alias in place of
jQuery
. But when writing plugins that may end up in other
people’s pages, we can’t be quite so cavalier. As plugin authors, we have no way of
knowing whether a page author intends to use the
$.noConflict()
function to
allow the
$
alias to be usurped by another library.
We could employ the sledgehammer approach and use the
jQuery
name in
place of the
$
alias, but dang it, we like using
$
and are loath to give up on it
so easily.
Section 6.2 discussed an idiom often used to make sure that the
$
alias referred
to the
jQuery
name in a localized manner without affecting the remainder of the
page, and this little trick can also be (and often is) employed when defining
jQuery plugins as follows:
(function($){
//
// Plugin definition goes here
//
})(jQuery);
By passing
jQuery
to a function that defines the parameter as
$
,
$
is guaranteed to
reference
jQuery
within the body of the function.
We can now happily use
$
to our heart’s content in the definition of the plugin.
Before we dive into learning how to add new elements to jQuery, let’s look at
one more technique plugin authors are encouraged to use.
190 CHAPTER 7
Extending jQuery with custom plugins
7.2.3 Taming complex parameter lists
Most plugins tend to be simple affairs that require few, if any, parameters. We’ve
seen ample evidence of this in the vast majority of the core jQuery methods and
functions, which either take a small handful of parameters or none at all. Intelli-
gent defaults are supplied when optional parameters are omitted, and parame-
ter order can even take on a different meaning when some optional parameters
are omitted.
The
bind()
method is a good example; if the optional data parameter is omit-
ted, the listener function, which is normally specified as the third parameter, can
be supplied as the second. The dynamic and interpretive nature of JavaScript
allows us to write such flexible code, but this sort of thing can start to break down
and get complex (both for page authors and ourselves as the plugin authors) as
the number of parameters grows larger. The possibility of a breakdown increases
when many of the parameters are optional.
Consider a somewhat complex function whose signature is as follows:
function complex(p1,p2,p3,p4,p5,p6,p7) {
This function accepts seven arguments; let’s say that all but the first are
optional. There are too many optional arguments to make any intelligent
guesses about the intention of the caller when optional parameters are omitted
(as we saw with the
bind()
method). If a caller of this function is only omitting
trailing parameters, this isn’t much of a problem because the optional trailing
arguments can be detected as nulls. But what if the caller wants to specify
p7
but
let
p2
through
p6
default? Callers would need to use placeholders for any omit-
ted parameters and write
complex(valueA,null,null,null,null,null,valueB);
Yuck! Even worse is a call such as
complex(valueA,null,valueC,valueD,null,null,valueB);
along with other variations of this nature. Page authors using this function are
forced to carefully keep track of counting nulls and the order of the parameters;
plus, the code is difficult to read and understand.
But short of not allowing so many options to the caller, what can we do?
Again, the flexible nature of JavaScript comes to the rescue; a pattern that
allows us to tame this chaos has arisen among the page-authoring communities—
the options hash.
The jQuery plugin authoring guidelines 191
Using this pattern, optional parameters are gathered into a single parameter
in the guise of a JavaScript
Object
instance whose property name/value pairs
serve as the optional parameters.
Using this technique, our first example could be written as
complex(valueA, {p7: valueB});
And the second as the following:
complex(valueA, {
p3: valueC,
p4: valueD,
p7: valueB
});
Much better!
We don’t have to account for omitted parameters with placeholder nulls, and
we also don’t need to count parameters; each optional parameter is conveniently
labeled so that it’s clear to see exactly what it represents (when we use better
parameter names than
p1
through
p7
, that is).
Although this is obviously a great advantage to the caller of our complex func-
tions, what about the ramifications for us as the function authors? As it turns out,
we’ve already seen a jQuery-supplied mechanism that makes it easy for us to
gather these optional parameters together and to merge them with default val-
ues. Let’s reconsider our complex example function with a required parameter
and six options. The new, simplified signature is
complex(p1,options)
Within our function, we can merge those options with default values with the
handy
$.extend()
utility function. Consider the following:
function complex(p1,options) {
var settings = $.extend({
option1: defaultValue1,
option2: defaultValue2,
option3: defaultValue3,
option4: defaultValue4,
option5: defaultValue5,
option6: defaultValue6
},options||{});
// remainder of function
}
By merging the values passed to us by the page author in the
options
parameter
with an object containing all the available options with their default values, the
192 CHAPTER 7
Extending jQuery with custom plugins
settings
variable ends up with all possible option default values superseded by
any explicit values specified by the page author.
Note that we guard against an
options
object that’s
null
or undefined with
||{}
, which supplies an empty object if
options
evaluates to
false
(as we know
null
and
undefined
do).
Easy, versatile, and caller-friendly!
We’ll see examples of this pattern in use later in this chapter and in jQuery
functions that will be introduced in chapter 8. But for now, let’s finally look at how
we extend jQuery with our own utility functions.
7.3 Writing custom utility functions
In this book, we use the term utility function to describe functions defined as prop-
erties of
jQuery
(and therefore
$
). These functions are not intended to operate on
DOM elements—that’s the job of methods defined to operate on a jQuery
wrapped set—but to either operate on non-element JavaScript objects or per-
form some other nonobject-specific operation. Some examples we’ve seen of
these types of function are
$.each()
and
$.noConflict()
.
In this section, we’ll learn how to add our own similar functions.
Adding a function as a property to an
Object
instance is as easy as declaring
the function and assigning it to the
object
property. (If this seems like black
magic to you and you have not yet read through the appendix, now would be a
good time to do so.) Creating a trivial custom utility function should be as easy as
$.say = function(what) { alert('I say '+what); }
And in truth, it is that easy. But this manner of defining a utility function isn’t
without its pitfalls; remember our discussion in section 7.2.2 regarding the
$
?
What if some page author is including this function on a page that uses Prototype
and has called
$.noConflict()
? Rather than add a jQuery extension, we’d create
a method on Prototype’s
$()
function. (Get thee to the appendix if the concept of
a method of a function makes your head hurt.)
This isn’t a problem for a private function that we know will never be shared,
but even then, what if some future changes to the pages usurp the
$
? It’s a good
idea to err on the side of caution.
One way to ensure that someone stomping on
$
doesn’t also stomp on us is not
using the
$
at all. We could write our trivial function as
jQuery.say = function(what) { alert('I say '+what); }
Writing custom utility functions 193
This seems like an easy way out but proves to be less than optimal for more com-
plex functions. What if the function body utilizes lots of jQuery methods and
functions internally to get its job done? We’d need to use
jQuery
rather than
$
throughout the function. That’s rather wordy and inelegant; besides, once we use
the
$
, we don’t want to let it go!
So looking back to the idiom we introduced in section 7.2.2, we can safely
write our function as follows:
(function($){
$.say = function(what) { alert('I say '+what); }
})(jQuery);
We highly encourage using this pattern (even though it may seem like overkill for
such a trivial function) because it protects the use of
$
when declaring and defin-
ing the function. Should the function ever need to become more complex, we can
extend and modify it without wondering whether it’s safe to use the
$
or not.
With this pattern fresh in our minds, let’s implement a non-trivial utility func-
tion of our own.
7.3.1 Creating a data manipulation utility function
Often, when emitting fixed-width output, it’s necessary to take a numeric value
and format it to fit into a fixed-width field (where width is defined as number of
characters). Usually such operations will right-justify the value within the fixed-
width field and prefix the value with enough fill characters to make up any differ-
ence between the length of the value and the length of the field.
Let’s write such a utility function that’s defined with the following syntax:
Function syntax: $.toFixedWidth
$.toFixedWidth(value,length,fill)
Formats the passed value as a fixed-width field of the specified length. An optional fill char-
acter can be supplied. If the numeric value exceeds the specified length, its higher order dig-
its will be truncated to fit the length.
Parameters
value (Number) The value to be formatted.
length (Number) The length of the resulting field.
fill (String) The fill character used when front-padding the value. If omitted,
0
is used.
Returns
The fixed-width field.
194 CHAPTER 7
Extending jQuery with custom plugins
The implementation of this function is shown in listing 7.1.
(function($){
$.toFixedWidth = function(value,length,fill) {
var result = value.toString();
if (!fill) fill = '0';
var padding = length - result.length;
if (padding < 0) {
result = result.substr(-padding);
}
else {
for (var n = 0; n < padding; n++)
result = fill + result;
}
return result;
};
})(jQuery);
This function is simple and straightforward. The passed value is converted to its
string equivalent, and the fill character is determined either from the passed
value or the default of
0
b
. Then, we compute the amount of padding needed
c
.
If we end up with negative padding (the result is longer than the passed field
length), we truncate from the beginning of the result to end up with the specified
length
d
; otherwise, we pad the beginning of the result with the appropriate
number of fill characters
e
prior to returning it as the result of the function
f
.
Simple stuff, but it serves to show how easily we can add a utility function. And,
as always, there’s room for improvement. Consider the following exercises:
■
As with most examples in books, the error checking is minimal to focus on
the lesson at hand. How would you beef up the function to account for
caller errors such as not passing numeric values for
value
and
length
?
What if they don’t pass them at all?
■
We were careful to truncate numeric values that were too long in order to
guarantee that the result was always the specified length. But, if the caller
passes more than a single-character string for the fill character, all bets are
off. How would you handle that?
■
What if you don’t want to truncate too-long values?
Now, let’s tackle a more complex function in which we can make use of the
$.toFixedWidth()
function that we just wrote.
Listing 7.1 Implementation of the $.toFixedWidth() utility function
b
c
d
e
f
Writing custom utility functions 195
7.3.2 Writing a date formatter
If you’ve come to the world of client-side programming from the server, one of
the things you may have longed for is a simple date formatter; something that the
JavaScript
Date
type doesn’t provide. Because such a function would operate on a
Date
instance, rather than any DOM element, it’s a perfect candidate for a utility
function. Let’s write one that uses the following syntax:
The implementation of this function is shown in listing 7.2. We’re not going to go
into great detail regarding the algorithm used to perform the formatting (after
all, this isn’t an algorithms book), but we’re going to use this implementation to
Function syntax: $.formatDate
$.formatDate(date,pattern)
Formats the passed date according to the supplied pattern. The tokens that are substituted
in the pattern are as follows:
yyyy: the 4-digit year
yy: the 2-digit year
MMMM: the full name of the month
MMM: the abbreviated name of the month
MM: the month number as a 0-filled, 2-character field
M: the month number
dd: the day in the month as a 0-filled, 2-character field
d: the day in the month
EEEE: the full name of the day of the week
EEE: the abbreviated name of the day of the week
a: the meridium (AM or PM)
HH: the 24-hour clock hour in the day as a 2-character, 0-filled field
H: the 24-hour clock hour in the day
hh: the 12-hour clock hour in the day as a 2-character, 0-filled field
h: the 12-hour clock hour in the day
mm: the minutes in the hour as a 2-character, 0-filled field
m: the minutes in the hour
ss: the seconds in the minute as a 2-character, 0-filled field
s: the seconds in the minute
S: the milliseconds in the second as a 3-character, 0-filled field
Parameters
date (Date) The date to be formatted.
pattern (String) The pattern to format the date into. Any characters not matching pat-
tern tokens are copied as-is to the result.
Returns
The formatted date.
196 CHAPTER 7
Extending jQuery with custom plugins
point out some interesting tactics that we can use when creating a somewhat com-
plex utility function.
(function($){
$.formatDate = function(date,pattern) {
var result = [];
while (pattern.length > 0) {
$.formatDate.patternParts.lastIndex = 0;
var matched = $.formatDate.patternParts.exec(pattern);
if (matched) {
result.push(
$.formatDate.patternValue[matched[0]].call(this,date)
);
pattern = pattern.slice(matched[0].length);
} else {
result.push(pattern.charAt(0));
pattern = pattern.slice(1);
}
}
return result.join('');
};
$.formatDate.patternParts =
/^(yy(yy)?|M(M(M(M)?)?)?|d(d)?|EEE(E)?|a|H(H)?|h(h)?|m(m)?|s(s)?|S)/;
$.formatDate.monthNames = [
'January','February','March','April','May','June','July',
'August','September','October','November','December'
];
$.formatDate.dayNames = [
'Sunday','Monday','Tuesday','Wednesday','Thursday','Friday',
'Saturday'
];
$.formatDate.patternValue = {
yy: function(date) {
return $.toFixedWidth(date.getFullYear(),2);
},
yyyy: function(date) {
return date.getFullYear().toString();
},
MMMM: function(date) {
return $.formatDate.monthNames[date.getMonth()];
},
MMM: function(date) {
return $.formatDate.monthNames[date.getMonth()].substr(0,3);
},
MM: function(date) {
Listing 7.2 Implementation of the $.formatDate() utility function
Implements the main
body of the function
b
Defines the regular
expression
c
Provides the name of the months
d
Provides the name
of the days
e
Collects token-to-value
translation functions
f
Writing custom utility functions 197
return $.toFixedWidth(date.getMonth() + 1,2);
},
M: function(date) {
return date.getMonth()+1;
},
dd: function(date) {
return $.toFixedWidth(date.getDate(),2);
},
d: function(date) {
return date.getDate();
},
EEEE: function(date) {
return $.formatDate.dayNames[date.getDay()];
},
EEE: function(date) {
return $.formatDate.dayNames[date.getDay()].substr(0,3);
},
HH: function(date) {
return $.toFixedWidth(date.getHours(),2);
},
H: function(date) {
return date.getHours();
},
hh: function(date) {
var hours = date.getHours();
return $.toFixedWidth(hours > 12 ? hours - 12 : hours,2);
},
h: function(date) {
return date.getHours() % 12;
},
mm: function(date) {
return $.toFixedWidth(date.getMinutes(),2);
},
m: function(date) {
return date.getMinutes();
},
ss: function(date) {
return $.toFixedWidth(date.getSeconds(),2);
},
s: function(date) {
return date.getSeconds();
},
S: function(date) {
return $.toFixedWidth(date.getMilliseconds(),3);
},
a: function(date) {
return date.getHours() < 12 ? 'AM' : 'PM';
}
};
})(jQuery);
198 CHAPTER 7
Extending jQuery with custom plugins
The most interesting aspect of this implementation, aside from a few JavaScript
tricks used to keep the amount of code in check, is that the function
b
needs
some ancillary data to do its job—in particular:
■
A regular expression used to match tokens in the pattern
c
■
A list of the English names of the months
d
■
A list of the English names of the days
e
■
A set of sub-functions designed to provided the value for each token type
given a source date
f
We could have included each of these as
var
definitions within the function body,
but that would clutter an already somewhat involved algorithm; and because
they’re constants, it makes sense to segregate them from variable data.
We don’t want to pollute the global namespace, or even the
$
namespace,
with a bunch of names needed only by this function, so we make these declara-
tions properties of our new function itself. Remember, JavaScript functions are
first-class objects, and they can have their own properties like any other Java-
Script object.
As for the formatting algorithm itself? In a nutshell, it operates as follows:
■
Creates an array to hold portions of the result.
■
Iterates over the pattern, consuming identified token and non-token char-
acters until it has been completely inspected.
■
Resets the regular expression (stored in
$.formatDate.patternParts
) on
each iteration by setting its
lastIndex
property to 0.
■
Tests the regular expression for a token match against the current begin-
ning of the pattern.
■
Calls the function in the
$.formatDate.patternValue
collection of conver-
sion functions to obtain the appropriate value from the
Date
instance if a
match occurs. This value is pushed onto the end of the results array, and
the matched token is removed from the beginning of the pattern.
■
Removes the first character from the pattern and adds it to the end of the
results array if a token isn’t matched at the current beginning of the pattern.
■
Joins the results array into a string and returns it as the value of the func-
tion when the entire pattern has been consumed.
Note that the conversion functions in the
$.formatDate.patternValue
collection
make use of the
$.toFixedWidth()
function that we created in the previous section.
Adding new wrapper methods 199
You’ll find both of these functions in the file chapter7/jquery.jqia.dateFormat.js
and a rudimentary page to test it at chapter7/test.dateFormat.html.
Operating on run-of-the-mill JavaScript objects is all well and good, but the
real power of jQuery lies in the wrapper methods that operate on a set of
DOM
elements collected via the power of jQuery selectors. Next, let’s see how we can
add our own powerful wrapper methods.
7.4 Adding new wrapper methods
The true power of jQuery lies in the ability to easily and quickly select and oper-
ate on
DOM elements. Luckily, we can extend that power by adding wrapper
methods of our own that manipulate selected
DOM elements as we deem appro-
priate. By adding wrapper methods, we automatically gain the use of the power-
ful jQuery selectors to pick and choose which elements are to be operated on
without having to do all the work ourselves.
Given what we know about JavaScript, we probably could have figured out on
our own how to add utility functions to the
$
namespace, but that’s not true of
wrapper functions. There’s a tidbit of jQuery-specific information that we need to
know; to add wrapper methods to jQuery, we must assign them as properties
to an object named
fn
in the
$
namespace.
The general pattern for creating a wrapper functions is
$.fn.wrapperFunctionName = function(params){function-body};
Let’s concoct a trivial wrapper method to set the color of the matched DOM ele-
ments to blue.
(function($){
$.fn.makeItBlue = function() {
return this.css('color','blue');
}
})(jQuery);
As with utility functions, we make the declaration within an outer function that
guarantees that
$
is an alias to
jQuery
. But unlike utility functions, we create the
new wrapper method as a property of
$.fn
rather than of
$
.
NOTE If you’re familiar with object-oriented JavaScript and its prototype-based
class declarations, you might be interested to know that
$.fn is merely an
alias for the
prototype property of the jQuery constructor function.
200 CHAPTER 7
Extending jQuery with custom plugins
Within the body of the method, the function context (
this
) refers to the wrapped
set. We can use all of the predefined jQuery commands on it; as in this example,
we call the
css()
command on the wrapped set to set the
color
to
blue
for all
matched
DOM elements.
WARNING The function context (this) within the main body of a wrapper method
refers to the wrapped set, but when inline functions are declared within
this function, they each have their own function contexts. You must take
care when using
this under such circumstances to make sure that it’s
referring to what you think it is! For example, if you use
each() with its
iterator function,
this within the iterator function references the DOM
element for the current iteration.
We can do almost anything we like to the DOM elements in the wrapped set, but
there is one very important rule when defining new wrapper methods; unless the
function is intended to return a specific value, it should always return the wrapped
set as its return value. This allows our new command to take part in any jQuery
command chains. In our example, because the
css()
command returns the
wrapped set, we simply return the result of the call to
css()
.
In this example, we apply the jQuery
css()
command to all the elements in
the wrapped set by applying it to
this
. If, for some reason, we need to deal with
each wrapped element individually (perhaps because we need to make condi-
tional processing decisions), the following pattern can be used:
(function($){
$.fn.someNewMethod = function() {
return this.each(function(){
//
// Function body goes here this refers to individual
// elements
//
});
}
})(jQuery);
In this pattern, the
each()
command is used to iterate over every individual ele-
ment in the wrapped set. Note that, within the iterator function,
this
refers to the
current
DOM element rather than the entire wrapped set. The wrapped set
returned by
each()
is returned as the new method’s value so that this method can
participate in chaining.
Adding new wrapper methods 201
That’s all there is to it, but (isn’t there always a but?) there are some techniques
we should be aware of when creating more involved jQuery wrapper methods.
Let’s define a couple more plugin methods of greater complexity to examine
those techniques.
7.4.1 Applying multiple operations in a wrapper method
Let’s develop another new plugin method that performs more than a single oper-
ation on the wrapped set. Imagine that we need to be able to flip the read-only
status of text fields within a form and to simultaneously and consistently affect the
appearance of the field. We could easily chain a couple of existing jQuery com-
mands together to do this, but we want to be neat and tidy about it and bundle
these operations together into a single method.
We’ll name our new command
setReadOnly()
, and its syntax is as follows:
The implementation of this plugin is shown in listing 7.3 and can be found in the
file chapter7/jquery.jqia.setreadonly.js.
(function($){
$.fn.setReadOnly = function(readonly) {
return this.filter('input:text')
.attr('readonly',readonly)
.css('opacity', readonly ? 0.5 : 1.0);
}
})(jQuery);
Command syntax: setReadOnly
setReadOnly(state)
Sets the read-only status of wrapped text fields to the state specified by
state
. The opacity
of the fields will be adjusted: 100% if not read-only or 50% if read-only. Any elements in the
wrapped set other than text fields are ignored.
Parameters
state (Boolean) The read-only state to set. If
true
, the text fields are made read-only;
otherwise, the read-only status is cleared.
Returns
The wrapped set.
Listing 7.3 Implementation of the setReadOnly() plugin method