Beginning C# 2008 Databases From Novice to Professional phần 9 ppt
Bạn đang xem bản rút gọn của tài liệu. Xem và tải ngay bản đầy đủ của tài liệu tại đây (752.5 KB, 52 trang )
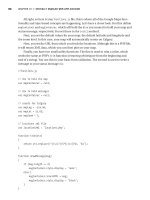
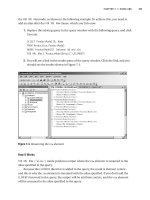
3. Run the program by pressing Ctrl+F5, and then click the Database Exception-2
button. You’ll see the message box in Figure 16-9. Click OK to close the message
box, click OK to close the next one, and then close the window.
Figure 16-9. Stored procedure database exception message
How It Works
The stored procedure tries to insert a new employee into the Employees table.
insert into employees
(
employeeid,
firstname
)
values (50, 'Cinderella')
However, since the EmployeeID column in the Employees table is an IDENTITY col-
umn, you can’t explicitly assign a value to it.
■Tip Actually, you can—as the message indicates—if you use SET IDENTITY_INSERT employees OFF
in the stored procedure before you attempt the INSERT. This would allow you to insert explicit EmployeeID
values, but this seldom is, or should be, done.
When this SQL err
or occurs
, the specific
SqlException catch clause tr
aps it and dis
-
plays the infor
mation.
The
finally block then closes the connection.
I
t
’s possible for stored procedures to encounter several errors. You can trap and
debug these using the
SqlException object, as y
ou
’ll see next.
CHAPTER 16 ■ HANDLING EXCEPTIONS 387
9004ch16final.qxd 12/13/07 3:59 PM Page 387
Try It Out: Handling a Database Exception (Part 3):
Errors Collection
The S
qlException
class S
qlException
class has an E
rrors
collection property. Each item in
the
E
rrors
collection is an object of type S
qlError
. When a database exception occurs, the
Errors collection is populated. For the example, you’ll try to establish a connection to a
nonexistent database and investigate the
SqlException’s Errors collection.
1. Insert the code in Listing 16-6 into the button5_Click method. Note that you’re
intentionally misspelling the database name.
Listing 16-6. button5_Click()
// create connection
SqlConnection conn = new SqlConnection(@"
data source = .\sqlexpress;
integrated security = true;
database = northwnd
");
// create command
SqlCommand cmd = conn.CreateCommand();
// specify stored procedure to be executed
cmd.CommandType = CommandType.StoredProcedure;
cmd.CommandText = "sp_DbException_2";
try
{
// open connection
conn.Open();
// execute stored procedure
cmd.ExecuteNonQuery();
}
catch (SqlException ex)
{
string str ="";
for (int i = 0; i < ex.Errors.Count; i++)
CHAPTER 16 ■ HANDLING EXCEPTIONS388
9004ch16final.qxd 12/13/07 3:59 PM Page 388
{
str +=
"\n" + "Index #" + i + "\n"
+ "Exception: " + ex.Errors[i].ToString() + "\n"
+ "Number: " + ex.Errors[i].Number.ToString() + "\n"
;
}
MessageBox.Show (str, "Database Exception");
}
catch (System.Exception ex)
{
string str;
str = "Source: " + ex.Source;
str += "\n" + "Exception Message: " + ex.Message;
MessageBox.Show (str, "ADO.NET Exception");
}
finally
{
if (conn.State == ConnectionState.Open)
{
MessageBox.Show(
"Finally block closing the connection",
"Finally"
);
conn.Close();
}
}
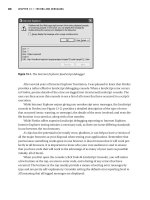
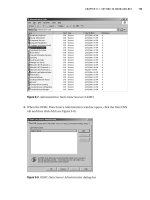
2. Run the program by pressing Ctrl+F5, and then click the Database Exception-2
button. You’ll see the message box in Figure 16-10.
Figure 16-10. H
andling multiple database err
ors
CHAPTER 16 ■ HANDLING EXCEPTIONS 389
9004ch16final.qxd 12/13/07 3:59 PM Page 389
Observe that two items are found in the Errors collection, and their error numbers
are different.
How It Works
In the connection string, you specify a database that doesn’t exist on the server; here you
misspell
Northwind as Northwnd.
// Create connection
SqlConnection conn = new SqlConnection(@"
data source = .\sqlexpress;
integrated security = true;
database = northwnd
");
When you try to open the connection, an exception of type SqlException is thrown
and you loop through the items of the
Errors collection and get each Error object using
its indexer.
catch (SqlException ex)
{
string str ="";
for (int i = 0; i < ex.Errors.Count; i++)
{
str +=
"\n" + "Index #" + i + "\n"
+ "Exception: " + ex.Errors[i].ToString() + "\n"
+ "Number: " + ex.Errors[i].Number.ToString() + "\n"
;
}
MessageBox.Show (str, "Database Exception");
}
This example sho
ws that the
SqlException object carr
ies detailed information about
ev
ery SQL error in its
Errors collection.
Summary
In this chapter
, y
ou saw how to handle exceptions thrown by ADO.NET and by the SQL
Server database. In particular, you learned how to handle both single and multiple data-
base err
ors with the
System.Data.SqlClient.SqlException class
.
In the next chapter
, y
ou’ll look at transactions and how to work with events.
CHAPTER 16 ■ HANDLING EXCEPTIONS390
9004ch16final.qxd 12/13/07 3:59 PM Page 390
Working with Events
Any type of application, either window based or web based, is designed and developed
to help users achieve functionality and run their businesses. Users interact with applica-
tions by using input devices such as the keyboard or the mouse to provide input to these
applications. Whatever users do using input devices gets translated into events that are
recognized and thus cause certain actions to occur. Clicking by using a mouse is the most
common task we computer users all do, and whenever we click, what should happen is
recorded in the form of an event or an action.
In this chapter, we’ll cover the following:
• Understanding events
• Properties of events
• Design of events
• Common events raised by controls
• Event generator and consumer
Understanding Events
An event can be defined as an action that a user can respond to or can be handled in the
form of code. Usually events get generated by a user action, such as clicking the mouse or
pressing a key.
Events are associated with the controls you put in Windows Forms or web forms, and
whenever you code any functionality behind a control’s behavior, for example, a click of a
mouse, then that associated event will be raised and the application will respond to that
event.
No application can be written without events.
Event-driven applications execute
code in response to events. Each form and control exposes a predefined set of events that
you can program against. If one of these events occurs and there is code in the associated
event handler, that code is invoked.
391
CHAPTER 17
9004ch17final.qxd 12/13/07 3:57 PM Page 391
Events enable a class or object to notify other classes or objects when something of
interest occurs. The entire event system works in the form of the
publisher and subscriber
model
. The class that sends or raises the event is known as the publisher, and the class
that receives (or handles) that event is known as the
subscriber.
In a typical C# Windows Forms Application or web application, you subscribe to
events raised by controls such as Buttons, ListBoxes, LinkLabels, and so forth. The Visual
Studio 2008 integrated development environment (IDE) allows you to browse the events
that a control publishes and select the ones that you want it to handle. The IDE automati-
cally adds an empty event handler method and the code to subscribe to the event.
Properties of Events
The events associated with any class or object work in some predefined manner. Here, we
describe the properties of events and the way the publisher and subscriber works to
achieve functionality.
• The publisher determines when an event is raised; the subscriber determines what
action is taken in response to the event.
• An event can have multiple subscribers. A subscriber can handle multiple events
from multiple publishers.
• Events that have no subscribers are never called.
• Events are typically used to signal user actions such as button clicks or menu selec-
tions in graphical user interfaces.
• When an event has multiple subscribers
, the event handlers are invoked synchro-
nously when an event is raised.
• Events can be used to synchronize threads.
•
I
n the .NET F
r
amewor
k class library, events are based on the
EventHandler delegate
and the
EventArgs base class
.
Design of Events
Events happen either before their associated action occurs (pre-events) or after that
action occurs (
post-events). For example, when a user clicks a button in a window, a post-
event is raised, allowing application-specific methods to execute. An event handler
delegate is bound to the method to be executed when the system raises an event. The
event handler is added to the event so that it is able to invoke its method when the event
CHAPTER 17 ■ WORKING WITH EVENTS392
9004ch17final.qxd 12/13/07 3:57 PM Page 392
is raised. Events can have event-specific data (for example, a mouse-down event can
include data about the screen cursor’s location).
The event handler signature observes the following conventions:
• The return type is Void.
• The first parameter is named
sender and is of type Object. This represents the
object that raised the event.
• The second parameter is named e and is of type EventArgs or a derived class of
EventArgs. This represents the event-specific data.
• The event takes only these two parameters.
Common Events Raised by Controls
Various controls come with Visual Studio 2008, and they are built to achieve different
functionality from one another. However, the industry has identified a few events that are
common among many controls, and most applications use only these types of controls.
Table 17-1 describes the common events among various controls.
Table 17-1. Common Events
Event Name Description
Click Usually occurs on left mouse click. This event can also occur with keyboard
input in the situation when the control is selected and the Enter key is pressed.
DoubleClick Occurs when left mouse button is clicked twice rapidly.
KeyDown Occurs when a key is pressed and a control has the focus.
KeyPress Occurs when a key is pressed and a control has the focus.
KeyUp Occurs when a key is released and a control has the focus.
MouseClick Occurs only when a control is being clicked by the mouse.
MouseDoubleClick Occurs when a control gets double-clicked by the mouse.
MouseDown Occurs when the mouse pointer is located over a control and the mouse
button is being clicked.
MouseUp Occurs when a mouse button is released over a control.
MouseEnter Occurs when the mouse pointer enters a control.
MouseHover O
ccurs when the mouse pointer is positioned o
ver a control.
MouseLeave O
ccurs when the mouse pointer r
ests on a contr
ol.
MouseMove Occurs when the mouse rotates or moves over a control.
MouseWheel Occurs when the user revolves the mouse wheel and a control has the focus.
CHAPTER 17 ■ WORKING WITH EVENTS 393
9004ch17final.qxd 12/13/07 3:57 PM Page 393
Event Generator and Consumer
Another way of thinking of an event is as a mechanism that notifies the Windows operat-
ing system or the .NET Framework that something has happened in the application, and
so the functionality takes place once it receives a response back from the .NET Frame-
work or Windows platform.
The application, which has the controls with functionality associated with them in
the form of events, is known as the
consumer, and the .NET Framework or Windows
platform, which receives the request for the event to take place, is known as the
event
generator
.
As you know, controls come with various types of events to serve particular function-
ality. The code segment known as the event handler notifies the application once an
event has occurred so the proper actions can be implemented behind that event handler.
Try It Out: Creating an Event Handler
In this exercise, you will see how to add an event handler for a control that you have on a
Windows Form.
1. Open a new Windows Forms Application project, and rename the solution and
project as Chapter17. Rename
Form1.cs to Events.cs, and also modify the Text
property of the form to Events.
2. Open the Toolbox and drag a Button control over to the form. Select the Button
control, navigate to the Properties window, and set the control’s Text property to
Click Me. Then click the lightning bolt button located on the toolbar shown in the
Properties window, and you will see the entire list of events that the Button control
supports; event handlers could be written for all these events (see Figure 17-1).
Also notice the tooltip titled “Events” under the lightning bolt button.
3. By default, the Click event comes preselected, and the text area beside the event is
blank. Double-click in this blank area, and you will see that an event handler
named
button1_Click has been created, as shown in Figure 17-2.
CHAPTER 17 ■ WORKING WITH EVENTS394
9004ch17final.qxd 12/13/07 3:57 PM Page 394
Figure 17-1. The events list in Designer mode
Figure 17-2. Event handler creation in Designer mode
4. Since the button1_Click event handler has been generated, its template will be
available in Code view. Switch to Code view of the Windows Form, named
Events.cs, to view the event handler and to prepare to write the functionality
for the
Click event (see Figure 17-3).
CHAPTER 17 ■ WORKING WITH EVENTS 395
9004ch17final.qxd 12/13/07 3:57 PM Page 395
Figure 17-3. Event handler in Code view
5. Inside the button1_Click() event handler, write the following line of code:
MessageBox.Show("I have been clicked");
6. Build and run the application, click button1, and you will see a dialog box appear
due to the event that is raised when the button is clicked.
How It Works
The most common event that a button handles, which also happens to be the default, is
the
Click event. In this example, you write code to flash a message box whenever a user
clicks the button on the form.
MessageBox.Show("I have been clicked");
Try It Out:Working with Mouse Movement Events
In this exercise, you will see the events that are associated with movements of the mouse.
To try them, follow these steps:
1. Navigate to Solution Explorer and open the Events form in Design view.
2. Drag a TextBox control onto the Windows Form just under the button1 control.
Select the TextBox control, and you will see an arrow on the top-right border of the
control; this arrow is called a
Smart Tag.
CHAPTER 17 ■ WORKING WITH EVENTS396
9004ch17final.qxd 12/13/07 3:57 PM Page 396
■Note The Smart Tag feature is available with some controls. The main purpose of this feature is to pro-
vide a generalized way for developers to specify a set of actions for a control at design time. Clicking a
component’s Smart Tag icon, shown here: allows you to select from a list of available actions offered from
the Smart Tag panel.
3. Click the Smart Tag, and a small panel will appear showing a check box for the
MultiLine property to be enabled (see Figure 17-4).
Figure 17-4. Smart Tag for the TextBox control
4. Click the MultiLine check box shown in the Smart Tag pop-up, and you will see the
height of the TextBox increase, as shown in Figure 17-5.
Figure 17-5. Setting the MultiLine property using the Smart Tag of the
TextBox control
CHAPTER 17 ■ WORKING WITH EVENTS 397
9004ch17final.qxd 12/13/07 3:57 PM Page 397
5. Now click outside the TextBox on the form itself to retain the new size the
MultiLine property has given to the TextBox by default. If you want, you can
also use the handles (the small three rectangles on each border line) to resize
the TextBox control.
■Tip The MultiLine property of a TextBox can also be set without using the Smart Tag feature. You can
directly set the MultiLine property to True, which is set to False by default.
6. Drag a Label control from the Toolbox to below the TextBox and set its AutoSize
property to False. Also, set the Label’s Font Size property to 12 and TextAlign
property to MiddleCenter. Now your Events form will look like the one shown
in Figure 17-6.
Figure 17-6. The Events Windows Form with controls
7. S
elect the
T
extB
ox, go to the Properties window, and click the Events button. In the
ev
ents list, double-click in the text ar
ea of the
MouseEnter and MouseLeave ev
ents
.
This will simply cr
eate the ev
ent handlers for these two mouse mo
v
ement ev
ents
.
8. S
witch to C
ode view and add the follo
wing code to the
MouseEnter and MouseLeave
ev
ent handlers:
private void textBox1_MouseEnter (object sender, EventArgs e)
{
label1.Text = "Mouse Enters into the TextBox";
}
CHAPTER 17 ■ WORKING WITH EVENTS398
9004ch17final.qxd 12/13/07 3:57 PM Page 398
private void textBox1_MouseLeave (object sender, EventArgs e)
{
label1.Text = "Mouse Leaves the TextBox";
}
9. Go to the Build menu and click Build Solution; you should receive a message indi-
cating a successful build.
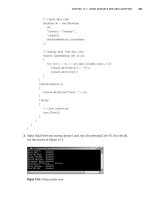
10. Press F5 to run the application. You will now see a message in the Label control
depending on the action you perform with your mouse. Move the mouse pointer
over the text box, and you’ll get the message shown in Figure 17-7.
Figure 17-7. Demonstrating the MouseEnter event
11. Now move the pointer outside of the text box, and you will see the message shown
in the Label control change (see Figure 17-8).
Figure 17-8. D
emonstrating the
MouseLeave ev
ent
CHAPTER 17 ■ WORKING WITH EVENTS 399
9004ch17final.qxd 12/13/07 3:57 PM Page 399
How It Works
The MouseEnter event will occur when you take the mouse pointer into the text box having
the focus, and this will be recognized by the
MouseEnter event handler, resulting in the
appropriate message being displayed in the Label control.
In the same way, when you move the mouse pointer away from the focus of the text
box, the
MouseLeave event gets into the action, and again the appropriate message gets
displayed in the Label control.
Try It Out:Working with the Keyboard’s KeyDown and
KeyUp Events
In this exercise, you will work with the KeyDown and KeyUp events, which are associated
with controls that can receive input from the keyboard whenever a user presses or
releases the Alt, Ctrl, or Shift keys. To try these events, follow these steps:
1. Navigate to Solution Explorer and open the Events.cs form in Design view.
2. Select the TextBox control, go to the Properties window, and click the Events but-
ton. In the events list, double-click in the text area of
KeyDown event. This will
simply create an event handler for the
KeyDown event.
3. Switch to Code view and add the following code to the KeyDown event handler:
private void textBox1_KeyDown(object sender, KeyEventArgs e)
{
if (e.Alt == true)
label1.Text="The Alt key has been pressed";
else
if (e.Control==true)
label1.Text="The Ctrl key has been pressed";
else
if (e.Shift==true)
label1.Text="The Shift key has been pressed";
}
4. Switch back to Design view again. Select the TextBox control, go to the Properties
window, and click the Events button. In the events list, double-click in the text
area of the
KeyUp event. This will simply create an event handler for the keyboard’s
KeyUp event.
CHAPTER 17 ■ WORKING WITH EVENTS400
9004ch17final.qxd 12/13/07 3:57 PM Page 400
5. Switch to Code view and add the following code to the KeyUp event handler:
p
rivate void textBox1_KeyUp(object sender, KeyEventArgs e)
{
i
f (e.Alt == false || e.Control==false || e.Shift==false)
label1.Text = "The Key has been released";
}
6. Go to the Build menu and click Build Solution; you should receive a message indi-
cating a successful build.
7. Press F5 to run the application. Move the mouse pointer over the text box, click
once, and then press and release either the Alt, Ctrl, or Shift keys; you will see a
message displayed in the Label control indicating which key you pressed.
How It Works
With the KeyDown event, you recognize which key is pressed at a particular point in time.
The conditional
if statement helps you trace which key has been pressed and will display
the message in the Label control.
if (e.Alt == true)
label1.Text="The Alt key has been pressed";
else
if (e.Control==true)
label1.Text="The Ctrl key has been pressed";
else
if (e.Shift==true)
label1.Text="The Shift key has been pressed";
The KeyUp event recognizes whenever the key that was pressed has been released,
and as a result displays the appropriate message in the Label control.
if (e.Alt == false || e.Control==false || e.Shift==false)
label1.Text = "The Key has been released";
Try It Out:Working with the Keyboard’s KeyPress Event
In this exercise, you will work with the KeyPress event. The KeyPress event gets into the
action whenever the associated control receives input in the form of a keypress; if that
key has an ASCII value, the
KeyPress event is raised. To try this event, follow these steps:
CHAPTER 17 ■ WORKING WITH EVENTS 401
9004ch17final.qxd 12/13/07 3:57 PM Page 401
1. Navigate to Solution Explorer and open the Events.cs form in Design view.
2. Select the TextBox control, go to the Properties window, and click the Events but-
ton. In the events list, double-click in the text area of the
K
eyPress
event. This will
simply create an event handler for the
K
eyPress
event.
3. Switch to Code view and add the following code to the KeyPress event handler:
private void textBox1_KeyPress(object sender, KeyPressEventArgs e)
{
if (char.IsDigit(e.KeyChar) == true)
label1.Text = "You have pressed a Numeric key";
else
if (char.IsLetter(e.KeyChar) == true)
label1.Text = "You have pressed a Letter key";
}
4. Now go to the Build menu and click Build Solution; you should receive a message
indicating a successful build.
5. Press F5 to run the application. Click inside the text box and then press a number
or letter key on the keyboard. You will see a message is displayed in the Label con-
trol indicating which type of key you pressed.
How It Works
With the KeyPress event, you recognize whether a numeric or alphabetic key has been
pressed at a par
ticular point in time. The conditional
if statement helps you tr
ace which
key has been pressed and displays the appropriate message in the Label control.
if (char.IsDigit (e.KeyChar)==true)
label1.Text = "You have pressed a Numeric key";
else
if (char.IsLetter (e.KeyChar)==true)
label1.Text = "You have pressed a Letter key";
Summary
In this chapter
, y
ou saw ho
w to handle ev
ents with r
espect to the mouse and keyboar
d.
In par
ticular
, y
ou lear
ned ho
w ev
ents ar
e handled when a mouse enters and leaves a con-
trol. Y
ou also lear
ned ho
w to tr
ap an ev
ent whenev
er an Alt, Ctrl, or S
hift key is pressed.
In the next chapter
, y
ou
’
ll look at ho
w to wor
k with text
and binar
y data.
CHAPTER 17 ■ WORKING WITH EVENTS402
9004ch17final.qxd 12/13/07 3:57 PM Page 402
Working with Text and
Binary Data
Some kinds of data have special formats, are very large, or vary greatly in size. Here,
we’ll show you techniques for working with text and binary data.
In this chapter, we’ll cover the following:
• Understanding SQL Server text and binary data types
• Storing images in a database
• Retrieving images from a database
• Working with text data
We’ll also present the T-SQL for creating tables in the tempdb database, which is
intended to hold any temporary table. We’ll start by covering what data types support
these kinds of data.
Understanding SQL Server Text and
Binary Data Types
SQL Server provides the types CHAR, NCHAR, VARCHAR, NVARCHAR, BINARY, and VARBINARY for
working with reasonably small text and binary data. You can use these with text (charac-
ter) data up to a maximum of 8000 bytes (4000 bytes for Unicode data,
NCHAR, and
NVARCHAR, which use 2 bytes per character).
For larger data, which SQL Server 2005 calls
large-value data types, you should use
the
VARCHAR(MAX), NVARCHAR(MAX), and VARBINARY(MAX) data types. VARCHAR(MAX) is for non-
Unicode text,
NVARCHAR(MAX) is for Unicode text, and VARBINARY(MAX) is for images and
other binary data.
403
CHAPTER 18
9004ch18final.qxd 12/13/07 3:56 PM Page 403
■Warning In SQL Server 2000, large data was stored using NTEXT, TEXT, and IMAGE data types.
These data types are deprecated and will likely be removed in the future. If you work with legacy appli-
cations, you should consider converting
NTEXT, TEXT, and IMAGE to NVARCHAR(MAX), VARCHAR(MAX),
and
VARBINARY(MAX), respectively. However, the System.Data.SqlDbType enumeration does not yet
include members for these data types, so we use
VARCHAR(MAX) and VARBINARY(MAX) for column data
types, but Text and Image when specifying data types for command parameters.
An alternative to using these data types is to not store the data itself in the database
but instead define a column containing a path that points to where the data is actually
stored. This can be more efficient for accessing large amounts of data, and it can save
resources on the database server by transferring the demand to a file server. It does require
mor
e complicated coordination and has the potential for database and data files to get
out of sync. We won’t use this technique in this chapter.
■Tip Since SSE databases cannot exceed 4GB, this technique may be your only alternative for very large
text and image data.
Within a C# program, binary data types map to an array of bytes (byte[]), and char-
acter data types map to strings or character arrays (
char[]).
■Note DB2, MySQL, Oracle, and the SQL standard call such data types large objects (LOBs); specifically,
they’re binary large objects (BLOBs) and character large objects (CLOBs). But, as with many database terms,
whether BLOB was originally an acronym for anything is debatable. Needless to say, it’s always implied a
data type that can handle large amounts of (amorphous) data, and SQL Server documentation uses BLOB
as a generic term for large data and data types.
Storing Images in a Database
Let
’s start by creating a database table for storing images and then loading some images
into it.
We’ll use small images but use
VARBINARY(MAX) to stor
e them. In the examples, we’ll
demonstr
ate using images in
C:\Documents and Settings\Administrator\My Documents; y
ou
can use the path of the location wher
e you have some images in your PC.
CHAPTER 18 ■ WORKING WITH TEXT AND BINARY DATA404
9004ch18final.qxd 12/13/07 3:56 PM Page 404
Try It Out: Loading Image Binary Data from Files
In this example, you’ll write a program that creates a database table and then stores
images in it.
1. Create a new Console Application project named Chapter18. When Solution
Explorer opens, save the solution.
2. Rename the Chapter18 project to LoadImages. Rename Program.cs to
LoadImages.cs, and replace its code with the code in Listing 18-1.
Listing 18-1. LoadImages.cs
using System;
using System.Data;
using System.Data.SqlClient;
using System.IO;
namespace LoadImages
{
class LoadImages
{
// you may refer to your own system's image file location
string imageFileLocation =
@" C:\Documents and Settings\Administrator\My Documents \" ;
// you may refer to your own image's file name here.
string imageFilePrefix = "painting-almirah";
// the basic idea is that the images get stored in some
// sequential numbers and so you refer to the base name
// and then you retrieve them all from the starting
// number until the image of particular number
int numberImageFiles = 1;
// we are accessing JPEG images; you may need to
// change the format based on the images you are accessing
string imageFileType = ".jpg";
int maxImageSize = 10000;
SqlConnection conn = null;
SqlCommand cmd = null;
CHAPTER 18 ■ WORKING WITH TEXT AND BINARY DATA 405
9004ch18final.qxd 12/13/07 3:56 PM Page 405
static void Main()
{
LoadImages loader = new LoadImages();
try
{
// open connection
loader.OpenConnection();
// create command
loader.CreateCommand();
// create table
loader.CreateImageTable();
// prepare insert
loader.PrepareInsertImages();
// insert images
int i;
for (i = 1; i <= loader.numberImageFiles; i++)
{
loader.ExecuteInsertImages(i);
}
}
catch (SqlException ex)
{
Console.WriteLine(ex.ToString());
}
finally
{
loader.CloseConnection();
}
}
void OpenConnection()
{
// create connection
conn = new SqlConnection(@"
server = .\sqlexpress;
integrated security = true;
database = tempdb
");
// open connection
conn.Open();
}
CHAPTER 18 ■ WORKING WITH TEXT AND BINARY DATA406
9004ch18final.qxd 12/13/07 3:56 PM Page 406
void CloseConnection()
{
// close connection
conn.Close();
Console.WriteLine("Connection Closed.");
}
void CreateCommand()
{
cmd = new SqlCommand();
cmd.Connection = conn;
}
void ExecuteCommand(string cmdText)
{
int cmdResult;
cmd.CommandText = cmdText;
Console.WriteLine("Executing command:");
Console.WriteLine(cmd.CommandText);
cmdResult = cmd.ExecuteNonQuery();
}
void CreateImageTable()
{
ExecuteCommand(@"
create table imagetable
(
imagefile nvarchar(20),
imagedata varbinary(max)
)
");
}
void PrepareInsertImages()
{
cmd.CommandText = @"
insert into imagetable
values (@imagefile, @imagedata)
";
cmd.Parameters.Add("@imagefile", SqlDbType.NVarChar, 20);
cmd.Parameters.Add("@imagedata", SqlDbType.Image, 1000000);
CHAPTER 18 ■ WORKING WITH TEXT AND BINARY DATA 407
9004ch18final.qxd 12/13/07 3:56 PM Page 407
cmd.Prepare();
}
void ExecuteInsertImages(int imageFileNumber)
{
string imageFileName = null;
byte[] imageImageData = null;
imageFileName =
imageFilePrefix + imageFileNumber.ToString() + imageFileType;
imageImageData =
LoadImageFile(imageFileName, imageFileLocation, maxImageSize);
cmd.Parameters["@imagefile"].Value = imageFileName;
cmd.Parameters["@imagedata"].Value = imageImageData;
ExecuteCommand(cmd.CommandText);
}
byte[] LoadImageFile(
string fileName,
string fileLocation,
int maxImageSize
)
{
byte[] imagebytes = null;
string fullpath = fileLocation + fileName;
Console.WriteLine("Loading File:");
Console.WriteLine(fullpath);
FileStream fs = new FileStream(fullpath, FileMode.Open,
➥
FileAccess.Read);
BinaryReader br = new BinaryReader(fs);
imagebytes = br.ReadBytes(maxImageSize);
Console.WriteLine(
"Imagebytes has length {0} bytes.",
imagebytes.GetLength(0)
);
return imagebytes;
}
}
}
CHAPTER 18 ■ WORKING WITH TEXT AND BINARY DATA408
9004ch18final.qxd 12/13/07 3:56 PM Page 408
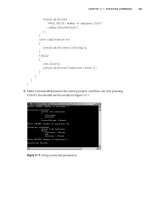
3. Run the program by pressing Ctrl+F5. You should see output similar to that in
Figure 18-1. It shows the information for loading an image we have on our PC at
the specified location, the operations performed, and the size of each of the
image.
Figure 18-1. Loading image data
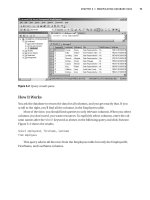
4. To see the image you have inserted into the database, open SQL Server Manage-
ment Studio Express and run a
SELECT query on the image table you have created
in the tempdb database (see Figure 18-2).
Figure 18-2. V
iewing image data
CHAPTER 18 ■ WORKING WITH TEXT AND BINARY DATA 409
9004ch18final.qxd 12/13/07 3:56 PM Page 409
How It Works
In the Main method, you do three major things. You call an instance method to create a
table to hold images.
// create table
loader.CreateImageTable();
You call an instance method to prepare a command (yes, you finally prepare a com-
mand, since you expect to run it multiple times) to insert images.
// prepare insert
loader.PrepareInsertImages();
You then loop through the image files and insert them.
// insert images
int i;
for (i = 1; i <= loader.numberImageFiles; i++)
{
loader.ExecuteInsertImages(i);
}
Note that you connect to tempdb, the temporary database that’s re-created when
SQL Ser
ver starts.
// create connection
conn = new SqlConnection(@"
server = .\sqlexpress;
integrated security = true;
database = tempdb
");
// open connection
conn.Open();
The tables in this database are temporary; that is, they’re always deleted when SQL
Server stops. This is ideal for these examples and many other situations, but don’t use
tempdb for any data that needs to persist permanently.
When you create the table, a simple one containing the image file name and the
image, you use the
VARBINARY(MAX) data type for the imagedata column.
CHAPTER 18 ■ WORKING WITH TEXT AND BINARY DATA410
9004ch18final.qxd 12/13/07 3:56 PM Page 410
void CreateImageTable()
{
ExecuteCommand(@"
create table imagetable
(
imagefile nvarchar(20),
imagedata varbinary(max)
)
");
}
But when you configure the INSERT command, you use the Image member of the
SqlDbType enumeration, since there is no member for the VARBINARY(MAX) data type. You
specify lengths for both variable-length data types, since you can’t prepare a command
unless you do.
void PrepareInsertImages()
{
cmd.CommandText = @"
insert into imagetable
values (@imagefile, @imagedata)
";
cmd.Parameters.Add("@imagefile", SqlDbType.NVarChar, 20);
// the image gets stored in the form of the Image string.
// figure 1000000 specifies the bytes for the amount to
// specify the size of the Image string.
cmd.Parameters.Add("@imagedata", SqlDbType.Image, 1000000);
cmd.Prepare();
}
The ExecuteInsertImages method accepts an integer to use as a suffix for the image
file name
, calls
LoadImageFile to get a b
yte arr
ay containing the image
, assigns the file
name and image to their corr
esponding command par
ameters
, and then executes the
command to inser
t the image
.
CHAPTER 18 ■ WORKING WITH TEXT AND BINARY DATA 411
9004ch18final.qxd 12/13/07 3:56 PM Page 411