Adobe Illustrator CS5 bible PHẦN 2 potx
Bạn đang xem bản rút gọn của tài liệu. Xem và tải ngay bản đầy đủ của tài liệu tại đây (1.36 MB, 73 trang )
Part I: Illustrator Basics
36
Understanding Pixel Preview mode
Because most Web page graphics are pixel-based, Pixel Preview mode is specifically intended for
graphics that designers want to place on Web pages. This mode lets you view images before con-
verting them to a Web graphics format. Choose View ➪ Pixel Preview, and Illustrator places a
check mark next to the Pixel Preview option and then shows a raster form of your image. Figure
2.10 shows what you would see in Pixel Preview mode. In the figure, the artwork is zoomed to
400% to more clearly show the effect of Pixel Preview mode.
Cross-Reference
For more on color and overprinting, see Chapters 7 and 18. For more on creating Web graphics, see
Chapter 19.
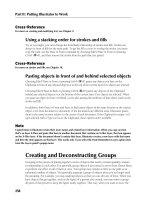
FIGURE 2.10
With Illustrator’s Pixel Preview option, you can view how the illustrator lines up to the pixel grid.
06_584750-ch02.indd 3606_584750-ch02.indd 36 6/3/10 7:42 PM6/3/10 7:42 PM
Chapter 2: Understanding Illustrator’s Desktop
37
Using and creating custom views
Illustrator has a special feature called custom views that allows you to save special views of an illus-
tration. Custom views contain view information, including magnification, location, and whether
the illustration is in Outline mode or Preview mode. If you have various layers or layer sets in
Preview mode and others in Outline mode (layers in Preview mode are indicated by regular eye-
balls to the left of their names in the Layers panel, while layers in Outline mode show an outlined
eyeball), custom views can also save that information. Custom views, however, don’t record
whether templates, rulers, page tiling, edges, or guides are shown or hidden.
If you find yourself continually going to a certain part of a document, zooming in or out, and
changing back and forth between the Preview and Outline modes, that document is a prime candi-
date for creating custom views. Custom views are helpful for showing clients artwork that you cre-
ated in Illustrator. Instead of fumbling around in the client’s presence, you can, for example, show
the detail in a logo instantly if you’ve preset the zoom factor and position and have saved the image
in a custom view.
To create a new view, set up the document in the way that you want to save the view. Then choose
View ➪ New View, and name the view in the New View dialog box. Each new view name appears
at the bottom of the View menu. No default keyboard shortcuts exist for these views, but you can
create your own shortcuts by using the Keyboard Shortcuts dialog box, available under the Edit
menu. You can create up to 25 custom views. Custom views are saved with a document as long as
you save it using the Illustrator format.
Using screen modes
So, you’ve been working on an illustration for an important client (actually, they all are important),
and the client scheduled an appointment to see your progress, but the best part of the work is hid-
den behind the panels and the Tools panel. You can turn off the panels and the Tools panel or you
can switch between the different screen modes.
Illustrator uses three screen modes represented by the three buttons at the bottom of the Tools
panel. They are Standard Screen Mode, Full Screen Mode with Menu Bar, and Full Screen Mode.
In addition to clicking the screen mode buttons in the Tools panel, you can also press F to switch
between the three modes.
Using the Edit Commands
In most programs, including Illustrator, many basic functions of the Edit menu work the same
way. If you’ve used the Edit menu in Photoshop or Microsoft Word, for example, you should have
no trouble using the same functions in Illustrator because the menu options are located in the
same place in each program, as shown in Figure 2.11.
06_584750-ch02.indd 3706_584750-ch02.indd 37 6/3/10 7:42 PM6/3/10 7:42 PM
Part I: Illustrator Basics
38
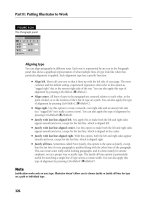
FIGURE 2.11
The various commands under the Edit menu help you to quickly cut, copy, and paste objects from place to
place as well as help you undo and redo previously applied commands.
Using the Clear command
The most simplistic Edit command is Clear. In Illustrator, it works almost exactly like Backspace
(Delete). When something is selected, choosing Clear eliminates what is selected.
You’re probably asking yourself, “If Backspace (Delete) does the same thing, why do we need
Clear?” or “Why didn’t they just call the Clear command Backspace (Delete)?” Ah, the makers of
Illustrator are a step ahead of you in this respect. Note that I said “almost” the same way; there’s a
subtle yet important difference in what the Clear command does and what Backspace (Delete)
does, due to Illustrator’s abundant use of panels.
If you’re working on a panel and have just typed a value in an editable text field, Backspace
(Delete) deletes the last character typed. If you tabbed down or up to an editable text field and
highlighted text or if you dragged across text in an editable text field and highlighted text, then
Backspace (Delete) deletes the highlighted characters. In all three situations, the Clear command
deletes anything that’s selected in the document.
06_584750-ch02.indd 3806_584750-ch02.indd 38 6/3/10 7:42 PM6/3/10 7:42 PM
Chapter 2: Understanding Illustrator’s Desktop
39
Cutting, copying, and pasting
The Cut, Copy, and Paste commands in Illustrator are very handy. Copying and cutting selected
objects places them on the Clipboard, which is a temporary holding place for objects that have
been cut or copied. After you place an object on the Clipboard, you can paste it in the center of the
same document, the same location as the cut or copied object, or another document, such as
Illustrator, InDesign, or Photoshop.
Choosing Cut from the Edit menu deletes the selected objects and copies them to the Clipboard,
where they’re stored until you cut or copy another object or until you shut down or restart your
computer. Quitting Illustrator doesn’t remove objects from the Clipboard.
Choosing Copy from the Edit menu works like Cut, but it doesn’t delete the selected objects.
Instead, it just copies them to the Clipboard, at which time you can choose Paste and slap another
copy into your document.
Choosing Paste from the Edit menu places any objects on the Clipboard into the center of the doc-
ument window. Paste is not available if nothing is on the Clipboard.
Tip
Alternatively, you can use the Paste in Front and Paste in Back options to position the object you’re pasting rel-
ative to other objects.
Now, here’s the really cool part: Just because you’ve pasted the object somewhere doesn’t mean it
isn’t on the Clipboard any more. It is! You can paste again and again — and keep on pasting until
you get bored or until your page is an indecipherable mess, whichever comes first. The most
important rule to remember about Cut, Copy, and Paste is that whatever is currently on the
Clipboard is replaced by anything that subsequently gets cut or copied to the Clipboard.
Cut, Copy, and Paste also work with text that you type in a document. Using the Type tools, you
can select type, cut or copy it, and then paste it. When you’re pasting type, it goes wherever your
blinking text cursor is located. If you have type selected (highlighted) and you choose Paste, the
type that was selected is replaced by whatever you had on the Clipboard.
You can cut or copy as much or as little of an illustration as you choose; you’re limited only by
your hard drive space (which is used only if you run out of RAM).
Tip
If you ever get a message saying you can’t cut or copy because you’re out of hard drive space, it’s time to start
deleting stuff from your hard drive — or simply get a bigger hard drive.
Thanks to the Adobe PostScript capability on the Clipboard, Illustrator can copy paths to other
Adobe software, including InDesign and Photoshop. Paths created in those packages (with the
exception of InDesign) can be pasted into Illustrator. With Photoshop, you have the option of past-
ing your Clipboard contents as rasterized pixels instead of as paths.
06_584750-ch02.indd 3906_584750-ch02.indd 39 6/3/10 7:42 PM6/3/10 7:42 PM
Part I: Illustrator Basics
40
You have the ability to drag Illustrator artwork from an Illustrator document right into a
Photoshop document. In addition, because Adobe lets you move things in both directions, you can
drag a Photoshop selection from any Photoshop document right into an Illustrator document.
Undoing and redoing
You can keep undoing in Illustrator until you run out of either computer memory or patience.
After you undo a bunch of times, you can redo by choosing Redo a bunch of times, which is found
right below Undo in the Edit menu. And guess what? You can redo everything you’ve undone. So,
if you undo 20 times, you can then immediately redo 20 times, and your art looks just like it did
before you started undoing.
Choosing Undo from the Edit menu undoes the last activity that was performed in the document.
Successive undos undo more and more activities, until the document is at the point where it was
opened or created or you’ve run out of memory.
Choosing Redo from the Edit menu redoes the last undo. You can continue to redo undos until
you’re back to the point where you started undoing or you perform another activity, at which time
you can no longer redo any previous undos. You have to undo the last thing you did and then
actually do everything again. In other words, all the steps that you undid are gone. It’s fine to use
the Undo feature to go back and check out what you did, but after you’ve used multiple undos,
don’t do anything if you want to redo back to where you started undoing from. Got that?
Summary
In this chapter, you learned the following:
l
Illustrator may seem difficult to learn at first, but with this book and a bit of dedication,
you can master it.
l
Illustrator has many keyboard shortcuts that increase productivity.
l
Adobe has kept the interface similar across its products.
l
The document window, Tools panel, panels, menus, and status bar look the same in many
Adobe applications.
l
You can view Illustrator documents at virtually any magnification level without actually
changing them.
l
Use the Hand tool to scroll around your document.
l
Illustrator’s Outline mode lets you see paths without their strokes and fills.
l
Cut, Copy, Paste, Undo, and Redo are under the Edit menu.
l
Illustrator provides virtually unlimited undos and redos.
06_584750-ch02.indd 4006_584750-ch02.indd 40 6/3/10 7:42 PM6/3/10 7:42 PM
41
CHAPTER
Working with
Illustrator Documents
IN THIS CHAPTER
Creating new documents
Changing the document setup
Opening and closing Illustrator
files
Saving files
Using the Export command
Placing art
Understanding vector-based
and pixel-based images
Placing raster images
Working with rasterized
Illustrator artwork
Using raster images
Working with document and
file information
W
hen you create an illustration in Illustrator, you’re actually creat-
ing a document that you can place on the Web, send to a printer,
or simply save on your computer. This chapter covers how to set
up and change a document, how to open and save files, and how to export
and place files. You also find out the difference between pixel-based docu-
ments and vector-based documents.
Setting Up a New Document
When you first load Illustrator, you see the Illustrator Welcome Screen, as
shown in Figure 3.1, which allows you to choose to create a new document
from scratch or from an existing Illustrator template. Alternatively, you can
choose to open an existing document so that you can do some additional
work with that document.
Note
The Illustrator Welcome Screen lists recently opened files, allowing you to
open them directly with a single click on the name of the file and also allowing
new documents to be quickly created from the list of document profiles on
the right.
If you have Illustrator already up and running without the Welcome Screen
showing, you can create a new document by choosing File ➪ New or by
pressing Ctrl+N (Ô+N). This new document now becomes the active docu-
ment. An active document means that the document is in front of any other
documents.
07_584750-ch03.indd 4107_584750-ch03.indd 41 6/3/10 7:43 PM6/3/10 7:43 PM
Part I: Illustrator Basics
42
FIGURE 3.1
Illustrator’s Welcome Screen allows you to create a new document or open an existing one.
The New Document dialog box, as shown in Figure 3.2, offers several settings you can set before
you start working on a new document:
l
Name. You can type a name for your new document.
l
New Document Profile. This is a named set of all the settings in this box. By choosing a
different named set, all the values below will update.
l
Number of Artboards. The first field lets you set how many artboards will appear initially
when you create your document. The buttons to the right of this field control how the art-
boards are positioned relative to each other.
l
Size. This allows you to choose standard preset dimensions, such as Letter or Legal, for
your document.
l
Width and Height. Instead of selecting a preset size, you can specify exact dimensions in
the Width and Height text fields.
l
Units. You can select the units you prefer to work in. Most artists choose points, but some
prefer working in picas, inches, millimeters, centimeters, or pixels.
l
Orientation. You can choose the orientation of the page. The orientation options are por-
trait (meant to be viewed vertically) and landscape (meant to be viewed horizontally).
l
Bleed. This controls the bleed settings for the document (how far outside the edges of the
defined document artwork will print).
l
Color Mode. You can choose from the CMYK and RGB color modes.
07_584750-ch03.indd 4207_584750-ch03.indd 42 6/3/10 7:43 PM6/3/10 7:43 PM
Chapter 3: Working with Illustrator Documents
43
Cross-Referenceerence
For more on CMYK and RGB, see Chapter 7.
l
Raster Effects. This is the resolution that raster-based effects (like drop shadows) will
use. Print documents should have at least 150 (although 300 is preferred), while Web-
based documents should use 72.
l
Preview Mode. You can choose to automatically preview your document in Pixel Preview
mode (showing pixels at 100% or closer) or Overprint Preview mode (showing the results
of objects set to Overprint).
l
Align New Objects to Pixel Grid. If you select this option, all objects will be automati-
cally aligned to the pixel grid, reducing jaggies and blurries.
FIGURE 3.2
Use the New Document dialog box to choose the basic settings for a new document.
The document window initially appears at Fit in Window size. In the title bar at the top of the
window, you see Untitled-1 (or another number, depending on how many new documents you
have started during this particular session of Illustrator) and the percentage zoom the document is
displayed at. As soon as you save the document, the title bar contains the name of the document.
You can’t change the way that some of the panels or presets appear when you first start Illustrator.
For example, the Selection tool is always selected in the Tools panel. Another unchangeable item
is the initial paint style with which you begin drawing: a fill of White and a stroke of 1-point
Black. The character attributes are always the same: 12-point Myriad Roman, auto leading, flush-
left alignment.
07_584750-ch03.indd 4307_584750-ch03.indd 43 6/3/10 7:43 PM6/3/10 7:43 PM
Part I: Illustrator Basics
44
Modifying the Setup of a Document
After you create a document, choose File ➪ Document Setup to display the Document Setup dialog
box (shown in Figure 3.3). Here you can change almost anything about the document structure
and how you work with that document.
At the top of this dialog box is a list box (a popup menu on the Mac) that includes sections of
options for Bleed and View, Transparency, and Type.
New Feature
Document Setup no longer contains Artboard options. Instead, you need to either click Edit Artboards in the
Document Setup dialog box or select the Artboard tool from the Tools panel.
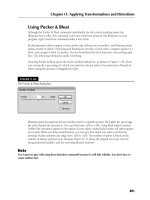
FIGURE 3.3
The Document Setup dialog box provides options for controlling your document’s settings.
Adjusting the Bleed and View Options
At the top of the Document Setup dialog box is a section called Bleed and View Options, although
it could just as easily have been called miscellaneous options we didn’t know where else to put.
This section contains the following settings:
07_584750-ch03.indd 4407_584750-ch03.indd 44 6/3/10 7:43 PM6/3/10 7:43 PM
Chapter 3: Working with Illustrator Documents
45
l
Units. This sets the unit of measurement for this document. All basic measurements that
are displayed in Illustrator use this setting for the current document.
l
Edit Artboards. This button is a little unusual. It simulates choosing the Artboard tool. It’s
most likely here for those of us who instinctively press Ctrl+Alt+N (Ô+Option+N) to change
the Artboard size and then remember that the Artboard options aren’t here anymore.
New Feature
To quickly access the Artboard tool (and thus the Control panel options to let you quickly change the page),
press Shift+O, which selects the Artboard tool and throws you instantly into Artboard mode so you can access
the Control panel.
l
Bleed. This sets the amount of outside gutter around the edge of the printed page (or
PDF) that appears. It’s useful for projects where backgrounds and artwork extend off the
edges of the page.
l
Show Images In Outline Mode. Instead of seeing the glorious detail in your placed
images, selecting this option puts a very neat late-1980s box frame in its place, as shown
in Figure 3.4.
l
Highlight Substituted Fonts. When a font isn’t available, Illustrator substitutes another
font for it. This highlights those substituted fonts.
l
Highlight Substituted Glyphs. When a glyph isn’t available, Illustrator substitutes
another character or a space for it. Selecting this option highlights those temporarily
changed characters.
FIGURE 3.4
Selecting the Show images In Outline Mode option changes placed images from their
original full-detailed glory (left) to a box frame (right).
07_584750-ch03.indd 4507_584750-ch03.indd 45 6/3/10 7:43 PM6/3/10 7:43 PM
Part I: Illustrator Basics
46
Working with Transparency options
Transparency options refer to making a transparent background screen. Many users like to use a
transparent grid to see the opacity of their objects. On a white background, the opacity isn’t easy to
see. Just as in Photoshop, you can see a checkered grid that shows the opacity of the objects in
front. The Flattener settings let you pick a resolution for the object when you change it to a raster-
ized (pixel) object when it’s flattened — that is, converted into a single layer with all overlapping
objects combined. The Transparency options are also found in the Document Setup dialog box.
l
Grid Size. This list box (popup menu) lets you can change your grid size to small,
medium, or large.
l
Grid Colors. You can customize your own grid colors.
l
Simulate Colored Paper. Selecting this check box makes the Artboard color match the
darker of the two grid colors you’ve chosen.
l
Preset. Select a preset (high, medium, or low resolution) from the Preset list box (popup
menu) or choose a Custom setting.
Changing Type Options
In the Document Setup dialog box, you can also change these Type Options:
l
Use Typographer’s Quotes. Select this option to use smart (curved) quotes rather than
the dumb (straight) ones.
l
Language. Choose a desired language from the menu. You can choose from a variety of
languages, including English, French, and Finnish, but you must have the language set up
on your system to be able to use that language.
l
Double Quotes. Choose the style from the drop-down list (popup menu). You have a variety
of quotes to choose from. Some users like the curved quotes rather than the straight ones.
l
Single Quotes. Choose the style from the drop-down list (popup menu). The choices of
single quotes are the same as the double quotes.
l
Superscript, Subscript, and Small Caps. Choose the Size and Position for Superscripts,
Subscripts, and Small Caps as a percentage of the original size.
l
Export. In this list box (popup menu), choose from Preserve Text Editability and Preserve
Text Appearance. In this case, you either choose to be able to edit the text (but it may not
look like you intended) or let the text look like it should (but make it so you can’t edit it).
Artboards
In Illustrator, the artboard defines the maximum drawing area that you can print. The artboard is
useful as a guide to where objects on a page belong. The maximum printable size is 227 × 227
inches or 358 square feet (provided that you can find a printer to print that big). You can define
any number of artboards, each can be any size, and when it comes time to print, you can print
them independently or in any combination.
07_584750-ch03.indd 4607_584750-ch03.indd 46 6/3/10 7:43 PM6/3/10 7:43 PM
Chapter 3: Working with Illustrator Documents
47
Commercial printers print colored artwork using separate plates for each of the primary colors
(typically, they use four plates). An application such as Illustrator can break down color images
into the separations that are used to create these plates. Crop marks are lines that are printed as an
aid to determining where to trim (or crop) the printed page when the document is printed on
oversized paper.
Illustrator’s separation setup ignores the artboard and places crop marks around the entire image-
able area. The imageable area is only the area where artwork exists. It may be within the artboard,
but it also may extend onto the pasteboard. When you export an illustration to another program,
such as QuarkXPress or InDesign, Illustrator uses the artboard as your default bounding box.
Choosing the artboard measurement units
You can view a document in points, picas, inches, centimeters, millimeters, or pixels. The mea-
surement units affect the numbers on the rulers and the locations of the hash marks on those same
rulers. The measurement system also changes the way measurements display in the Info panel and
in all dialog boxes where you type a measurement other than a percentage.
You change the measurement system in one of three ways:
l
Using the Preferences dialog box. Use this method if you want to use all documents that
are currently open. To do so, choose Edit (Illustrator) ➪ Preferences ➪ Units & Display
Performance.
l
Press Ctrl+Alt+Shift+U (Ô+Option+Shift+U). This cycles through all the available units
in your active document.
l
Using the Document Setup dialog box. Use this method for the currently active docu-
ment. You open this dialog box by choosing File ➪ Document Setup.
Working with the Artboards panel
Choose Window ➪ Artboards to view the Artboards panel, as shown in Figure 3.5. Double-clicking
the artboard takes you to that artboard in the document, viewing it at Fit in Window zoom level.
Double-clicking the page icon to its right opens the Artboard Options dialog box for that artboard.
FIGURE 3.5
The Artboards panel lists available artboards.
07_584750-ch03.indd 4707_584750-ch03.indd 47 6/3/10 7:43 PM6/3/10 7:43 PM
Part I: Illustrator Basics
48
Clicking the New Artboard icon creates a new artboard at the same size as the currently active one.
The up and down arrows control the artboard number, which is the order in which the artboards
are used for stacking, printing, and when exporting to PDF. Note that this number can be com-
pletely independent of the name of the artboard.
The Artboard tool
The Artboard tool allows you to change existing artboards and create new artboards. The Artboard
tool is in the lower half of the Tools panel, as shown in Figure 3.6.
FIGURE 3.6
The Artboard tool is found in the lower section of the Tools panel.
As soon as you select the Artboard tool, the screen changes, making everything outside the art-
board area darkened and putting a big dashed line around the Artboard. The Control panel also
changes, displaying the options shown in Figure 3.7.
FIGURE 3.7
Choosing the Artboard tool results in a different set of options in the Control panel.
From this view of the Control panel, you can quickly change to preset page sizes (left side) and
type specific dimensions for your existing artboard. You can also quickly add a new artboard by
clicking the New Artboard button.
But what’s great about this tool is that you can now modify an existing artboard or create new ones
with the tool. Just click and drag outside of the existing artboard to create a new artboard. Click
once on any existing artboard to select it and then grab one of its handles to modify it.
Changing the artboard size using the Control panel
Choose the size of the artboard by selecting one of the following preset sizes in the Size drop-down
list (popup menu) on the left edge of the Control panel, as shown in Figure 3.8:
07_584750-ch03.indd 4807_584750-ch03.indd 48 6/3/10 7:43 PM6/3/10 7:43 PM
Chapter 3: Working with Illustrator Documents
49
FIGURE 3.8
The crazy number of options in the Size list
l
Custom. Any size you type in the Width and Height fields of the Document Setup dialog
box automatically changes the Size drop-down (popup) to Custom.
l
Fit Artboard to Artwork bounds. Choosing this option instantly changes the size of the
artboard to the size of all the artwork in your document.
l
Fit Artboard to selected art. Choosing this option instantly changes the size of the art-
board to the size of all the artwork you currently have selected.
l
Letter. 8.5 × 11 inches
l
Legal. 8.5 × 14 inches
l
Tabloid. 11 × 17 inches
l
A4. 8.268 × 11.693 inches (21 × 29.7 centimeters)
l
A3. 11.693 × 16.535 inches (29.7 × 42 centimeters)
l
B5. 7.165 × 10 inches (18.2 × 25.4 centimeters)
l
B4. 10.118 × 14.331 inches (55.7 × 36.4 centimeters)
Note
A4, A3, B5, and B4 are paper sizes commonly used outside the United States.
l
NTSC and so on. The options in this section change the artboard to the size (in pixels) of
these video-centric choices.
07_584750-ch03.indd 4907_584750-ch03.indd 49 6/3/10 7:43 PM6/3/10 7:43 PM
Part I: Illustrator Basics
50
l
176 × 208 and so on. Makes your artboard 176 × 208 pixels or the dimension you
choose in this section.
l
VGA and so on. Makes your artboard the appropriate screen size.
Setting the artboard orientation using the Control panel
You define the orientation of your artboard by choosing one of the two Orientation pages. On the
left is Portrait orientation, and on the right is Landscape orientation:
l
Portrait orientation. You use this when the document is taller than it is wide. You can
also think of portrait orientation as the vertical view.
l
Landscape orientation. You use this when the document is wider than it is tall. You can
also think of landscape orientation as the horizontal view.
The Artboard Options dialog box
Clicking the Artboard Options button displays the Artboard Options dialog box, as shown in
Figure 3.9. This dialog box is really useful if you don’t have the Control panel displayed, but I’m
sure you do, so the Artboard Options dialog box becomes much, much less useful. In fact, the only
thing you can change here that you can’t change in the Control panel is the Fade option (in the
oddly named Global section). If you have a pre-Intel processor Mac, you might want to deselect
this option with complex documents, but otherwise, you can safely ignore these options.
FIGURE 3.9
The Artboard Options dialog box
07_584750-ch03.indd 5007_584750-ch03.indd 50 6/3/10 7:43 PM6/3/10 7:43 PM
Chapter 3: Working with Illustrator Documents
51
Opening and Closing Illustrator Files
You can open many types of files in Illustrator. To open a file, choose File ➪ Open or press Ctrl+O
(Ô+O) to display the Open dialog box. Find the file you want to open, and double-click it to open
it into a document window on the screen.
To close the active Illustrator file, choose File ➪ Close or press Ctrl+W (Ô+W). The active docu-
ment is the one that’s in front of all other documents. Closing an Illustrator document doesn’t close
Illustrator; it continues running until you choose File ➪ Exit (Illustrator ➪ Quit Illustrator).
If you saved the file prior to closing it, the file just disappears. If you’ve modified the file since the
last time you saved it, a message box appears asking whether you want to save changes before clos-
ing. If you’ve not saved the file at all, the Save As dialog box opens so that you can name the file
and choose a location for it. If you click Don’t Save (or press D while the message box is showing),
then any changes that you made to the document since you last saved it (or if you’ve never saved
it, all the changes you made since you created it) are lost. Clicking Cancel or pressing Esc takes
you back to the drawing, where you can continue to work on it.
Saving Files
Saving and backing up Illustrator documents are some of the most important Illustrator tasks you
can perform.
To save a file, choose File ➪ Save or press Ctrl+S (Ô+S). If you’ve previously saved the file, updat-
ing the existing file with the changes that you’ve made takes just a fraction of a second. If you’ve
not yet saved the file, the Save As dialog box similar to the one shown in Figure 3.10 opens.
Illustrator files are best saved as AI files (with the .ai extension) because this is the native Illustrator
format, which preserves all Illustrator-specific information.
When saving files, remember these tips and tricks:
l
Decide where to save the file. Ensure that the name of the folder where you want to save
the file is displayed above the file list window. Saving your working files in a location
other than the Illustrator folder is a good habit. Otherwise, you can have trouble figuring
out which files are yours, which files are tutorial files, and so on.
l
Name the file something distinctive. If you look for a file six months from now, you
may not recognize it. Avoid using Untitled-1, Untitled-2, and so on. Such names are non-
descriptive, and you can too easily replace the file at a later date with a file of the same
name. For the same reasons, don’t use Document 1, Document 2, and so on.
Here are your formatting choices for saving an Illustrator file:
l
Adobe Illustrator Document. For use when passing between users who have Adobe
Illustrator.
07_584750-ch03.indd 5107_584750-ch03.indd 51 6/3/10 7:43 PM6/3/10 7:43 PM
Part I: Illustrator Basics
52
l
Illustrator EPS (eps). For use when sending or passing files between users who may not
have Illustrator, but can place or open the files in another program, such as InDesign or
Photoshop.
l
Illustrator Template (ait). For use in creating templates that you can use as guides for
future drawings.
l
Adobe PDF (pdf). For use in sending the file to anyone who has or can download Adobe
Reader or Acrobat Standard or Professional.
l
SVG Compressed (svgz). For use when creating a Web page. This option generally pro-
duces smaller files than the uncompressed SVG format.
l
SVG (svg). For use when creating a Web page. SVG stands for Scalable Vector Graphics
and is an XML-based format that can produce much smaller file sizes than the typical bit-
map formats, such as JPEG and TIF.
FIGURE 3.10
The Save As dialog box allows you to save your document in several formats.
07_584750-ch03.indd 5207_584750-ch03.indd 52 6/3/10 7:43 PM6/3/10 7:43 PM
Chapter 3: Working with Illustrator Documents
53
Using the Save As command
You activate the Save As command by choosing File ➪ Save As or by pressing Ctrl+Shift+S
(Ô+Shift+S). By using this command, you can save multiple versions of the document at different
stages of progress. If you choose Save As and don’t rename the file or change the save location,
Illustrator prompts you to replace the existing file. If you choose Replace, Illustrator erases the file
that you saved before and replaces it with the new file that you’re saving.
Understanding the Save a Copy command
The Save a Copy command that you activate by choosing File ➪ Save a Copy or by pressing
Ctrl+Alt+S (Ô+Option+S) saves a copy of your document at its current state (with copy appended
to the file name) without affecting your document or its name. The next time you press Ctrl+S
(Ô+S), Illustrator saves your changes to the original, and the copy isn’t affected by any of your
changes.
You really can’t save too often. Whenever I put off saving for just a few minutes, that’s when the appli-
cation aborts or unexpectedly quits. Depending on your work habits, you may need to save more fre-
quently than other people do. Here are some golden rules about when to save:
l
Save as soon as you create a new file. Get it out of the way. The toughest part of saving is
deciding how and where you’re going to save the file and naming it. If you get those things
out of the way in the beginning, pressing Ctrl+S (Ô+S) later is fairly painless.
l
Save before you print. It’s just a good idea in case your program quits when you print.
l
Save before you switch to another application. This is another good idea in case you forget
that you still have the application running or another application forces you to restart, such as
when you’re loading new programs.
l
Save right after you do something that you never want to have to do again. For example,
you want to save after getting the kerning just right on a logo or matching all the colors in
your gradients so that they meet seamlessly.
l
Save after you use an Effect command that takes more than a few seconds to complete.
l
Save before you create a new document or go to another document.
l
Save at least every 15 minutes. This is just a good, basic rule; that way, you’re sure to have the
latest version in case of a power outage that can shut your system down immediately.
When should I save?
07_584750-ch03.indd 5307_584750-ch03.indd 53 6/3/10 7:43 PM6/3/10 7:43 PM
Part I: Illustrator Basics
54
Reverting to the last saved version
Choosing File ➪ Revert is an option that automatically closes the document and opens the last
saved version of it. This option is grayed out if you’ve not yet saved the file. When you select it, a
dialog box appears asking you to confirm that you actually do want to revert to the last saved ver-
sion of the document.
Caution
You can’t undo a Revert action, and you can’t redo anything you’ve done up to that point with the document.
Saving for Web & Devices option
Saving an Illustrator file for the Web is an easy step that ensures Illustrator properly saves your file
for Web usage. This option allows you to choose various settings, such as the amount of compres-
sion that’s applied to your document in order to reduce the file size so that your Web pages load
faster. Choose File ➪ Save for Web & Devices or press Alt+Shift+Ctrl+S (Ô+Shift+Option+S) to
access the Save for Web & Devices dialog box, as shown in Figure 3.11.
FIGURE 3.11
The Save for Web & Devices dialog box allows you to save your document in a format suited for use on
the Web.
07_584750-ch03.indd 5407_584750-ch03.indd 54 6/3/10 7:43 PM6/3/10 7:43 PM
Chapter 3: Working with Illustrator Documents
55
The tabs you see in the Save for Web & Devices dialog box are Original, Optimized, 2-Up, and
4-Up. The first tab, Original, shows the file in its original state. The second tab, Optimized, shows
the file in the optimized settings you chose at the right of the Save for Web & Devices dialog box.
The third and fourth tabs, 2-Up and 4-Up, respectively, show the figure in the original state along
with one or three of the other default options so you can decide which option best suits your needs.
Cross-Reference
For more on the Save for Web & Devices dialog box, see Chapter 19.
Understanding file types and options
You can save and export Illustrator files in several ways. Actually, you can save in and export them
to many formats by using the File ➪ Save As and File ➪ Export commands.
Saving an Illustrator file with the wrong options can dramatically affect whether you can place or
open that file in other software as well as what features Illustrator includes with the file when
Illustrator reopens it. Saving a document as an older version of Illustrator may alter the document
if the older version is missing features you used in your document.
As a rule, unless you’re going to take your Illustrator document into another program, you can
save it as an Adobe Illustrator (.ai) file without any problems. This keeps the file size down and
makes saving and opening the file much quicker.
Using Illustrator’s compatibility options
Most software packages are forward-compatible for one major version, but Illustrator is novel in
that you can open an Illustrator 1.1 file in the current version of the software, even though many
years have passed between those product versions.
If necessary, you can also export an Illustrator document to certain older Illustrator formats using
the Illustrator Options dialog box. To open this dialog box, select File ➪ Save As and then choose
Illustrator from the Save as type list box. In the options dialog box, you can choose the version of
Illustrator to save as.
The only real reason to save illustrations in older versions of Illustrator is to exchange files with
Illustrator users who haven’t upgraded from an old version. This is pretty much always a bad idea,
as saving as a legacy version may remove useful information from your Illustrator file. Within a few
months after the release of Illustrator, most users will be upgrading. If they aren’t, they probably
don’t understand the new features and usefulness of the latest version (or in the case of many
printers/service providers, they just don’t want to deal with the hassle of upgrading). Regardless of
why people aren’t upgrading, it’s going to cause compatibility issues for you, so encourage them to
upgrade as soon as possible. If they’re truly serious about using Illustrator, they need to be using
the most current version. I won’t deal with printers that aren’t on the most current version of
Illustrator because they tend to be technically incompetent when it comes to working with my files
07_584750-ch03.indd 5507_584750-ch03.indd 55 6/3/10 7:43 PM6/3/10 7:43 PM
Part I: Illustrator Basics
56
correctly, which almost always results in printer-specific errors. The following list provides infor-
mation about saving files in each version:
l
Illustrator CS4. Saves the file with all Illustrator CS4-compatible features intact.
l
Illustrator CS3. Saves the file with all Illustrator CS3-compatible features intact.
l
Illustrator CS2. Saves the file with all Illustrator CS2-compatible features intact.
l
Illustrator CS. Saves the file with all Illustrator CS-compatible features intact.
l
Illustrator 10. Saves the file with transparency, color profiles, and embedded fonts.
l
Illustrator 9. Saves the file with transparency and color profiles.
l
Illustrator 8. Saves the file in a cross-platform (Mac and Windows) Illustrator 8 format.
Illustrator 8 added support for EMF file format and drag-and-drop to Microsoft Office
products (Windows), Japanese format FreeHand files, and DXF file formats.
l
Illustrator 3. Saves the file in the Illustrator 3 format. In fact, you can use the Illustrator 3
format for lots of cheating — doing things that Illustrator normally doesn’t allow you to
do (like opening up a file in Illustrator 3, 4, 5, 5.5, 6, or 7). For example, technically, you
can’t place gradients or masks into patterns. But if you save a gradient as an Illustrator 3
file and reopen it in Illustrator 7, the gradient becomes a blend, which you can use in a
pattern (although Illustrator’s Expand feature is quicker for this sort of thing).
l
Japanese Illustrator 3. Saves the file in the Japanese Illustrator 3 format, which preserves
the Japanese type options.
Saving as Illustrator EPS
If you do have to place your Illustrator document in a non-Adobe program, such as QuarkXPress,
you may want to save the file as Illustrator EPS (Encapsulated PostScript). First, choose File ➪ Save
As to display the Save As dialog box. Then select the Illustrator EPS option in the Save As type list
box (Format popup menu), name the file, and click Save to open the EPS Options dialog box, as
shown in Figure 3.12.
The following Preview options affect the way that other software programs see Illustrator files
when you save them as Illustrator EPS files:
l
None. This option lets most software programs recognize the Illustrator document as an
EPS file, but instead of viewing it in their software, you see a box with an X in it. Usually,
this box is the same size as the illustration and includes any stray anchor points or control
handles. The file prints fine from other software.
l
TIFF (Black & White). This option saves the file with a preview for Windows systems.
Page-layout or other software programs for PCs that can import EPS files can preview
illustrations that you save with this option.
l
TIFF (8-bit Color). This option saves the file with a color preview for Windows systems.
Page-layout and other software programs display this file in 8-bit color (256 colors) when
you place it in a document. An Illustrator file that you save with a color preview takes up
more file space than a file saved with any other option.
07_584750-ch03.indd 5607_584750-ch03.indd 56 6/3/10 7:43 PM6/3/10 7:43 PM
Chapter 3: Working with Illustrator Documents
57
FIGURE 3.12
The EPS Options dialog box allows you to specify how EPS files are saved.
Note
Two additional preview options are available on a Mac. Macintosh (8-bit color) maps to a selected 256-color
panel. In Macintosh (Black & White), anything at 50% or higher intensity maps to black, while everything else
maps to white.
In addition to the Preview options, you can choose from several other options that affect how the
EPS file is saved:
l
Transparency. You can Preserve or Discard Overprints. Overprinting allows underlying
colors to appear through transparent areas of the drawing.
l
Fonts. Choose to embed the fonts with the file (although this makes the file larger) so you
don’t have to worry about font substitution if someone else doesn’t have your font or the
same version of your font.
l
Options. These let you include linked files to ensure that any necessary files are included.
Click the following check boxes to ensure you gain the best results when saving as an EPS:
07_584750-ch03.indd 5707_584750-ch03.indd 57 6/3/10 7:43 PM6/3/10 7:43 PM
Part I: Illustrator Basics
58
l
Include Document Thumbnails. Allows someone to determine the file contents with-
out opening the file.
l
Include CMYK PostScript in RGB Files. Allows for more accurate color printing.
l
Compatible Gradient and Gradient Mesh Printing. Allows older (10+ years) print-
ers to do a better job of printing gradients, but decreases the quality of gradients in
most printers.
l
Adobe PostScript®. Allows for compatibility with applications that don’t support
newer PostScript versions (you can choose from Level 2 or Level 3 here).
Note
The Mac version also provides a Use Printer’s Default Screen check box. It instructs Illustrator to use any
default screen defined in the printer’s PPD file.
Saving files as Adobe PDF
One reason for saving a file in Illustrator as PDF (Portable Document Format) is because anyone
can load Adobe Reader for free and view the file. But the better reason is that all applications you
will probably ever deal with can open, view, and place PDF files. To save your document in PDF,
first choose File ➪ Save As and select Adobe PDF in the Save As type list box (Format popup
menu). Click Save to display the Save Adobe PDF dialog box, as shown in Figure 3.13.
FIGURE 3.13
The Save Adobe PDF dialog box provides many options for controlling how PDF files are saved.
07_584750-ch03.indd 5807_584750-ch03.indd 58 6/3/10 7:44 PM6/3/10 7:44 PM
Chapter 3: Working with Illustrator Documents
59
This dialog box includes seven areas that you can use to set options. You select the settings by choos-
ing from the list on the left side of the dialog box. The following lists the areas and their options:
l
General. Under this category, you can set the Compatibility ranging from Acrobat 8/9
(PDF 1.7) to Acrobat 4 (PDF 1.3). If a user has an older version of Acrobat, you may need
to save with backward-compatibility so the user can read the file. Depending on the PDF
version you select, the following options may also be available:
l
Preserve Illustrator Editing Capabilities. Saves all Illustrator data in the PDF file so
that you can reopen and edit the PDF file in Illustrator.
l
Embed Page Thumbnails. Includes a thumbnail image that appears in the Open or
Place dialog boxes.
l
Optimize for Fast Web View. Creates a file that can be viewed more quickly in a
Web browser.
l
View PDF after Saving. Opens the document in your PDF viewing application after
it’s saved.
l
Create Acrobat Layers from Top-Level Layers. Creates layers in the PDF file (useful
for multilanguage versions of your file, for example).
l
Create Multi-page PDF from Page Tiles. Combines all pages of your document into
a multipage PDF file.
l
Compression. In this area, you can change compression settings for Color Bitmap Images,
Grayscale Bitmap Images, and Monochrome Bitmap Images. You also have a check box
that determines whether to compress text and line art. This makes for a smaller file for
e-mailing or uploading files to other users. These image types offer similar options, but
you can choose different compression settings for each of them. These options are available:
l
Downsampling. Reduces the file size by reducing the number of pixels in the image.
l
Compression type. Allows you to choose from no compression, JPEG, JPEG2000,
and ZIP compression. You may need to experiment with the various options to see
which type of compression produces optimal results for your particular document.
l
Image Quality. Allows you to choose the level of quality for JPEG and JPEG2000
image files. Lower-quality files are smaller but may not result in quite the appearance
you want.
l
Marks & Bleeds. In this area, you set the Printer’s Marks — lines printed outside the
image area that show how to trim the drawings once you get them back from the printer
or how to register the multiple color pages — Printer Mark Type, Trim Mark Weight, and
how far to offset it from the artwork. The Bleeds for the top, bottom, left, and right of the
page are set here. Bleeds are used to print images slightly oversize so that white edges
won’t appear once the images are trimmed.
l
Output. You use this category to specify how colors are converted between the RGB and
CMYK color profiles when the file is saved. RGB is typically used for on-screen display,
while CMYK is generally considered a more accurate profile for printed documents.
07_584750-ch03.indd 5907_584750-ch03.indd 59 6/3/10 7:44 PM6/3/10 7:44 PM
Part I: Illustrator Basics
60
l
Advanced. The Advanced PDF settings are Fonts and Overprint and Transparency
Flattener Options. Use these options to embed fonts for use in other applications and to
set your transparency and overprinting abilities in other applications (if you’re saving the
file in PDF version 1.3). The transparency and overprinting options control the way
underlying colors appear through transparent areas of the drawing.
l
Security. Under this area, you set whether the document requires a password for a user to
open it and whether the password restricts editing. You also set the Security Permissions and
the Acrobat Permissions (printing allowed, changes allowed, copying of text, images, or
other content and enabling text access of screen-reader devices for the visually impaired).
l
Summary. In this area, you can see all the other options that Illustrator saves with the file.
Tip
You can save all the options under the Save Adobe PDF dialog box as presets by clicking Save Preset. This
makes it easier for you to reuse the same settings in the future.
Saving files in SVG
Scalable Vector Graphics (SVG) is a vector-based image format based on XML (eXtensible Markup
Language), and it’s one of the formats supported by Illustrator. Vector-based formats often have
smaller file sizes than do bitmap image formats, so utilizing vector-based images for the Web can
offer some important advantages in keeping Web page load times to a minimum. Figure 3.14
shows the SVG Options dialog box.
To save Illustrator documents in SVG format, choose File ➪ Save As to display the Save As dialog
box. In the Save As dialog box, choose SVG from the Save As type list box (Format popup menu).
You can also choose the compressed SVG option to create an even smaller file.
FIGURE 3.14
The SVG Options dialog box allows you to create vector-based images for the Web.
07_584750-ch03.indd 6007_584750-ch03.indd 60 6/3/10 7:44 PM6/3/10 7:44 PM