wiley adobe dreamweaver cs5 bible phần 2 doc
Bạn đang xem bản rút gọn của tài liệu. Xem và tải ngay bản đầy đủ của tài liệu tại đây (3.38 MB, 135 trang )
99
Setting Your
Preferences
IN THIS CHAPTER
Dreamweaver made to order
Customizing Dynamic
HTML specs
Extending preferences outside
Dreamweaver
Specifying your code formatting
E
veryone works differently. Whether you need to conform to a corpo-
rate style sheet handed down from the powers that be or you think,
“It just looks better that way,” Dreamweaver offers you the flexibility
to shape your Web page tools and your code output. This chapter describes
the options available in Dreamweaver’s Preferences and then details how
you can instruct Dreamweaver to format source code your way.
Customizing Your Environment
The vast majority of Dreamweaver’s settings are controlled through the
Preferences dialog box. You can open Preferences by choosing Edit ➪ Pref-
erences (Dreamweaver ➪ Preferences) or by using the keyboard shortcut
Ctrl+U (Command+U). Within Preferences, you find 20 different subjects
listed on the left side of the screen. As you switch from one category to
another by selecting a name from the Category list, the options available
for that category appear in the main area of the dialog box. Most changes
to Preferences take effect immediately after you close the window by clicking
OK. This chapter covers all the options available in each category; the cat-
egories are grouped by function rather than by order of appearance in the
Category list.
100
Part I: Laying the Groundwork in Dreamweaver CS5
General preferences
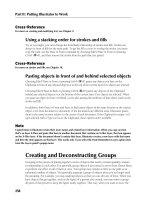
Dreamweaver’s General preferences, shown in Figure 3-1, cover the program’s appearance, user
operation, and fundamental file settings. The appearance of the program’s interface may seem to
be a trivial matter, but Dreamweaver is a program for designers and coders, to whom work envi-
ronment is extremely important. These user-operation options, described in the following sec-
tions, are based purely on how you, the user, work best.
Figure3-1
Dreamweaver’s General Preferences enable you to change your program’s appearance and certain overall
operations.
Document options
The first area of the General category, Document Options, determines how you work with HTML
and other files.
Tip
In choosing all the preferences, including the General ones, you can work in two ways. If you are a seasoned
Web designer, you probably want Dreamweaver to work in your established manner to minimize the learning
curve. If you’re just starting out as a Web-page creator, work with the default options for a while and then try
other options. You should know right away which style works for you.
n
101
Chapter 3: Setting Your Preferences
Open Documents In Tabs option
This Macintosh-only checkbox tells Dreamweaver whether you want files to open in tabs instead
of separate windows. Documents in tabs keep the workspace orderly and allow you to easily switch
between open files. If you click the additional Always Show Tabs option, Dreamweaver will dis-
play every document with a tab, even if there is only one.
Show Welcome Screen option
The welcome screen is a very helpful innovation that gets you up and running right away in
Dreamweaver — whether you’re just starting out or in the middle of editing a full site. If you’re
new to the program, Dreamweaver’s welcome screen gives you quick access to tutorials and a
tour of the key features. After you’ve worked with the program for a while, you’ll appreciate the
immediate access to the more recently opened files and one-click creation of static or dynamic
pages. The welcome screen displays when Dreamweaver launches or when no document is cur-
rently open.
The welcome screen is extremely handy, but if it doesn’t fit with your workflow, you can disable
it. Clear the Show Welcome Screen checkbox and, depending on your other settings and actions,
the next time Dreamweaver opens you see either a blank, documentless environment or your pre-
viously opened files.
The welcome screen changes from time to time because it includes a Flash movie (located in the
lower-right corner) that uses dynamically set parameters to display different information if you’re
connected to the Internet when running Dreamweaver.
Reopen Documents On Startup option
In an ideal world, a Web designer works on one page at a time, carefully crafting each and
every detail. Well, it’s far from an ideal world and often designers are working on several pages
simultaneously — and over multiple sessions. If your workflow fits into this real-world model,
the Reopen Documents On Startup option makes your life a little easier.
When I’m working on a Web application, I often have four to six pages (or more) open simulta-
neously. If I’m continuing my work from one day to the next, the first thing I do is to make sure
I’ve opened all the files that I need. With the Reopen Documents On Startup option selected,
Dreamweaver automatically opens any files left unclosed when I last quit the program. If this
option is left unselected, you see either the welcome screen or a documentless environment.
Warn When Opening Read-Only Files option
Read-only files have been locked to prevent accidental overwriting. Optionally, Dreamweaver can
warn you when such a file is opened. The warning is actually more than just an alert, however.
Dreamweaver provides an option on the warning dialog box to make the file writable (or check it
out if you’re using the Check In/Check Out feature). Alternatively, you can just view the file.
102
Part I: Laying the Groundwork in Dreamweaver CS5
Cross-Reference
See Chapter 31 for more on the Check In/Check Out feature.
n
Although Dreamweaver enables you to edit the file either way, if the document is still read-only
when you save your changes, the Save As dialog box opens, and you’re prompted to store the file
under a new name.
Enable Related Files option
With the Enable Related Files option selected, Dreamweaver displays a link to any file referenced
in the primary source document in the Related Files bar. Click any related file link to view its
source code while continuing to show the rendered main page in Display or Live view. Related
files can be CSS external files, server-side includes, Library items, JavaScript source files, or any
other type of file that is linked, included, or imported.
The associated Discover Dynamic Related Files list determines whether you want Dreamweaver to
process the server-side code in a PHP, ColdFusion, or ASP page to identify any additional related
files on demand (the default Manually option), all the time (Automatically) or never (Disabled).
Most content management systems such as WordPress, Drupal, or Joomla rely on server-side
code to combine files for needed functionality. With the Discover Dynamic Related Files option,
you can locate specific functions or styles that would otherwise remain hidden.
Cross-Reference
Chapter 5 has all the details on how to make the most of the Related Files feature.
n
Update Links option
As your site grows in complexity, keeping track of the various links is an increasingly difficult
task. Dreamweaver has several enhanced features to help you manage links, and the Update
Links When Moving Files option is one of them. Dreamweaver can check each link on a page
when a file is moved — whether it is the Web page you’re working on or one of the support files,
such as an image, that goes on the page. The Update Links option determines how Dreamweaver
reacts when it notes an altered link.
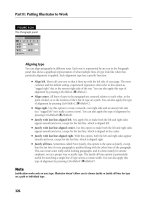
By default, the Update Links When Moving Files option is set to Prompt, which causes Dream-
weaver to alert you to any link changes and requires you to verify the code alterations by clicking
the Update button, as shown in Figure 3-2. To leave the files as they are, click the Don’t Update
button. You can elect to have Dreamweaver automatically keep your pages up-to-date by select-
ing the Always option from the Update Links drop-down list. Finally, you can select the Never
option, and Dreamweaver ignores the link changes necessary when you move, rename, or delete
a file.
As a general rule, I keep my Update Links option set to Always. It is a very rare circumstance
when I intentionally maintain a bad link on my Web page. Likewise, I recommend using the
Never option with extreme caution.
103
Chapter 3: Setting Your Preferences
Figure3-2
Dreamweaver offers to update all links when a file is moved or renamed.
Editing options
The second main section of the General category of the Preferences dialog box consists of numer-
ous checkbox options you can turn on or off. Overall, these options fall into the user-interaction
category, reflecting how you like to work. Take the Show Dialog When Inserting Objects option,
for example. Some Web creators prefer to enter all their attributes at one time through the Property
inspector and would rather not have dialog boxes appear for every inserted object. Others want
to get their file sources in immediately and modify the rest later. The choice depends on how you
want to work. The following sections describe various other options.
Show Dialog When Inserting Objects option
By default, almost all the objects that Dreamweaver inserts — via either the Insert panel or the
Insert menu — open an initial dialog box to gather needed information. In some cases, the dialog
box enables you to input a URL or browse for a source file. Turning off the Show Dialog When
Inserting Objects option causes Dreamweaver to insert a default-sized object, or a placeholder, for
the object in this circumstance. You must then enter all attributes through the Property inspector.
Tip
To selectively avoid the prompts, leave this option checked, but press Ctrl+click (Option+click) on an object
to skip the prompt.
n
Enable Double-Byte Inline Input option
Some computer representations of languages, primarily Asian languages, require more raw
descriptive power than others. The ideogram for snow, for example, is far more complex than a
four-letter word. These languages need twice the number of bytes per character and are known as
double-byte languages. In versions of Dreamweaver before 2, all double-byte characters had to go
through a separate text-input window, instead of directly into the Document window.
Dreamweaver now simplifies the page creation process for double-byte languages with the Enable
Double-Byte Inline Input option. If selected, this option enables double-byte characters to be
entered directly into the Document window. To use the old method of inserting such characters,
deselect this option.
104
Part I: Laying the Groundwork in Dreamweaver CS5
Switch To Plain Paragraph After Heading option
This may seem like a small thing, but this nifty little feature is one of my favorites. If the Switch
To Plain Paragraph After Heading option is not enabled, pressing Enter (Return) after a heading
tag (
<h1> or <h2>, for example) causes the next line to maintain the heading style. Select the
Switch To Plain Paragraph After Heading option so that the next line is a standard paragraph
(
<p>) tag.
Use this option to speed up your workflow. You’ll almost always want a heading followed by a
plain paragraph. This option gets rid of one more click of the mouse or shortcut key, making your
workflow that much faster.
Allow Multiple Consecutive Spaces option
Some designers prefer adding two spaces after every period, or they like to use multiple spaces to
indent paragraphs to maintain a print-type appearance. Without this option selected, this type of
spacing requires that you press Ctrl+Shift+Space (Command+Shift+Space) to add an
to
the document. Select the Allow Multiple Consecutive Spaces option, and Dreamweaver adds the
necessary code for you, without requiring the additional keyboard shortcut.
Tip
This option may seem wonderful at first, but I recommend leaving it unchecked. Having a single space after a
sentence is the standard online and is even becoming standard practice in most print applications. (You’ll find
no double spaces in this little tome.) Enabling this option only encourages bad habits.
n
Use <strong> And <em> In Place Of <b> And <i> option
In new HTML and XHTML standards, the <b> and <i> tags are deprecated because they don’t
imply any structural significance to the text they surround. Many screen readers may even com-
pletely ignore the
<b> and <i> tags. Check the Use <strong> And <em> In Place Of <b> And <i>
box to use the more syntactically correct
<strong> and <em> tags in their place.
The option to use
<strong> and <em> tags enables you to create more descriptive HTML code.
Individuals using screen readers benefit, and you make your code more syntactically correct, fur-
ther separating style from content.
Warn When Placing Editable Regions Within <p> Or <h1>-<h6> Tags option
Sometimes Dreamweaver adheres a bit too strictly to the rules for my taste — and this prefer-
ence addresses one of those times. In Dreamweaver templates, editable regions define areas of the
page that can be altered in the pages derived from templates. Most often, designers wrap editable
regions around block elements such as headings or paragraphs. However, there are occasions
when it is advantageous to make just the content within block tags editable and lock the sur-
rounding tags themselves. I, for example, apply this technique when I want a template-derived
page to always start with a single
<h1> heading, but know that the heading will always be differ-
ent. Dreamweaver regards this approach with suspicion because such an editable region will not
allow the user to press Enter (Return) and add more block-level tags.
105
Chapter 3: Setting Your Preferences
To prevent novices from inadvertently limiting the expansion of content within an editable
region, Dreamweaver displays an alert whenever a template is saved that has an editable region
within a block element. You can continue the save — and the subsequent updating of template-
derived pages — or you can cancel and correct the situation. In previous versions, Dreamweaver
displayed this error without recourse, even when the coding it was protesting was intentional. By
disabling the Warn When Placing Editable Regions Within <p> Or <h1>-<h6> Tags option, you
can avoid having to repeatedly dismiss the alert.
If you’re new to Dreamweaver and its template technology, I recommend that you enable this
option. Doing so will likely save you grief on your initial template-derived pages and prevent you
from having to redo the templates. However, once you’ve worked with templates for a while, I
suggest you disable this option; the technique of embedding editable regions within block tags is
a common one and not having to acknowledge the alert over and over again is a major time-saver.
Maximum Number Of History Steps option
Almost every Dreamweaver action, except the mouse click, is listed in the History panel. These
steps can be undone by moving the slider on the History panel or choosing Edit ➪ Undo. A limit
exists, however, to the number of steps that can be tracked. By default, this option is set to 50.
Although 50 history steps are more than enough for most systems, you can alter this number by
changing the Maximum Number Of History Steps value. When the maximum number of history
steps is exceeded, the oldest actions are wiped from memory and made unrecoverable. The his-
tory steps are not discarded when a file is saved.
Spelling Dictionary option
The Spelling Dictionary option enables you to select a spell-checking dictionary from any of those
installed. In addition to the standard English-language version, which has 15 options — Danish,
Dutch, English (American), English (British), English (Canadian), Finnish, French, German (Classic),
German (New Spelling), Italian, Norwegian (Bokml), Portuguese (Brazilian), Portuguese (Iberian),
Spanish, and Swedish — additional dictionaries exist online. As of this writing, dictionaries in the
following other languages are also available: German, Spanish, Swedish, French, Italian, Brazilian-
Portuguese, and Catalan. You can download these dictionaries from Adobe’s Dreamweaver
Exchange at
www.adobe.com/support/dreamweaver/documentation/dictionary.html.
After a dictionary is downloaded, save the
.dat file in the Configuration\Dictionaries folder and
restart Dreamweaver.
To select a different dictionary for spell checking, select the Dictionary option button and choose
an item from the drop-down list. Dreamweaver also maintains a personal dictionary (although
it’s not visible on the list) to hold any words you want Dreamweaver to learn during the spell-
checking process. So the next time you spell check a technical document, just click Add for each
word Dreamweaver catches that you want it to remember. That word is added to the personal
dictionary, and you never have to worry about it again.
106
Part I: Laying the Groundwork in Dreamweaver CS5
Preferences for invisible elements
By their nature, all HTML markup tags remain unseen to one degree or another when presented
for viewing through the browser. You may want to see certain elements while designing a page,
however. For example, adjusting line spacing is a common task, and turning on the visibility of
the line break tag
<br> can help you understand the layout.
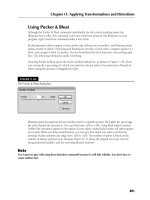
Dreamweaver enables you to control the visibility of 13 different codes, as well as dynamic data
and server-side includes — or rather their symbols, as shown in Figure 3-3. When, for example,
a named anchor is inserted, Dreamweaver shows you a small gold shield with an anchor emblem.
Not only does this shield indicate the anchor’s position, but you can also manipulate the code
with cut-and-paste or drag-and-drop techniques. Moreover, clicking a symbol opens the perti-
nent Property inspector and enables quick changes to the tag’s attributes.
Tip
Temporarily hide all invisible elements by deselecting View ➪ Visual Aids ➪ Invisible Elements.
n
The 13 items controlled through the Invisible Elements panel are as follows:
Named Anchors
L
Scripts
L
Comments
L
Line Breaks
L
Client-Side Image Maps
L
Embedded Styles
L
Hidden Form Fields
L
Form Delimiter
L
Anchor Points For AP Elements
L
Anchor Points For Aligned Elements
L
Visual Server Markup Tags (ASP, CFML, . . . )
L
Nonvisual Server Markup Tags (ASP, CFML, . . . )
L
CSS Display: None
L
Most of the Invisible Elements options display or hide small symbols in Dreamweaver’s visual
Document window. Several options, however, show an outline or another type of highlight.
Turning off Form Delimiter, for example, removes the dashed line that surrounds a form in the
Document window.
107
Chapter 3: Setting Your Preferences
Figure3-3
You can show or hide any or all of the 13 invisible elements listed in the Preferences dialog box and
determine the appearance of recordset fields and includes.
Tip
You may have noticed that the PHP, ColdFusion, Active Server Page, and .NET tags are combined into
one symbol, Server Markup tags. Dreamweaver’s capability to handle dynamic pages generated by data-
bases makes these invisible elements essential. I generally leave the Nonvisual Server Markup Tags option
unchecked because these icons flag server-side coding in the page and tend to interrupt the flow of the
design.
n
Dreamweaver-developed pages often include references to dynamic text. Dynamic text is replaced
by an entry from a recordset when the page is processed by the application server. Dreamweaver
uses what is called dot notation in programming circles to fully display these names, such as
{rsMaillist.EmailAddress}, enclosed in curly braces. When designing a page, the field
names may be longer than the actual data, and the full dot notation becomes a visual hindrance
rather than an aid. In these situations, you may want to use Dreamweaver’s alternative dynamic
text syntax, an empty pair of curly braces:
{}. Enable this option from the Show Dynamic Text
As drop-down list on the Invisible Elements panel.
108
Part I: Laying the Groundwork in Dreamweaver CS5
When designing dynamic sites you may often use server-side includes to speed development and
updates. Unfortunately, rendering these in the design window can often cause problems if you
are conditionally including multiple files. Clear the Show Contents Of Included File option to
disable rendering your server-side includes.
Highlighting preferences
Dreamweaver is extremely extensible — custom functions are automatically incorporated, server-
side markup is more acceptable, and more third-party tags are supported. Many of these features
depend on hidden capabilities that are not noticeable in the final HTML page. The Web designer,
however, must consider them. Dreamweaver employs user-selectable highlighting to mark areas
on a Web page under construction.
Mouse-Over
L
Editable Regions
L
Nested Editable Regions
L
Locked Regions
L
Library Items
L
Third-Party Tags
L
Untranslated Live Data
L
Translated Live Data
L
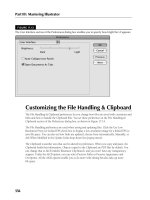
The Highlighting panel of the Preferences dialog box, shown in Figure 3-4, enables you to choose
the highlight color for eight different types of extended objects.
In each case, select the color swatch to open Dreamweaver’s color picker and choose a highlight
color. Then, use the Eyedropper to pick a color from the Web-safe palette or from the desktop.
After you’ve chosen an appropriate color, be sure to select the related Show checkbox so that the
highlighting is displayed; all but the highlighting for nested editable regions can be toggled to be
shown or hidden.
Note
You can see the Locked Region highlighted in Templates only if you open the Code view; the Display view
highlights Editable Regions only. You see the Live Data highlighting only while actually viewing your page in
Live Data mode.
n
109
Chapter 3: Setting Your Preferences
Figure3-4
Use the Highlighting preferences to control how template regions, library items, and third-party tags appear
in the Document window.
Status Bar preferences
The Status Bar is a handy collection of different tool sets: the Tag Selector, the Select tool, the
Hand tool, the Zoom tool, the Set Magnification pop-up menu, the Window Size pop-up menu,
and the Connection Speed indicator. The Status Bar category of the Preferences dialog box,
shown in Figure 3-5, controls options for two of the tools.
Window Sizes option
The Window Sizes list at the top of the Status Bar category shows the current options for the
Window Size pop-up menu. This list is completely user-editable and enables you to add new win-
dow sizes, modify existing dimensions, add descriptions, or delete rarely used measurements.
As discussed in Chapter 2, the Window Size pop-up is a Dreamweaver feature that enables you to
instantly change your screen size so that you can view and build your page under different moni-
tor conditions. To change any of the current dimensions, simply click the measurement you want
to alter and enter a new value. You can also change any description of the existing widths and
heights by clicking in the Description column and entering your text. Although you can enter as
much text as you like, it’s not practical to enter more than about 15 to 20 characters.
110
Part I: Laying the Groundwork in Dreamweaver CS5
Figure3-5
Use the Status Bar category to evaluate your real-world download times and control the size of your
Document window.
To enter a new set of dimensions in the Window Sizes list box, follow these steps:
1. From the Status Bar category of the Preferences dialog box, locate the last entry in the
current list. If the last entry is not immediately available, use the vertical scroll bar to
move to the end.
2. Click once in the Width column on the line below the last entry.
3. Enter the desired width of the new window size in pixels.
4. Press Tab to move to the Height column.
5. Enter the desired height for the new window size.
6. Press Tab again.
7. Optionally, you can enter short, descriptive text in the Description column, and then
press Tab when you’re finished.
8. To continue adding new sizes, repeat Steps 2 through 6. Click OK when you finish.
Caution
You don’t have to enter the word “pixels” or the abbreviation “px” after your values in the Width and Height
columns of the Window Sizes list box, but you can. If you enter any dimensions under 20, Dreamweaver con-
verts the measurement to its smallest possible window size, 20 pixels.
n
111
Chapter 3: Setting Your Preferences
Connection Speed option
Dreamweaver understands that not all access speeds are created equal, so the Connection Speed
option enables you to check the download time for your page (or the individual images) at a vari-
ety of rates. The Connection Speed setting evaluates the download statistics in the status bar. You
can choose from seven preset connection speeds, all in kilobits per second: 14.4, 28.8, 33.6, 56,
64, 128, and 1,500. The lower speeds (14.4 through 56) represent various dial-up modem con-
nection rates — if you are building a page for the mass market, you might still consider select-
ing 56. Use the 128 setting if your audience connects through an ISDN line. If you know that
everyone will view your page through a direct LAN connection, change the connection speed to
1,500. You are not limited to these preset settings. You can type any desired speed directly into
the Connection Speed text box. If you find yourself designing for an audience using DSL or cable
modems, change the Connection Speed to 150 or higher.
File Types / Editors preferences
Refinement is often the name of the game in Web design, and quick access to your favorite modifica-
tion tools — whether you’re modifying code, graphics, or other media — is one of Dreamweaver’s
key features. The File Types / Editors category, shown in Figure 3-6, is where you specify the pro-
gram you want Dreamweaver to call for any file type you define.
Figure3-6
Assign your favorite HTML, graphics editors, and more through the newly extended File Types / Editors
category of the Preferences dialog box.
112
Part I: Laying the Groundwork in Dreamweaver CS5
Open In Code View option
It’s not just an HTML world — many code types are commonly found on a Web designer’s palette
such as XML, XSL, PHP, and Perl. Dreamweaver’s internal code is full-featured enough to handle
a wide variety of code and, with the Open In Code View option, you can determine which types
you’d like it to handle. By default, JavaScript (
.js), text (.txt), and Active Server Application
(
.asa) files are automatically opened in Code view. Dreamweaver attempts to open any other
selected file type in Design view.
If you find yourself hand-editing other file types, such as XML files, you can add their extension
to the Open In Code View field. Separate extensions with a space, and be sure to begin each one
with a period.
External Code Editor option
Dreamweaver recognizes the importance of your choice of a text editor. Although Dreamweaver
ships with two extremely robust code editors — as well as its excellent built-in code editor —
you can opt to use any other program. To select your editor, enter the path in the External Code
Editor text box or click the Browse button to choose the appropriate executable file.
Two editors, BBEdit for Macintosh and HomeSite for Windows, are integrated with Dream-
weaver to varying degrees. Both of the editors can be called from within Dreamweaver, and both
have Dreamweaver buttons for returning to the main program — switching between the editor
and Dreamweaver automatically updates the page. Like Dreamweaver’s internal HTML editor,
BBEdit highlights the corresponding code to a selection made in Dreamweaver; this property
does not, however, extend to HomeSite. You specify and control your external editor selection
with the options listed in the sections that follow.
Enable BBEdit Integration (Macintosh only) option
Dreamweaver for Macintosh ships with this option activated. If you prefer to use another editor,
deselect this option. Clear this box to enable the External Code Editor fields.
Reload Modified Files option
The drop-down list for the Reload Modified Files setting offers three choices for working with an
external editor:
Prompt:
L
Detects when files are updated by another program and enables you to decide
whether to update them within Dreamweaver.
Always:
L
Updates the file in Dreamweaver automatically when the file is changed in an
outside program.
Never:
L
Assumes that you want to make all updates from within Dreamweaver yourself.
Personally, I prefer to have Dreamweaver always update my files. I find that it saves a couple of
mouse clicks — not to mention time.
113
Chapter 3: Setting Your Preferences
Save On Launch option
Any external HTML editor — even the integrated HomeSite or BBEdit — opens and reads a
previously saved file. So, if you make any changes in Dreamweaver’s visual editor and switch to
your editor without saving, the editor shows only the most recently saved version. You have three
options to control this function:
Prompt:
L
Determines that unsaved changes have been made and asks you to save the
file. If you do not, the external editor reverts to the last saved version.
Always:
L
Saves the file automatically before opening it in the external editor.
Never:
L
Disregards any changes made since the last save, and the external editor opens
the previously saved file.
Here, again, as with Reload Modified Files, I prefer to always save my files when switching back
and forth.
Tip
If you try to open a file that has never been saved in an external editor, Dreamweaver prompts you to save
it regardless of your preference settings. If you opt not to save the file, the external editor is not opened,
because it has no saved file to display.
n
Fireworks option
Dreamweaver enjoys a tight integration with its sister graphics program, Adobe Fireworks. To
empower Dreamweaver with Fireworks capabilities, such as Launch and Edit, Dreamweaver has
to know where Fireworks is installed. If you install Studio 8, the path to Fireworks is prefilled for
you and shown in this option. If you install Fireworks separately, you’ll need to click Browse and
locate the Fireworks executable.
Defining editors for different file types
Dreamweaver has the capability to call an editor for any specified type of file at the click of a
button. For example, when you import a graphic, you often need to modify its color, size, shape,
transparency, or another feature to make it work correctly on the Web page. Rather than start-
ing your graphics program independently, you load the image, make the changes, and resave
the image. Dreamweaver enables you to send any selected image directly to your editor. After
you’ve made your modifications and saved the file, the altered image appears automatically in
Dreamweaver.
The capability to associate different file types with external editors applies to more than just
images in Dreamweaver. You can link one or more editors to any type of media — images, audio,
video, even specific kinds of code. The defined external editor is invoked when the file is double-
clicked in the Files panel. Because the editors are assigned according to file extension, as opposed
to media type, one editor can be assigned to GIF files and another to JPEGs. The selection is com-
pletely customizable.
114
Part I: Laying the Groundwork in Dreamweaver CS5
Note
If you have the same file type both defined to Open In Code View and set up in the editor list, the file defaults
to opening in Code view.
n
When you double-click a file in the Files panel, that file type’s primary editor runs. Dreamweaver
offers the capability to define multiple editors for any file extension. You might, for instance, pre-
fer to open certain JPEGs in Fireworks and others in Photoshop. To choose an alternative editor,
right-click (Control+click) the filename in the Files panel and select the desired program from the
Open With menu option. The Open With option also enables you to browse for a program.
To assign an editor to an existing file type, follow these steps:
1. Select the file type from the Extensions list.
2. Click the Add (+) button above the Editors list. The Add External Editor dialog box opens.
3. Locate the application file of the editor and click Open when you’re ready. You can also
select a shortcut to or alias for the application.
4. If you want to select the editor as the primary editor, click Make Primary while the edi-
tor is highlighted.
To add a new file type, click the Add (+) button above the Extensions list and enter the file
extension — including the period — in the field displayed at the bottom of the list. For multiple
file extensions, separate each extension with a space, as shown here:
.doc .dot .rtf
Tip
Looking for a good, almost-all-purpose media editor? QuickTime Pro makes a great addition to Dreamweaver
as the editor for AIFF, AU, WAV, MP3, AVI, MOV, animated GIF, and other files. The Pro Player is wonder-
ful for quick edits and optimization, especially with sound files. It’s available from the Apple Web site (www.
apple.com/quicktime) for both platforms for around $30.
n
Finally, to remove an editor or a file extension, select it and click the Delete (–) button above the
corresponding list. Note that removing a file extension also removes the associated editor.
Cross-Reference
Make sure that your graphics program is adept at handling the three graphic formats used most on the Web:
GIFs, JPEGs, and PNG images. One optimal choice is Adobe Fireworks, a graphics editor designed specifically
for the Web, which integrates seamlessly with Dreamweaver. In fact, it integrates so nicely that this book
includes an entire chapter on it, Chapter 24.
n
Copy/Paste preferences
Dreamweaver has beefed up its copy-and-paste prowess when it comes to text. Now, when a
copied section of any text document — including those from Microsoft Office — is pasted into
Dreamweaver, Dreamweaver automatically converts the formatting to HTML, preserving the
115
Chapter 3: Setting Your Preferences
full range of original formatting. Moreover, you can even drag entire documents right onto the
Dreamweaver Web page — what happens next depends on the settings in the Copy/Paste prefer-
ences, shown in Figure 3-7.
With the Copy/Paste options, you can determine how text from documents outside of Dream-
weaver is added to the page. Best of all, this feature works hand-in-glove with the new Paste
Special command, which gives you the opportunity to change the settings on a case-by-case basis.
Figure3-7
The Copy/Paste settings affect any text pasted into Dreamweaver.
The four main Copy/Paste options are:
Text Only:
L
Pastes completely unformatted text; even line breaks or paragraphs are
removed.
Text With Structure:
L
Pastes unstyled text while retaining structured elements such as
lists, paragraphs, line breaks, and tables.
Text With Structure Plus Basic Formatting:
L
Adds simple formatting, such as bold,
italic, and underline, to structured text. If the text is copied from an HTML document,
the pasted text retains any HTML text style tags, including
<b>, <i>, <u>, <strong>,
<em>, <abbr>, and <acronym>.
Text With Structure Plus Full Formatting:
L
Pasted text keeps all structure and format-
ting. If the copied text retains inline CSS styles, Dreamweaver pastes them as well.
116
Part I: Laying the Groundwork in Dreamweaver CS5
Two other options are available for modifying your copy/paste preferences. The Retain Line
Breaks option maintains line breaks in pasted text; if you choose Text Only, this option is
disabled. The Clean Up Word Paragraph Spacing option works with the Text With Structure
and Text With Structure Plus Basic Formatting choices to remove additional space between
paragraphs.
New Document preferences
Dreamweaver has greatly improved the New Document interface. You can now quickly choose
which type of document you want to create, as well as select from built-in page designs and CSS.
The New Document dialog appears each time you press Ctrl+N (Command+N) or choose File ➪
New. Use the New Document preferences (shown in Figure 3-8) to refine how you interact with
the New Document dialog.
Figure3-8
Choose your default document extensions, encoding, and HTML version.
117
Chapter 3: Setting Your Preferences
Default Document option
The Default Document menu contains all the default document types in the New Document dia-
log box (File ➪ New). Choose the document type you want to be the default for quickly creating
new documents. If you design ASP applications more often than plain HTML files, just choose
ASP VBScript or ASP JavaScript from the list menu. You can also choose templates, XML files,
PHP files, and the list goes on.
Default Extension option
You can define a default extension for each document type in Dreamweaver. This means that
if your server requires all ASP files to have the
.dan extension and all your ColdFusion pages
to have the
.joe extension, you can change the extension to fit your needs. Simply enter the
desired file extension, with a leading period, in the Default Extension field.
Default Document Type option
A document type, or DTD, is a line of code found at the top of an HTML page that lets the browser
know how to render the following file. DTDs are also used to validate the page against a chosen
set of specifications.
The Default Document Type option enables you to select which DTD, if any, you’d like to include
by default. This option is originally set to XHTML 1.0 Transitional, a standard now among many
Web designers. You can choose from other XHTML and HTML selections including HTML 5.
You can always change the DTD by choosing File ➪ Convert and then selecting one of the entries
presented in the sub-list.
Encoding options
The Encoding options determine the character set in which you want your Web page to be
displayed. The Default Encoding option for the English version of Dreamweaver is initially set
to Western European. Developers of multilanguage sites may find it better to choose Unicode
(UTF-8) as the encoding option. New pages use whatever choice you make from the Default
Encoding list; however, the encoding can be altered in the Page Properties on a per-page basis.
When opening existing pages without an encoding, the selected encoding is added if the accom-
panying option (Use When Opening Existing Files That Don’t Specify An Encoding) is checked.
The Unicode Normalization Form list enables you to choose how the Unicode characters are con-
verted to binary format. The Include Unicode Signature option determines whether a byte order
mark (BOM) is attached to the file. Neither option has any effect unless the Default Encoding is
set to Unicode (UTF-8).
Show New Document Dialog Box On Control+N option
If you consistently use the same document type, clear the Show New Document Dialog Box On
Control+N (Command+N) box to prevent the New Document dialog box from coming up when
you press Ctrl+N (Command+N). This can measurably speed up creating new documents. Leave
this box checked to see the New Document dialog box every time you create a new document.
118
Part I: Laying the Groundwork in Dreamweaver CS5
Adjusting Advanced Features
Evolution of the Web and its language, HTML, never ends. New features emerge, often from lead-
ing browser developers. A developer often introduces a feature similar to those marketed by his
competitors but that works in a slightly different way. The HTML standards organization — the
World Wide Web Consortium, also known as the W3C — can then endorse one approach or
introduce an entirely new method of reaching a similar goal. Eventually, one method usually
wins the approval of the marketplace and becomes the accepted coding technique.
To permit the widest range of features, Dreamweaver enables you to designate how your code
is written to accommodate the latest Web features: accessibility options, AP elements, and style
sheets. The default preferences for these elements offer the highest degree of cross-browser and
backward compatibility. If your Web pages are intended for a more specific audience, such as a
Netscape Navigator–only intranet, Dreamweaver enables you to take advantage of a more specific
feature set. Furthermore, Dreamweaver also gives you control over its Layout mode, enabling you
to set options globally or on a site-by-site basis.
Accessibility preferences
Dreamweaver offers much improved support for accessibility options. With the passing of the
Section 508 statute (
www.usdoj.gov/crt/508/508home.html), all government agencies are
required to make their sites as accessible as possible (and making your own site accessible isn’t
such a bad idea). Dreamweaver makes that transition just a little easier for you by allowing you to
manage which accessibility options you want to enable by using the accessibility preferences, as
shown in Figure 3-9.
Show Attributes When Inserting option
Check the box next to each tag for which you want to view additional accessible options when
you insert that object into your page. If you check the box next to Form Objects, you get an
expanded dialog the next time you insert any form element, such as a text field or checkbox.
Inserting a form element with the accessibility options enabled gives you a much wider range of
options, including labels and the capability to set an access key and tab index. The same holds
true for frames, media, and images.
Keep Focus In The Panel When Opening option (Windows only)
When Dreamweaver opens a panel, such as the Files panel or CSS Styles panel, it typically
returns focus to the Document window, either in Design view or Code view. If you’re using a
screen reader, you’d then need to locate and select the opened panel to work in it. Apply the
Keep Focus In The Panel When Opening option to maintain selection in the opened panel.
119
Chapter 3: Setting Your Preferences
Figure3-9
Choose the tags where you want additional accessibility options to appear while you are coding.
Offscreen Rendering option (Windows only)
Dreamweaver uses double buffering (drawing into an off-screen bitmap before drawing to the
screen) to prevent flickering. Unfortunately, this confuses screen readers, devices that help blind
people use applications (such as Dreamweaver). If you’re using a screen reader, disable this
option.
AP Elements preferences
Aside from helping you control the underlying coding method for producing AP elements,
Dreamweaver enables you to define the default AP element. An AP element is a page element,
often a
<div> tag that is absolutely positioned. This capability is especially useful during a major
production effort in which the Web development team must produce hundreds of AP elements
spread over a Web site. Being able to specify in advance the initial size, color, background, and
visibility saves numerous steps — each of which would have to be repeated for every AP element.
Figure 3-10 shows the layout of the AP Elements category of the Preferences dialog box. The con-
trols accessible through the AP Elements category are described in the following sections.
120
Part I: Laying the Groundwork in Dreamweaver CS5
Figure3-10
In the AP Elements category of Preferences, you can predetermine the structure of the default
Dreamweaver AP element.
Visibility option
AP elements can be either visible or hidden when the Web page is first loaded. An AP element
created using the default visibility option is always displayed initially; however, no specific
information is written into the code. Selecting Visible forces Dreamweaver to include a
visibility:visible line in your AP element code. Likewise, if you select Hidden from
the Visibility options, the AP element is initially hidden.
Use the Inherit option when creating nested AP elements. Creating one AP element inside another
makes the outer AP element the parent and the inner AP element the child. If the parent AP ele-
ment is visible and the child AP element is set to
visibility:inherit, the child is also visible.
This option makes it possible to affect the visibility of many AP elements with one command —
hide the parent AP element, and all the inheriting child AP elements disappear as well.
Width and Height options
When you choose Draw AP Div from the Insert panel, you drag out the size and shape of your
AP element. Choosing Insert ➪ Layout Objects ➪ AP Div puts an AP element of a default size
121
Chapter 3: Setting Your Preferences
and shape at your current cursor position. The Width and Height options enable you to set these
defaults. Select the text boxes and type in your new values. Dreamweaver’s default is an AP ele-
ment that is 200 pixels wide and 115 pixels high.
Background Color option
AP elements can have their own background colors independent of the Web page’s overall back-
ground color (which is set as a
<body> attribute). You can define the default background color of
any inserted AP element through either the Insert menu or the Insert panel. For this preference
setting, type a color, either by its standard name or as a hexadecimal triplet, directly into the text
box. You can also click the color swatch to display the Dreamweaver browser-safe color picker.
Caution
Note that although you can specify a different background color for the AP element, you can’t alter the
AP element’s default text and link colors (except on an AP-element-by-AP-element basis) as you can with a
page. If your page and AP element background colors are highly contrasting, be sure your text and links are
readable in both environments. A similar caveat applies to the use of an AP element’s background image, as
explained in the next section.
n
Background Image option
Just as you can pick a specific background color for AP elements, you can select a different back-
ground image for AP elements. You can type a file source directly into the Background Image
text box or select your file from a dialog box by clicking the Browse button. The AP element’s
background image supersedes the AP element background color, just as it does in the HTML page.
Similarly, just as the page’s background image tiles to fill the page, so does the AP element’s back-
ground image.
Nesting option
The two best options regarding AP elements seem to be directly opposed: overlapping and
nesting AP elements. You can design AP elements to appear one on top of another, or you can
code AP elements so that they are within one another. Both techniques are valuable options,
and Dreamweaver enables you to decide which one should be the overriding method. The AP
Elements panel is capable of displaying both approaches, as shown in Figure 3-11.
If you are working primarily with nested AP elements and plan to use the inheritance facility,
check the Nest When Created Within An AP Div option. If your design entails a number of over-
lapping but independent AP elements, make sure this option is turned off. Regardless of your
preference, you can reverse it on an individual basis by pressing the Ctrl (Command) key when
drawing out your AP elements.
122
Part I: Laying the Groundwork in Dreamweaver CS5
Figure3-11
Nested AP elements are shown in the AP Elements panel as child entries and unnested ones are depicted
on the same level.
CSS Styles preferences
The CSS Styles category (see Figure 3-12) is entirely devoted to how your code is written. As
specified by the W3C, CSS declarations — the specifications of a style — can be written in
several ways. One method displays a series of items, separated by semicolons:
H1 {
font-family: Arial, Helvetica, sans-serif;
font-size: 12pt;
line-height: 14pt;
font-weight: bold;
}
Certain properties (such as Font) have their own grouping shorthand, developed to be more
readable to designers coming from a traditional print background. A second, shorthand method
of rendering the preceding declaration follows:
H1 { font: bold 12px/14px Arial, Helvetica, sans-serif; }
With the CSS Styles category, you can enable the shorthand method for any or all the five dif-
ferent properties that permit it. Select any of the checkboxes under Use Shorthand For to have
Dreamweaver write your style code in this fashion.