Beginning ASP.NET 2.0 E-Commerce in C# 2005 From Novice to Professional PHẦN 7 pps
Bạn đang xem bản rút gọn của tài liệu. Xem và tải ngay bản đầy đủ của tài liệu tại đây (2.43 MB, 70 trang )
CHAPTER 10 ■ DEALING WITH CUSTOMER ORDERS
399
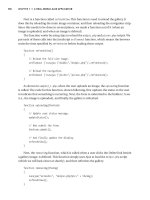
9. Switch OrdersAdmin.aspx to Source View and disable the view state for the
OrderDetailsAdmin.ascx instance. Change its name from OrderDetailsAdmin1 to
orderDetailsAdmin:
</asp:GridView>
<br />
<uc1:OrderDetailsAdmin EnableViewState="false"
id="orderDetailsAdmin" runat="server">
</uc1:OrderDetailsAdmin>
</span>
</asp:Content>
How It Works: OrderDetailsAdmin.ascx
Whew, you’ve written a lot of code for this control. The code itself isn’t complicated, but you had to deal with a lot
of user interface elements. The two important details to understand are as follows:
• You used the session to persist data about the selected order. This is read in the OrderDetailsAdmin
control to obtain the ID of the selected order.
• You used Page_PreRender instead of Page_Load, because it executed after the session gets the
chance to be updated in the parent form.
Because we talked about each method while writing the code, it should be pretty clear how the page works. Run it
now and play with the buttons to make sure everything works as it should.
Summary
We covered a lot of ground in this chapter. You implemented a system by which you can both
take orders and manually administer them.
You accomplished this in two separate stages. You added a Proceed to Checkout button
onto the shopping cart control to allow the visitor to order the products in the shopping cart.
You implemented a simple orders administration page, where the site administrator could
view and handle pending orders.
In addition, we looked at the use of validation controls and also, importantly, set the scene
for entirely automating the order system.
Because order data is now stored in the database, you can create various statistics and run
calculations based on the items sold. In the next chapter, you’ll learn how to implement a “Visitors
who bought this also bought . . .” feature, which wouldn’t have been possible without the order
data stored in the database.
Darie-Watson_4681C10.fm Page 399 Tuesday, September 20, 2005 4:52 AM
Darie-Watson_4681C10.fm Page 400 Tuesday, September 20, 2005 4:52 AM
401
■ ■ ■
CHAPTER 11
Making Product
Recommendations
One of the most important advantages of an Internet store compared to a brick-and-mortar
location is the capability to customize the web site for each visitor based on his or her prefer-
ences or based on data gathered from other visitors with similar preferences. If your web site
knows how to suggest additional products to your visitor in a clever way, he or she might end
up buying more than initially planned.
In this chapter, you’ll implement a simple but efficient product recommendations system
in your BalloonShop web store. You can implement a product recommendations system in
several ways, depending on your kind of store. Here are a few popular ones:
• Up-Selling: The strategy of offering consumers the opportunity to purchase an “upgrade”
or a little extra based on their requested purchases. Perhaps the most famous example of
up-selling—“Would you like to super-size that?”—is mentioned to customers when they
order a value meal at McDonald’s. This seemingly innocent request greatly increases the
profit margin.
• Cross-Selling: The practice of offering customers complementary products. Continuing
with the McDonald’s analogy, when customers order hamburgers, they’ll always hear
the phrase “Would you like fries with that?” because everyone knows that fries go with
burgers. Because the consumers are ordering burgers, it’s likely that they also like french
fries—the mere mention of fries is likely to generate a new sale.
• Featured products on the home page: BalloonShop permits the site administrator to
choose the products featured on the main page and on the department pages.
In this chapter, you’ll implement a dynamic recommendations system with both up-selling
and cross-selling strategies. This system has the advantage of not needing manual maintenance.
Because at this point BalloonShop retains what products were sold, you can now implement a
“customers who bought this product also bought . . .” feature.
Darie-Watson_4681C11.fm Page 401 Monday, September 19, 2005 10:02 AM
402
CHAPTER 11
■ MAKING PRODUCT RECOMMENDATIONS
Increasing Sales with Dynamic
Recommendations
In BalloonShop, you’ll implement the dynamic recommendations system in the visitor’s shopping
cart and in the product details page. After adding the new bits to your shop, the product details
page will contain the product recommendations list at the bottom of the page, as shown in
Figure 11-1.
Figure 11-1. The product details page with the dynamic recommendations system implemented
The shopping cart page gets a similar addition, as shown in Figure 11-2.
Darie-Watson_4681C11.fm Page 402 Monday, September 19, 2005 10:02 AM
CHAPTER 11 ■ MAKING PRODUCT RECOMMENDATIONS
403
Figure 11-2. The product details page with the dynamic recommendations system implemented
Implementing the Data Tier
Before writing any code, you first need to understand the logic you’ll implement for making
product recommendations. We’ll focus here on the logic of recommending products that were
ordered together with another specific product. Afterward, the recommendations for the shop-
ping cart page will function in a similar way, but will take more products into consideration.
So you need to find out what other products were bought by customers who also bought
the product for which you’re calculating the recommendations (in other words, determine
“customers who bought this product also bought . . .” information). Let’s develop the SQL logic
to achieve the list of product recommendations step by step.
Darie-Watson_4681C11.fm Page 403 Monday, September 19, 2005 10:02 AM
404
CHAPTER 11
■ MAKING PRODUCT RECOMMENDATIONS
■Tip Because SQL is very powerful, you can actually implement the exact same functionality in several
ways. We’ll cover here one of the options, but when implementing the actual stored procedures, you’ll be
shown other options as well.
To find what other products were ordered together with a specific product, you need to
join two instances of the OrderDetail table on their OrderID fields. Feel free to review the
“Joining Data Tables” section in Chapter 4 for a quick refresher about table joins. Joining
multiple instances of a single table is just like joining different data tables that contain the
same data.
You join two instances of OrderDetail—called od1 and od2—on their OrderID fields, while
filtering the ProductID value in od1 for the ID of the product you’re looking for. This way, in the
od2 side of the relationship you’ll get all the products that were ordered in the orders that contain
the product you’re looking for.
The SQL code that gets all the products that were ordered together with the product iden-
tified by a ProductID of 4 is
SELECT od2.ProductID
FROM OrderDetail od1 JOIN OrderDetail od2 ON od1.OrderID = od2.OrderID
WHERE od1.ProductID = 4
This code returns a long list of products, which includes the product with the ProductID of
4, such as this one:
ProductID
1
4
7
10
14
18
22
26
30
1
4
7
10
14
18
4
14
18
22
26
30
Darie-Watson_4681C11.fm Page 404 Monday, September 19, 2005 10:02 AM
CHAPTER 11 ■ MAKING PRODUCT RECOMMENDATIONS
405
Starting from this list of results, you need to get the products that are most frequently
bought along with this product. The first problem with this list of products is that it includes
the product with the ProductID of 4. To eliminate it from the list (because, of course, you can’t
put it in the recommendations list), you simply add one more rule to the WHERE clause:
SELECT od2.ProductID
FROM OrderDetail od1
JOIN OrderDetail od2 ON od1.OrderID = od2.OrderID
WHERE od1.ProductID = 4 and od2.ProductID != 4
Not surprisingly, you get a list of products that is similar to the previous one, except it
doesn’t contain the product with a ProductID of 4 anymore:
ProductID
1
7
10
14
18
22
26
30
1
7
10
14
18
14
18
22
26
30
Now the list of returned products is shorter, but it contains multiple entries for the products
that were ordered more than once in the orders that contain the product identifier 4. To get the
most relevant recommendations, you need to see which products appear more frequently in this
list. You do this by grouping the results of the previous query by ProductID and sorting in
descending order by how many times each product appears in the list (this number is given by
the Rank calculated column in the following code snippet):
SELECT od2.ProductID, COUNT(od2.ProductID) AS Rank
FROM OrderDetail od1
JOIN OrderDetail od2 ON od1.OrderID = od2.OrderID
WHERE od1.ProductID = 4 AND od2.ProductID != 4
GROUP BY od2.ProductID
ORDER BY Rank DESC
This query now returns a list such as the following:
Darie-Watson_4681C11.fm Page 405 Monday, September 19, 2005 10:02 AM
8213592a117456a340854d18cee57603
406
CHAPTER 11
■ MAKING PRODUCT RECOMMENDATIONS
ProductID rank
14 3
18 3
22 2
26 2
30 2
1 2
7 2
10 2
If you don’t need the rank to be returned, you can rewrite this query by using the COUNT
aggregate function directly in the ORDER BY clause. You can also use the TOP keyword to specify
how many records you’re interested in. If you want the top five products of the list, this query
does the trick:
SELECT TOP 5 od2.ProductID
FROM OrderDetail od1
JOIN OrderDetail od2 ON od1.OrderID = od2.OrderID
WHERE od1.ProductID = 4 AND od2.ProductID != 4
GROUP BY od2.ProductID
ORDER BY COUNT(od2.ProductID) DESC
The results of this query are
ProductID
18
14
22
10
7
Because this list of numbers doesn’t make much sense to a human eye, you’ll also want to
know the name and the description of the recommended products. The following query does
exactly this by querying the Product table for the IDs returned by the previous query (the
description isn’t requested because of space reasons):
SELECT ProductID, Name
FROM Product
WHERE ProductID IN
(
SELECT TOP 5 od2.ProductID
FROM OrderDetail od1
JOIN OrderDetail od2 ON od1.OrderID = od2.OrderID
WHERE od1.ProductID = 4 AND od2.ProductID != 4
GROUP BY od2.ProductID
ORDER BY COUNT(od2.ProductID) DESC
)
Darie-Watson_4681C11.fm Page 406 Monday, September 19, 2005 10:02 AM
CHAPTER 11 ■ MAKING PRODUCT RECOMMENDATIONS
407
Based on the data from the previous fictional results, this query returns something like this:
ProductID Name
18 Love Cascade Hearts
14 Love Rose
22 I'm Younger Than You
10 I Can't Get Enough of You
7 Smiley Kiss Red Balloon
Alternatively, you might want to calculate the product recommendations only using data
from the orders that happened in the last n days. For this, you need an additional join with the
orders table, which contains the date_created field. The following query calculates product
recommendations based on orders placed in the past 30 days:
SELECT ProductID, Name
FROM Product
WHERE ProductID IN
(
SELECT TOP 5 od2.ProductID
FROM OrderDetail od1
JOIN OrderDetail od2 ON od1.OrderID = od2.OrderID
JOIN Orders ON od1.OrderID = Orders.OrderID
WHERE od1.ProductID = 4 AND od2.ProductID != 4
AND DATEDIFF(dd, Orders.DateCreated,GETDATE()) < 30
GROUP BY od2.ProductID
ORDER BY COUNT(od2.ProductID) DESC
)
We won’t use this trick in BalloonShop, but it’s worth keeping in mind as a possibility.
Adding Product Recommendations
Make sure you understand the data tier logic explained earlier, as you’ll implement it in the
GetProductRecommendations stored procedure. The only significant difference from the queries
shown earlier is that you’ll also ask for the product description, which will be truncated at a
specified number of characters.
The GetProductRecommendations stored procedure is called when displaying Product.aspx to
show what products were ordered together with the selected product. Add this stored procedure to
the BalloonShop database:
CREATE PROCEDURE GetProductRecommendations
(@ProductID INT,
@DescriptionLength INT)
AS
SELECT ProductID,
Name,
SUBSTRING(Description, 1, @DescriptionLength) + ' ' AS Description
FROM Product
Darie-Watson_4681C11.fm Page 407 Monday, September 19, 2005 10:02 AM
408
CHAPTER 11
■ MAKING PRODUCT RECOMMENDATIONS
WHERE ProductID IN
(
SELECT TOP 5 od2.ProductID
FROM OrderDetail od1
JOIN OrderDetail od2 ON od1.OrderID = od2.OrderID
WHERE od1.ProductID = @ProductID AND od2.ProductID != @ProductID
GROUP BY od2.ProductID
ORDER BY COUNT(od2.ProductID) DESC
)
An Alternate Solution Using SubQueries
Because SQL is so versatile, GetProductRecommendations can be written in a variety of ways. In
our case, one popular alternative to using table joins is using subqueries. Here’s a version of
GetProductRecommendations that uses subqueries instead of joins. The commented code is self-
explanatory:
CREATE PROCEDURE GetProductRecommendations2
(@ProductID INT,
@DescriptionLength INT)
AS
Returns the product recommendations
SELECT ProductID,
Name,
SUBSTRING(Description, 1, @DescriptionLength) + ' ' AS Description
FROM Product
WHERE ProductID IN
(
Returns the products that were ordered together with @ProductID
SELECT TOP 5 ProductID
FROM OrderDetail
WHERE OrderID IN
(
Returns the orders that contain @ProductID
SELECT DISTINCT OrderID
FROM OrderDetail
WHERE ProductID = @ProductID
)
Must not include products that already exist in the visitor's cart
AND ProductID <> @ProductID
Group the ProductID so we can calculate the rank
GROUP BY ProductID
Order descending by rank
ORDER BY COUNT(ProductID) DESC
)
Darie-Watson_4681C11.fm Page 408 Monday, September 19, 2005 10:02 AM
CHAPTER 11 ■ MAKING PRODUCT RECOMMENDATIONS
409
Adding Shopping Cart Recommendations
The logic for showing shopping cart recommendations is very similar to what you did earlier,
except now you need to take into account all products that exist in the shopping cart, instead
of a single product. Add the following procedure to your BalloonShop database:
CREATE PROCEDURE GetShoppingCartRecommendations
(@CartID CHAR(36),
@DescriptionLength INT)
AS
Returns the product recommendations
SELECT ProductID,
Name,
SUBSTRING(Description, 1, @DescriptionLength) + ' ' AS Description
FROM Product
WHERE ProductID IN
(
Returns the products that exist in a list of orders
SELECT TOP 5 od1.ProductID AS Rank
FROM OrderDetail od1
JOIN OrderDetail od2
ON od1.OrderID=od2.OrderID
JOIN ShoppingCart sp
ON od2.ProductID = sp.ProductID
WHERE sp.CartID = @CartID
Must not include products that already exist in the visitor's cart
AND od1.ProductID NOT IN
(
Returns the products in the specified shopping cart
SELECT ProductID
FROM ShoppingCart
WHERE CartID = @CartID
)
Group the ProductID so we can calculate the rank
GROUP BY od1.ProductID
Order descending by rank
ORDER BY COUNT(od1.ProductID) DESC
)
The alternate version of this procedure, which uses subqueries instead of table joins, looks
like this:
CREATE PROCEDURE GetShoppingCartRecommendations2
(@CartID CHAR(36),
@DescriptionLength INT)
AS
Darie-Watson_4681C11.fm Page 409 Monday, September 19, 2005 10:02 AM
410
CHAPTER 11
■ MAKING PRODUCT RECOMMENDATIONS
Returns the product recommendations
SELECT ProductID,
Name,
SUBSTRING(Description, 1, @DescriptionLength) + ' ' AS Description
FROM Product
WHERE ProductID IN
(
Returns the products that exist in a list of orders
SELECT TOP 5 ProductID
FROM OrderDetail
WHERE OrderID IN
(
Returns the orders that contain certain products
SELECT DISTINCT OrderID
FROM OrderDetail
WHERE ProductID IN
(
Returns the products in the specified shopping cart
SELECT ProductID
FROM ShoppingCart
WHERE CartID = @CartID
)
)
Must not include products that already exist in the visitor's cart
AND ProductID NOT IN
(
Returns the products in the specified shopping cart
SELECT ProductID
FROM ShoppingCart
WHERE CartID = @CartID
)
Group the ProductID so we can calculate the rank
GROUP BY ProductID
Order descending by rank
ORDER BY COUNT(ProductID) DESC
)
Implementing the Business Tier
The business tier of the product recommendations system consists of two methods named
GetRecommendations. One of them is located in the CatalogAccess class and retrieves recom-
mendations for a product details page, and the other one is located in the ShoppingCartAccess
class and retrieves recommendations to be displayed in the visitor’s shopping cart.
Add this GetRecommendations method to your CatalogAccess class:
Darie-Watson_4681C11.fm Page 410 Monday, September 19, 2005 10:02 AM
CHAPTER 11 ■ MAKING PRODUCT RECOMMENDATIONS
411
// gets product recommendations
public static DataTable GetRecommendations(string productId)
{
// get a configured DbCommand object
DbCommand comm = GenericDataAccess.CreateCommand();
// set the stored procedure name
comm.CommandText = "GetProductRecommendations";
// create a new parameter
DbParameter param = comm.CreateParameter();
param.ParameterName = "@ProductID";
param.Value = productId;
param.DbType = DbType.Int32;
comm.Parameters.Add(param);
// create a new parameter
param = comm.CreateParameter();
param.ParameterName = "@DescriptionLength";
param.Value = BalloonShopConfiguration.ProductDescriptionLength;
param.DbType = DbType.Int32;
comm.Parameters.Add(param);
// execute the stored procedure
return GenericDataAccess.ExecuteSelectCommand(comm);
}
Add this version of the GetRecommendations method to your ShoppingCartAccess class:
// gets product recommendations for the shopping cart
public static DataTable GetRecommendations()
{
// get a configured DbCommand object
DbCommand comm = GenericDataAccess.CreateCommand();
// set the stored procedure name
comm.CommandText = "GetShoppingCartRecommendations";
// create a new parameter
DbParameter param = comm.CreateParameter();
param.ParameterName = "@CartID";
param.Value = shoppingCartId;
param.DbType = DbType.String;
param.Size = 36;
comm.Parameters.Add(param);
// create a new parameter
param = comm.CreateParameter();
param.ParameterName = "@DescriptionLength";
param.Value = BalloonShopConfiguration.ProductDescriptionLength;
param.DbType = DbType.Int32;
comm.Parameters.Add(param);
// execute the stored procedure
return GenericDataAccess.ExecuteSelectCommand(comm);
}
Darie-Watson_4681C11.fm Page 411 Monday, September 19, 2005 10:02 AM
412
CHAPTER 11
■ MAKING PRODUCT RECOMMENDATIONS
Implementing the Presentation Tier
Creating the user interface for product recommendations implies three major steps:
• Creating a new Web User Control that displays the product recommendations. This new
control will be named ProductRecommendations.ascx.
•Adding ProductRecommendations.ascx to Product.aspx, where it must display the
“customers who bought this product also bought:” list.
•Adding ProductRecommendations.ascx to ShoppingCart.aspx, where it displays the
“customers who bought these products also bought:” list.
Let’s do these steps in the following exercise.
Exercise: Creating the User Interface
1. Add the following styles to BalloonShop.css:
.RecommendationHead
{
color: Black;
font-family: Verdana, Helvetica, sans-serif;
font-weight: bold;
font-size: 10px;
}
.RecommendationText
{
color: Black;
font-family: Verdana, Helvetica, sans-serif;
font-size: 10px;
}
.RecommendationLink
{
color: Black;
font-family: Verdana, Helvetica, sans-serif;
text-decoration: underline;
font-size: 10px;
}
a.RecommendationLink:hover
{
color: Red;
}
2. Add a new Web User Control named ProductRecommendations.ascx to your UserControls folder.
Darie-Watson_4681C11.fm Page 412 Monday, September 19, 2005 10:02 AM
8213592a117456a340854d18cee57603
CHAPTER 11 ■ MAKING PRODUCT RECOMMENDATIONS
413
3. Write this code in the Source View window of the control, representing a DataList showing the
product recommendations list:
<asp:Label ID="recommendationsHeader" runat="server"
CssClass="RecommendationHead" />
<asp:DataList ID="list" runat="server">
<ItemTemplate>
<table cellpadding="0" cellspacing="0">
<tr>
<td width="170px">
<a class="RecommendationLink"
href='Product.aspx?ProductID=<%# Eval("ProductID") %>'>
<%# Eval("Name") %>
</a>
</td>
<td class="RecommendationText" valign="top">
<%# Eval("Description") %>
</td>
</tr>
</table>
</ItemTemplate>
</asp:DataList>
4. Switch to the code-behind file, change Page_Load to Page_PreRender, and complete its code like this:
protected void Page_PreRender(object sender, EventArgs e)
{
// Get the currently loaded page
string currentLocation = Request.AppRelativeCurrentExecutionFilePath;
// If we're in Product.aspx
if (currentLocation == "~/Product.aspx")
{
// get the product ID
string productId = Request.QueryString["ProductID"];
// get product recommendations
DataTable table;
// display recommendations
table = CatalogAccess.GetRecommendations(productId);
list.DataSource = table;
list.DataBind();
// display header
if (table.Rows.Count > 0)
recommendationsHeader.Text =
"Customers who bought this product also bought:";
else
recommendationsHeader.Text = "";
}
Darie-Watson_4681C11.fm Page 413 Monday, September 19, 2005 10:02 AM
414
CHAPTER 11
■ MAKING PRODUCT RECOMMENDATIONS
// If we're in ShoppingCart.aspx
else if (currentLocation == "~/ShoppingCart.aspx")
{
// get product recommendations
DataTable table;
// display recommendations
table = ShoppingCartAccess.GetRecommendations();
list.DataSource = table;
list.DataBind();
// display header
if (table.Rows.Count > 0)
recommendationsHeader.Text =
"Customers who bought these products also bought:";
else
recommendationsHeader.Text = "";
}
}
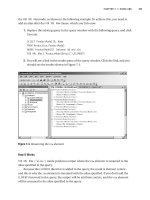
5. Open Product.aspx in Design View and drag ProductRecommendations.ascx from the Solution
Explorer to the bottom of the form. Your new form will look like Figure 11-3.
Figure 11-3. Product.aspx in Design View
6. Now do the same for ShoppingCart.aspx. Open ShoppingCart.aspx in Design View and drag
ProductRecommendations.ascx from the Solution Explorer to the bottom of the form, as shown in
Figure 11-4.
Darie-Watson_4681C11.fm Page 414 Monday, September 19, 2005 10:02 AM
CHAPTER 11 ■ MAKING PRODUCT RECOMMENDATIONS
415
Figure 11-4. Product.aspx in Design View
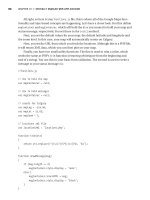
7. Test your web site now to ensure that the new functionality works as expected. The results should
resemble the screenshots presented at the beginning of this chapter.
How It Works: Showing Product Recommendations
The most complex part of this new functionality is creating the database stored procedures. In this exercise, you just
needed to display the calculated products inside the Product.aspx and ShoppingCart.aspx Web Forms. The
Page_PreRender event handler is used instead of Page_Load to ensure that the recommendations list is properly
updated after the shopping cart changes, in case the visitor deletes products from the cart.
Summary
In this short chapter, you added a new and interesting functionality to the BalloonShop web
site. With product recommendations, you have more chances to convince visitors to buy
products from the BalloonShop web site.
In the next chapter, you’ll enter the third stage of development by adding customer
accounts functionality.
Darie-Watson_4681C11.fm Page 415 Monday, September 19, 2005 10:02 AM
Darie-Watson_4681C11.fm Page 416 Monday, September 19, 2005 10:02 AM
417
■ ■ ■
CHAPTER 12
Adding Customer Accounts
So far in this book, you’ve built a basic (but functional) site and hooked it into PayPal for
taking payments and confirming orders. In this last section of the book, you’ll take things a
little further. By cutting out PayPal from the ordering process, you can gain better control and
reduce overheads. This isn’t as complicated as you might think, but you must be careful to do
things right.
This chapter lays the groundwork for this task by implementing a customer account system.
To make e-commerce sites more user-friendly, details such as credit card numbers are
stored in a database so that visitors don’t have to retype this information each time they place
an order. The customer account system you’ll implement will do this and will include all the
web pages required for entering such details.
As well as implementing these web pages, you’ll need to take several other factors into
account. First, simply placing credit card numbers, expiry dates, and so on into a database in
plain text isn’t ideal. This method might expose this data to unscrupulous people with access
to the database. This could occur remotely or be perpetrated by individuals within your client’s
organization. Rather than enforcing a prohibitively restrictive access policy to such data, it’s
much easier to encrypt sensitive information and retrieve it programmatically when required.
You’ll create a security library to make this easier.
Secondly, secure communications are important because you’ll be capturing sensitive
information such as credit card details via the Web. You can’t just put a form up for people to
access via HTTP and allow them to send it to you because the data could be intercepted. You’ll
learn how to use SSL over HTTPS connections to solve this problem.
You’ll be taking the BalloonShop application to the point where you can move on and
implement your own backend order pipeline in the next chapters.
Handling Customer Accounts
You can handle customer account functionality in web sites in many ways. In general, however,
they share the following features:
• Customers log in via a login page or dialog box to get access to secured areas of the web site.
• Once logged in, the Web Application remembers the customer until the customer logs
out (either manually via a Log Out button or automatically if the session times out or a
server error occurs).
Darie-Watson_4681C12.fm Page 417 Monday, September 12, 2005 6:50 AM
418
CHAPTER 12
■ ADDING CUSTOMER ACCOUNTS
• All secure pages in a Web Application need to check whether a customer is logged in
before allowing access.
First, let’s look at the general implementation details for the BalloonShop e-commerce site.
Creating a BalloonShop Customer
Account Scheme
Actually, you’ve already done a lot of the work here—back in Chapter 9, you implemented a
system whereby site administrators can log in and, among other things, edit products in the
catalog. You did this using forms authentication, and you created a login page, Login.aspx, to
allow users in an Administrators role to log in. The current login status, that is, whether a user
is logged in, is shown using a user control you created, Login.ascx.
In this chapter, you’ll take things a little further by extending the system for use with
customers. You must make several changes to enable this, but the starting point is to include
a new role, in addition to Administrators, which we’ll call (surprisingly enough) Customers.
Customers will then log in using the same login page as administrators, but because they are in
a different role, the similarity ends there. They will not, for example, have access to the administra-
tion tools that administrators can use. They will, however, have access to a customer details
page, where they can view and edit address, contact, and credit card details prior to placing an
order. Another major addition is that of a registration page, where new customers can sign up
on the site.
As you can see, the amount of user data you need to store has increased now that you’re
catering to customers, with address data and so on needing somewhere to live. Luckily, ASP.NET
introduces the concept of user profiles, a flexible storage system that fits this need perfectly,
with minimal effort. Later in the chapter, you’ll see how user profiles can be quickly configured
using the web.config file and how you can hook into this information from your code.
Of course, there are alternatives to using the forms authentication system. You could use
Microsoft Passport authentication—although many people prefer not to because it ties accounts
into a proprietary system and can be time consuming and tricky to set up correctly. You could
also use Windows Authentication, where user accounts are associated with Windows accounts
stored on the hosting server or in the domain of the hosting server. This solution is great for
intranet sites, where users already have domain accounts, but is difficult to set up and maintain
for Internet sites, and is usually avoided in such cases. Alternatively, you could implement your
own custom system, which gives you the most flexibility at the cost of increased development time.
One important thing you’d have to do in a custom system, as mentioned in Chapter 9, is to
secure user passwords. It isn’t a good idea to store user passwords in your database in plain
text, because this information is a potential target for attack. Instead, you should store what is
known as the hash of the password. A hash is a unique string that represents the password, but
cannot be converted back into the password itself. To validate the password entered by the
user, you simply need to generate a hash for the password entered and compare it with the
hash stored in your database. If the hashes match, the passwords entered match as well, so you
can be sure that the customer is not an imposter. The ASP.NET forms authentication system
you’ll use in this chapter handles this side of things for you, and ensures that user passwords
are stored securely (and in a case-sensitive way, providing enhanced security). However, it’s
Darie-Watson_4681C12.fm Page 418 Monday, September 12, 2005 6:50 AM
CHAPTER 12 ■ ADDING CUSTOMER ACCOUNTS
419
still worth looking at as a general technique, and so the security library you’ll create shortly
includes hashing capabilities.
Hashing is a one-way system, but to store credit card details securely, you’ll need to use a
more advanced, bidirectional form of encryption. This enables you to store credit card details
securely, but get access to them when you need to; that is, when the customer pays for an order.
The specifics of implementing this scheme in your application include the following tasks:
• Adding a user profile schema to the application
• Modifying the site to allow customer accounts, including registration and detail editing
pages
•Modifying ShoppingCart.ascx, which will now redirect the user to a checkout page called
Checkout.aspx
The SecurityLib Classes
The two areas you’ve seen so far where security functionality is required are
•Password hashing
• Credit card encryption
Both tasks can be carried out by classes in the SecurityLib directory, which you’ll add as a
subdirectory of App_Code. The reason for separating this functionality from the main code of
the web site in this case is purely logical. Of course, at some point, you may want to access this
code in another application. Having all the relevant files in one place makes it easy to copy else-
where or even to extract it and put it into a shared class library. To facilitate all this, the classes
in the SecurityLib directory are all placed in a separate namespace—also called SecurityLib. Note
that to share the code in a class library requires Visual C# Express or the full version of Visual
Studio, because Visual Web Developer Express doesn’t allow you to create class libraries. The
SecurityLib directory contains the following files:
• PasswordHasher.cs: Contains the PasswordHasher class, which contains the shared method
Hash that returns a hash for the password supplied.
• SecureCard.cs: Contains the SecureCard class, which represents a credit card. This class
can be initialized with credit card information, which is then accessible in encrypted
format. Alternatively, it can be initialized with encrypted credit card data and provide
access to the decrypted information contained within.
• SecureCardException.cs: Should there be any problems during encryption or decryption,
the exception contained in this file, SecureCardException, is thrown by SecureCard.
• StringEncryptor.cs: The class contained in this file, StringEncryptor, is used by SecureCard
to encrypt and decrypt data. This means that if you want to change the encryption method,
you only need to modify the code here, leaving the SecureCard class untouched.
• StringEncryptorException.cs: Contains the StringEncryptorException exception,
thrown by StringEncryptor if an error occurs.
We’ll look at the code for hashing first, followed by encryption.
Darie-Watson_4681C12.fm Page 419 Monday, September 12, 2005 6:50 AM
8213592a117456a340854d18cee57603
420
CHAPTER 12
■ ADDING CUSTOMER ACCOUNTS
Hashing
Hashing, as has already been noted, is a means by which a unique value can be obtained that
represents an object. In practice, this means doing the following:
1. Serialize the object being hashed into a byte array.
2. Hash the byte array, obtaining a new hashed byte array.
3. Convert the hashed byte array into the format required for storage.
For passwords this is simple because converting a string (which is an array of characters)
into a byte array is no problem. Converting the resultant hashed byte array into a string for
database storage and quick comparison is also simple.
The actual method used to convert the source byte array into a hashed byte array can vary.
The System.Security.Cryptography namespace in .NET contains several algorithms for hashing
and allows you to provide your own if necessary, although we won’t go into details of this here.
The two main hashing algorithms found in the .NET Framework are SHA1 (Secure Hash Algo-
rithm) and MD5 (Message Digest, another name for the hash code generated). SHA1 generates
a 160-bit hash (regardless of the size of the input data), whereas MD5 generates a 128-bit hash;
therefore, SHA1 is generally considered more secure (although slower) than MD5. The Framework
also contains other versions of the SHA1 hash algorithm that generate longer hashes, up to 512 bits,
as well as hash algorithms that work using a key (shared secret) and the data to be hashed.
In the SecurityLib implementation, you’ll use SHA1, although it’s easy to change this if
you require stronger security. You’ll see the code that achieves this in the PasswordHasher class
in the following exercise.
Exercise: Implementing the PasswordHasher Class
1. Create a new subdirectory in the App_Code directory of BalloonShop called SecurityLib.
2. Add a new class file called PasswordHasher.cs with code as follows:
using System;
using System.Collections.Generic;
using System.Text;
using System.Security.Cryptography;
namespace SecurityLib
{
public static class PasswordHasher
{
private static SHA1Managed hasher = new SHA1Managed();
public static string Hash(string password)
{
Darie-Watson_4681C12.fm Page 420 Monday, September 12, 2005 6:50 AM
CHAPTER 12 ■ ADDING CUSTOMER ACCOUNTS
421
// convert password to byte array
byte[] passwordBytes =
System.Text.ASCIIEncoding.ASCII.GetBytes(password);
// generate hash from byte array of password
byte[] passwordHash = hasher.ComputeHash(passwordBytes);
// convert hash to string
return Convert.ToBase64String(passwordHash , 0,
passwordHash.Length);
}
}
}
3. Add a new web page to the root of the BalloonShop web site called SecurityLibTester.aspx, using
the usual options for having code in an external file and selecting the default BalloonShop Master Page.
4. Add the following code to SecurityLibTester.aspx:
<%@ Page Language="C#" MasterPageFile="~/BalloonShop.master"
AutoEventWireup="true" CodeFile="SecurityLibTester.aspx.cs"
Inherits="SecurityLibTester" Title="SecurityLib Test Page" %>
<asp:Content ID="Content1"
ContentPlaceHolderID="contentPlaceHolder" runat="Server">
Enter your password:<br />
<asp:TextBox ID="pwdBox1" runat="server" />
<br />
Enter your password again:<br />
<asp:TextBox ID="pwdBox2" runat="server" />
<br />
<asp:Button ID="processButton" runat="server" Text="Process"
OnClick="processButton_Click" />
<br />
<asp:Label ID="result" runat="server" />
</asp:Content>
5. Modify SecurityLibTester.aspx.cs as follows:
using System;
using System.Text;
using SecurityLib;
public partial class SecurityLibTester : System.Web.UI.Page
{
Darie-Watson_4681C12.fm Page 421 Monday, September 12, 2005 6:50 AM
422
CHAPTER 12
■ ADDING CUSTOMER ACCOUNTS
protected void processButton_Click(object sender, EventArgs e)
{
string hash1 = PasswordHasher.Hash(pwdBox1.Text);
string hash2 = PasswordHasher.Hash(pwdBox2.Text);
StringBuilder sb = new StringBuilder();
sb.Append("The hash of the first password is: ");
sb.Append(hash1);
sb.Append("<br />The hash of the second password is: ");
sb.Append(hash2);
if (hash1 == hash2)
{
sb.Append("<br />The passwords match! Welcome!");
}
else
{
sb.Append("<br />Password invalid. "
+ "Armed guards are on their way.");
}
result.Text = sb.ToString();
}
}
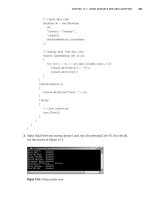
6. Browse to BalloonShop/SecurityLibTester.aspx, enter two passwords, and click Process. The
result is shown in Figure 12-1.
Figure 12-1. Password hasher result
Darie-Watson_4681C12.fm Page 422 Monday, September 12, 2005 6:50 AM
CHAPTER 12 ■ ADDING CUSTOMER ACCOUNTS
423
How It Works: Implementing the PasswordHasher Class
The code in the PasswordHasher class follows the steps that were discussed earlier. First, you use the utility
function System.Text.ASCIIEncoding.ASCII.GetBytes to convert the password string into a byte array:
// convert password to byte array
byte[]passwordBytes =
System.Text.ASCIIEncoding.ASCII.GetBytes(password);
Next, you use the private shared member hasher, an instance of SHA1Managed, to generate a hash byte array:
// generate hash from byte array of password
byte[] passwordHash = hasher.ComputeHash(passwordBytes);
Finally, you convert the hash back into a string by using the utility function Convert.ToBase64String and return
the result:
// convert hash to string
return Convert.ToBase64String(passwordHash , 0,
passwordHash.Length);
All the hash algorithm classes in the .NET Framework use this ComputeHash method to get a hash from an input
array of bytes. To increase the size of the hash, you can replace the hasher with another one of these, for example:
public static class PasswordHasher
{
private static SHA512Managed hasher = new SHA512Managed();
}
This change would result in a 512-bit hash, which is probably a bit excessive in this sort of application!
The client page, SecurityLibTest.aspx, hashes two passwords and compares the result. The code is basic
enough to ignore for now, but it’s important to note that the generated hashes vary a great deal for even simple
changes to the input data, even just changes of case—one of the defining features of good hash generation.
Encryption
Encryption comes in many shapes and sizes and continues to be a hot topic. No definitive solution
to encrypting data exists, although plenty of advice can be given. In general, there are two
forms of encryption:
• Symmetric encryption: A single key is used both to encrypt and decrypt data.
• Asymmetric encryption: Separate keys are used to encrypt and decrypt data. The encryption
key is commonly known as the public key, and anyone can use it to encrypt information.
The decryption key is known as the private key, because it can only be used to decrypt
data that has been encrypted using the public key.
Darie-Watson_4681C12.fm Page 423 Monday, September 12, 2005 6:50 AM