Foundations of Python Network Programming 2nd edition phần 3 docx
Bạn đang xem bản rút gọn của tài liệu. Xem và tải ngay bản đầy đủ của tài liệu tại đây (304.89 KB, 36 trang )
CHAPTER 4 ■ SOCKET NAMES AND DNS
52
• In general, an FQDN may be used to identify a host from anywhere else on the
Internet. Bare hostnames, by contrast, work as relative names only if you are
already inside the organization and using their own nameservers (a concept we
discuss later in this chapter) to resolve names on your desktop, laptop, or server.
Thus athena should work as an abbreviation for athena.mit.edu if you are actually
on the MIT campus, but it will not work if you are anywhere else in the world—
unless you have configured your system to always try MIT hostnames first, which
would be unusual, but maybe you are on their staff or something.
Socket Names
The last two chapters have already introduced you to the fact that sockets cannot be named with a single
primitive Python value like a number or string. Instead, both TCP and UDP use integer port numbers to
share a single machine's IP address among the many different applications that might be running there,
and so the address and port number have to be combined in order to produce a socket name, like this:
('18.9.22.69', 80)
While you might have been able to pick up some scattered facts about socket names from the last
few chapters—like the fact that the first item can be either a hostname or a dotted IP address—it is time
for us to approach the whole subject in more depth.
You will recall that socket names are important at several points in the creation and use of sockets.
For your reference, here are all of the major socket methods that demand of you some sort of socket
name as an argument:
• mysocket.accept(): Each time this is called on a listening TCP stream socket that
has incoming connections ready to hand off to the application, it returns a tuple
whose second item is the remote address that has connected (the first item in the
tuple is the net socket connected to that remote address).
• mysocket.bind(address): Assigns the socket the local address so that outgoing
packets have an address from which to originate, and so that any incoming
connections from other machines have a name that they can use to connect.
• mysocket.connect(address): Establishes that data sent through this socket will be
directed to the given remote address. For UDP sockets, this simply sets the default
address used if the caller uses send() rather than sendto(); for TCP sockets, this
actually negotiates a new stream with another machine using a three-way
handshake, and raises an exception if the negotiation fails.
• mysocket.getpeername(): Returns the remote address to which this socket is
connected.
• mysocket.getsockname(): Returns the address of this socket's own local endpoint.
• mysocket.recvfrom( ): For UDP sockets, this returns a tuple that pairs a string
of returned data with the address from which it was just sent.
• mysocket.sendto(data, address): An unconnected UDP port uses this method to
fire off a data packet at a particular remote address.
So, there you have it! Those are the major socket operations that care about socket addresses, all in
one place, so that you have some context for the remarks that follow. In general, any of the foregoing
methods can receive or return any of the sorts of addresses that follow, meaning that they will work
CHAPTER 4 ■ SOCKET NAMES AND DNS
53
regardless of whether you are using IPv4, IPv6, or even one of the less common address families that we
will not be covering in this book.
Five Socket Coordinates
Monty Python's Holy Grail famously includes “the aptly named Sir Not-Appearing-In-This-Film” in its
list of knights of the round table, and this section does something of the same service for this book. Here
we will consider the full range of “coordinates” that identify a socket, only to note that most of the
possible values are not within the scope of our project here in this book.
When reviewing the sample programs of Chapter 2 and Chapter 3, we paid particular attention to
the hostnames and IP addresses that their sockets used. But if you read each program listing from the
beginning, you will see that these are only the last two coordinates of five major decisions that were
made during the construction and deployment of each socket object. Recall that the steps go something
like this:
>>> import socket
>>> s = socket.socket(socket.AF_INET, socket.SOCK_DGRAM)
>>> s.bind(('localhost', 1060))
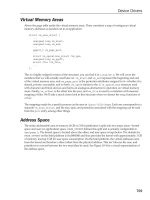
In order, here is the full list of values that had to be chosen, and you will see that there are five in all.
First, the address family makes the biggest decision: it names what kind of network you want to talk
to, out of the many kinds that a particular machine might support.
In this book, we will always use the value AF_INET for the address family, because we believe that
making this book about IP networking will best serve the vast majority of Python programmers, while at
the same time giving them skills that will work on Linux, Mac OS, or even Windows. But if you will
import the socket module in Python, print out dir(socket), and look for the symbols that start with AF_
(“Address Family”), you may see choices whose names you will recognize, like AppleTalk and Bluetooth.
Especially popular on POSIX systems is the AF_UNIX address family, which works just like Internet
sockets but runs directly between programs on the same machine with more efficiency than is possible
when traversing the entire IP network stack just to arrive back at the localhost interface.
Next after the address family comes the socket type. It chooses the particular kind of communication
technique that you want to use on the network you have chosen. You might guess that every single
address family presents entirely different socket types that you would have to go look up for each one,
since, after all, what address family besides AF_INET is going to present socket types like UDP and TCP?
Happily, this suspicion is misplaced. Although UDP and TCP are indeed quite specific to the AF_INET
protocol family, the socket interface designers decided to create more generic names for the broad idea
of a packet-based socket, which goes by the name SOCK_DGRAM, and the broad idea of a reliable flow-
controlled data stream, which as we have seen is known as a SOCK_STREAM. Because many address
families support either one or both of these mechanisms, even though they might implement them a bit
differently than they are implemented under IP, only these two symbols are necessary to cover many
protocols under a variety of different address families.
The third field in the socket() call, the protocol, is rarely used because once you have specified the
address family and socket type, you have narrowed down the possible protocols to one major option.
For this reason, programmers usually leave this unspecified or provide the value zero to force it to be
chosen automatically. If you want a stream under IP, the system knows to choose TCP; if you want
datagrams, then it selects UDP. That is why none of our socket() calls in this book has a third argument:
it is in practice almost never needed. Look inside the socket module for names starting with IPPROTO for
some examples of protocols defined for the AF_INET family; listed there you will see the two this book
actually addresses, under the names IPPROTO_TCP and IPPROTO_UDP.
The fourth and fifth fields are, then, the IP address and U
DP or TCP port number that were
explained in detail in the last two chapters.
CHAPTER 4 ■ SOCKET NAMES AND DNS
54
But we should immediately step back, and note that it is only because of our specific choices for the
first three coordinates that our socket names have had two components, hostname and port! If you
instead had chosen AppleTalk or ATM or Bluetooth for your address family, then some other data
structure might have been required of you instead of a tuple with a string and an integer inside. So the
whole set of coordinates, which in this section we have talked about as five coordinates, is really three
fixed coordinates needed to create the socket, followed by however many more coordinates your
particular address family requires you to use in order to make a network connection.
IPv6
And having explained all of that, it turns out that this book actually does need to introduce one
additional address family, beyond the AF_INET we have used so far: the address family for IPv6, named
AF_INET6, which is the way forward into a future where the world does not, in fact, run out of IP
addresses.
Once the old ARPANET really started taking off, its choice of 32-bit address names—which made so
much sense back when computer memory chips were measured by the kilobyte—became a clear and
worrying limitation. With only about four billion possible addresses available, even assuming that we
could use the address space that fully, that makes fewer than one IP address for every person on the
earth—which means real trouble once everyone has both a computer and an iPhone!
Even though only a few percent of the computers on the Internet today are actually using IPv6 to
communicate with the global network through their Internet service providers (where “today” is
September 2010), the steps necessary to make your Python programs compatible with IPv6 are simple
enough that you should go ahead and try writing code that prepares us all for the future.
In Python you can test directly for whether the underlying platform supports IPv6 by checking the
has_ipv6 Boolean attribute inside the socket module:
>>> import socket
>>> socket.has_ipv6
True
But note that this does not tell you whether an actual IPv6 interface is up and configured and can
currently be used to send packets anywhere; it is purely an assertion about whether IPv6 support has
been compiled into the operating system, not about whether it is in use!
The differences that IPv6 will make for your Python code might sound quite daunting, if listed one
right after the other:
• Your sockets have to be prepared to have the family AF_INET6 if you are called
upon to operate on an IPv6 network.
• No longer do socket names consist of just two pieces, an address and a port
number; instead, they can also involve additional coordinates that provide “flow”
information and a “scope” identifier.
• The pretty IPv4 octets like 18.9.22.69 that you might already be reading from
configuration files or from your command-line arguments will now sometimes be
replaced by IPv6 host addresses instead, which you might not even have good
regular expressions for yet. They have lots of colons, they can involve hexadecimal
numbers, and in general they look quite ugly.
The benefits of the IPv6 transition are not only that it will make an astronomically large number of
addresses available, but also that the protocol has more complete support for things like link-level
security than do most implementations of IPv4.
But the changes just listed can sound like a lot of trouble if you have been in the habit of writing
clunky, old-fashioned code that puts IP addresses and hostnames through regular expressions of your
CHAPTER 4 ■ SOCKET NAMES AND DNS
55
own devising. If, in other words, you have been in the business of interpreting addresses yourself in any
form, you probably imagine that the transition to IPv6 will make you write even more complicated code
than you already have. Fear not: my actual recommendation is that you get out of address interpretation
or scanning altogether, and the next section will show you how!
Modern Address Resolution
To make your code simple, powerful, and immune from the complexities of the transition from IPv4 to
IPv6, you should turn your attention to one of the most powerful tools in the Python socket user's
arsenal: getaddrinfo().
The getaddrinfo() function sits in the socket module along with most other operations that involve
addresses (rather than being a socket method). Unless you are doing something specialized, it is
probably the only routine that you will ever need to transform the hostnames and port numbers that
your users specify into addresses that can be used by socket methods!
Its approach is simple: rather than making you attack the addressing problem piecemeal, which is
necessary when using the older routines in the socket module, it lets you specify everything you know
about the connection that you need to make in a single call. In response, it returns all of the coordinates
we discussed earlier that are necessary for you to create and connect a socket to the named destination.
Its basic use is very simple and goes like this:
>>> from pprint import pprint
>>> infolist = socket.getaddrinfo('gatech.edu', 'www')
>>> pprint(infolist)
[(2, 1, 6, '', ('130.207.244.244', 80)),
(2, 2, 17, '', ('130.207.244.244', 80))]
>>> ftpca = infolist[0]
>>> ftpca[0:3]
(2, 1, 6)
>>> s = socket.socket(*ftpca[0:3])
>>> ftpca[4]
('130.207.244.244', 80)
>>> s.connect(ftpca[4])
The variable that I have so obscurely named ftpca here is an acronym for the order of the variables
that are returned: “family, type, protocol, canonical name, and address,” which contain everything you
need to make a connection. Here, we have asked about the possible methods for connecting to the HTTP
port of the host gatech.edu, and have been told that there are two ways to do it: by creating a
SOCK_STREAM socket (socket type 1) that uses IPPROTO_TCP (protocol number 6) or else by using a
SOCK_DGRAM (socket type 2) socket with IPPROTO_UDP (which is the protocol represented by the integer17).
And, yes, the foregoing answer is indicative of the fact that HTTP officially supports both TCP and
UDP, at least according to the official organization that doles out port numbers (and that gave HTTP one
of each). Usually when calling getaddrinfo(), you will specify which kind of socket you want rather than
leaving the answer up to chance!
If you use getaddrinfo() in your code, then unlike the listings in Chapter 2 and Chapter 3—which
used real symbols like AF_INET just to make it clearer how the low-level socket mechanisms were
working—your production Python code might not even have to reference any symbols at all from the
socket module except for those that explain to getaddrinfo() which kind of address you want. Instead,
you will use the first three items in the getaddrinfo() return value as the arguments to the socket()
constructor, and then use the fifth item as the address to any of the calls listed in the first section of this
chapter.
As you can see from the foregoing code snippet, getaddrinfo() generally allows not only the
hostname but also the port name to be a symbol rather than an integer—eliminating the need of older
CHAPTER 4 ■ SOCKET NAMES AND DNS
56
Python code to make extra calls if the user might want to provide a symbolic port number like www or
smtp instead of 80 or 25.
Asking getaddrinfo() Where to Bind
Before tackling all of the options that getaddrinfo() supports, it will be more useful to see how it is used
to support three basic network operations. We will tackle them in the order that you might perform
operations on a socket: binding, connecting, and then identifying a remote host who has sent you
information.
If you want an address to provide to bind(), either because you are creating a server socket or
because you for some reason want your client to be connecting to someone else but from a predictable
address, then you will call getaddrinfo() with None as the hostname but with the port number and
socket type filled in. Note that here, as in the following getaddrinfo() calls, zeros serve as wildcards in
fields that are supposed to contain numbers:
>>> from socket import getaddrinfo
>>> getaddrinfo(None, 'smtp', 0, socket.SOCK_STREAM, 0, socket.AI_PASSIVE)
[(2, 1, 6, '', ('0.0.0.0', 25)), (10, 1, 6, '', ('::', 25, 0, 0))]
>>> getaddrinfo(None, 53, 0, socket.SOCK_DGRAM, 0, socket.AI_PASSIVE)
[(2, 2, 17, '', ('0.0.0.0', 53)), (10, 2, 17, '', ('::', 53, 0, 0))]
Here we asked about where we should bind() a socket if we want to serve SMTP traffic using TCP,
and if we want to serve DNS traffic using DCP, respectively. The answers we got back in each case are the
appropriate wildcard addresses that will let us bind to every IPv4 and every IPv6 interface on the local
machine with all of the right values for the socket family, socket type, and protocol in each case.
If you instead want to bind() to a particular IP address that you know that the local machine holds,
then omit the AI_PASSIVE flag and just specify the hostname. For example, here are two ways that you
might try binding to localhost:
>>> getaddrinfo('127.0.0.1', 'smtp', 0, socket.SOCK_STREAM, 0)
[(2, 1, 6, '', ('127.0.0.1', 25))]
>>> getaddrinfo('localhost', 'smtp', 0, socket.SOCK_STREAM, 0)
[(10, 1, 6, '', ('::1', 25, 0, 0)), (2, 1, 6, '', ('127.0.0.1', 25))]
You can see that supplying the IPv4 address for the localhost locks you down to receiving
connections only over IPv4, while using the symbolic name localhost (at least on my Linux laptop, with
a well-configured /etc/hosts file) makes available both the IPv4 and IPv6 local names for the machine.
One question that you might already be asking at this point, by the way, is what on earth you are
supposed to do when you assert that you want to supply a basic service and getaddrinfo() goes and
gives you several addresses to use—you certainly cannot create a single socket and bind() it to more
than one address! In Chapter 7, we will tackle the techniques that you can use if you are writing server
code and want to have several sockets going at once.
Asking getaddrinfo() About Services
Except for the use shown in the previous section, all other uses of getaddrinfo() are outward-looking,
and generate information suitable for connecting you to other applications. In all such cases, you can
either use an empty string to indicate that you want to connect back to the localhost using the loopback
interface, or provide a string giving an IPv4 address, IPv6 address, or hostname to name your
destination.
The usual use of getaddrinfo() in all other cases—which, basically, is when you are preparing to
connect() or sendto()—is to specify the AI_ADDRCONFIG flag, which filters out any addresses that are
CHAPTER 4 ■ SOCKET NAMES AND DNS
57
impossible for your computer to reach. For example, an organization might have both an IPv4 and an
IPv6 range of IP addresses; but if your particular host supports only IPv4, then you will want the results
filtered to include only addresses in that family. In case the local machine has only an IPv6 network
interface but the service you are connecting to is supporting only IPv4, the AI_V4MAPPED will return you
those IPv4 addresses re-encoded as IPv6 addresses that you can actually use.
So you will usually use getaddrinfo() this way when connecting:
>>> getaddrinfo('ftp.kernel.org', 'ftp', 0, socket.SOCK_STREAM, 0,
socket.AI_ADDRCONFIG | socket.AI_V4MAPPED)
[(2, 1, 6, '', ('204.152.191.37', 21)),
(2, 1, 6, '', ('149.20.20.133', 21))]
And we have gotten exactly what we wanted: every way to connect to a host named ftp.kernel.org
through a TCP connection to its FTP port. Note that several IP addresses were returned because this
service, to spread load, is located at several different machines on the Internet. You should generally
always use the first address returned, and if a connection fails, then try the remaining ones, because
there is intelligence built into the name-resolution system to properly randomize the order in which you
receive them. By always trying the first server IP address first, you will offer the various servers a
workload that is in the proportion that the machine administrators intend.
Here is another query, which describes how I can connect from my laptop to the HTTP interface of
the IANA that assigns port numbers in the first place:
>>> getaddrinfo('iana.org', 'www', 0, socket.SOCK_STREAM, 0,
socket.AI_ADDRCONFIG | socket.AI_V4MAPPED)
[(2, 1, 6, '', ('192.0.43.8', 80))]
The IANA web site is actually a good one for demonstrating the utility of the AI_ADDRCONFIG flag,
because—like any other good Internet standards organization—their web site already supports IPv6. It
just so happens that my laptop can speak only IPv4 on the wireless network to which it is currently
connected, so the foregoing call was careful to return only an IPv4 address. But if we take away our
carefully chosen flags in the sixth parameter, then we will also be able to see their IPv6 address:
>>> getaddrinfo('iana.org', 'www', 0, socket.SOCK_STREAM, 0)
[(2, 1, 6, '', ('192.0.43.8', 80)),
(10, 1, 6, '', ('2001:500:88:200::8', 80, 0, 0))]
This can be useful if you are not going to try to use the addresses yourself, but if you are providing
some sort of directory information to other hosts or programs.
Asking getaddrinfo() for Pretty Hostnames
One last circumstance that you will commonly encounter is where you either are making a new
connection, or maybe have just received a connection to one of your own sockets, and you want an
attractive hostname to display to the user or record in a log file. This is slightly dangerous because a
hostname lookup can take quite a bit of time, even on the modern Internet, and might return a
hostname that no longer works by the time you go and check your logs—so for log files, try to record
both the hostname and raw IP address!
But if you have a good use for the “canonical name” of a host, then try running getaddrinfo() with
the AI_CANONNAME flag turned on, and the fourth item of any of the tuples that it returns—that were
always empty strings in the foregoing examples, you will note—will contain the canonical name:
>>> getaddrinfo('iana.org', 'www', 0, socket.SOCK_STREAM, 0,
socket.AI_ADDRCONFIG | socket.AI_V4MAPPED | socket.AI_CANONNAME)
[(2, 1, 6, '43-8.any.icann.org', ('192.0.43.8', 80))]
CHAPTER 4 ■ SOCKET NAMES AND DNS
58
You can also supply getaddrinfo() with the attributes of a socket that is already connected to a
remote peer, and get a canonical name in return:
>>> mysock = old_sock.accept()
>>> addr, port = mysock.getpeername()
>>> getaddrinfo(addr, port, mysock.family, mysock.type, mysock.proto,
socket.AI_CANONNAME)
[(2, 1, 6, 'rr.pmtpa.wikimedia.org', ('208.80.152.2', 80))]
Again, this will work only if the owner of the IP address happens to have a name defined for it (and,
obviously, it requires the hostname lookup to succeed).
Other getaddrinfo() Flags
The examples just given showed the operation of three of the most important getaddrinfo() flags. The flags
available vary somewhat by operating system, and you should always consult your own computer's
documentation (not to mention its configuration!) if you are confused about a value that it chooses to
return. But there are several flags that tend to be cross-platform; here are some of the more important ones:
• AI_ALL: We have already discussed that the AI_V4MAPPED option will save you in the
situation where you are on a purely IPv6-connected host, but the host to which
you want to connect advertises only IPv4 addresses: it resolves this problem by
“mapping” the IPv4 addresses to their IPv6 equivalent. But if some IPv6 addresses
do happen to be available, then they will be the only ones shown. Thus the
existence of this option: if you want to see all of the addresses from your IPv6-
connected host, even though some perfectly good IPv6 addresses are available,
then combine this AI_ALL flag with AI_V4MAPPED and the list returned to you will
have every address known for the target host.
• AI_NUMERICHOST: This turns off any attempt to interpret the hostname parameter
(the first parameter to getaddrinfo()) as a textual hostname like cern.ch, and only
tries to interpret the hostname string as a literal IPv4 or IPv6 hostname like
74.207.234.78 or fe80::fcfd:4aff:fecf:ea4e. This is much faster, as no DNS
round-trip is incurred (see the next section), and prevents possibly untrusted user
input from forcing your system to issue a query to a nameserver under someone
else's control.
• AI_NUMERICSERV: This turns off symbolic port names like www and insists that port
numbers like 80 be used instead. This does not necessarily have the network-
query implications of the previous option, since port-number databases are
typically stored locally on IP-connected machines; on POSIX systems, resolving a
symbolic port name typically requires only a quick scan of the /etc/services file
(but check your /etc/nsswitch.conf file's services option to be sure). But if you
know your port string should always be an integer, then activating this flag can be
a useful sanity check.
One final note about flags: you do not have to worry about the IDN-related flags that some operating
systems use in order to enable getaddrinfo() to resolve those fancy new domain names that have
Unicode characters in them. Instead, Python will accept a Unicode string as the hostname and set
whatever options are necessary to get it converted for you:
>>> getaddrinfo(u'πμ.μ', 'www', 0, socket.SOCK_STREAM, 0,
socket.AI_ADDRCONFIG | socket.AI_V4MAPPED)
[(2, 1, 6, '', ('199.7.85.13', 80))]
CHAPTER 4 ■ SOCKET NAMES AND DNS
59
If you are curious about how this works behind the scenes, read up on the relevant international
standards starting with RFC 3492, and note that Python now includes an idna codec that can translate to
and from internationalized domain names:
>>> u'πμ.μ'.encode('idna')
'xn hxajbheg2az3al.xn jxalpdlp'
It is this resulting plain-ASCII string that is actually sent to the domain name service when you enter
the Greek sample domain name just shown.
Primitive Name Service Routines
Before getaddrinfo() was all the rage, programmers doing socket-level programming got by with a
simpler collection of name service routines supported by the operating system. They should be avoided
today since most of them are hardwired to speak only IPv4.
You can find their documentation in the Standard Library page on the socket module. Here, the
most efficient thing to do will be to play show-and-tell and use quick examples to illustrate each call.
Two calls let you learn about the hostname of the current machine:
>>> socket.gethostname()
'asaph'
>>> socket.getfqdn()
'asaph.rhodesmill.org'
And two more let you convert between IPv4 hostnames and IP addresses:
>>> socket.gethostbyname('cern.ch')
'137.138.144.169'
>>> socket.gethostbyaddr('137.138.144.169')
('webr8.cern.ch', [], ['137.138.144.169'])
Finally, three routines let you look up protocol numbers and ports using symbolic names known to
your operating system:
>>> socket.getprotobyname('UDP')
17
>>> socket.getservbyname('www')
80
>>> socket.getservbyport(80)
'www'
If you want to try learning the primary IP address for the machine on which your Python program is
running, you can try passing its fully qualified hostname into a gethostbyname() call, like this:
>>> socket.gethostbyname(socket.getfqdn())
'74.207.234.78'
But since either call could fail and return an address error (see the section on error handling in
Chapter 5), your code should have a backup plan in case this pair of calls fails to return a useful IP
address.
CHAPTER 4 ■ SOCKET NAMES AND DNS
60
Using getsockaddr() in Your Own Code
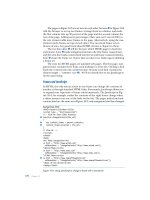
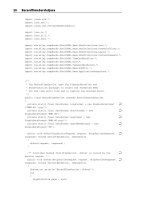
To put everything together, I have assembled a quick example of how getaddrinfo() looks in actual
code. Take a look at Listing 4–1.
Listing 4–1. Using getaddrinfo()to Create and Connect a Socket
#!/usr/bin/env python
# Foundations of Python Network Programming - Chapter 4 - www_ping.py
# Find the WWW service of an arbitrary host using getaddrinfo().
import socket, sys
if len(sys.argv) != 2:
» print >>sys.stderr, 'usage: www_ping.py <hostname_or_ip>'
» sys.exit(2)
hostname_or_ip = sys.argv[1]
try:
» infolist = socket.getaddrinfo(
» » hostname_or_ip, 'www', 0, socket.SOCK_STREAM, 0,
» » socket.AI_ADDRCONFIG | socket.AI_V4MAPPED | socket.AI_CANONNAME,
» » )
except socket.gaierror, e:
» print 'Name service failure:', e.args[1]
» sys.exit(1)
info = infolist[0] # per standard recommendation, try the first one
socket_args = info[0:3]
address = info[4]
s = socket.socket(*socket_args)
try:
» s.connect(address)
except socket.error, e:
» print 'Network failure:', e.args[1]
else:
» print 'Success: host', info[3], 'is listening on port 80'
It performs a simple are-you-there test of whatever web server you name on the command line by
attempting a quick connection to port 80 with a streaming socket. Using the script would look
something like this:
$ python www_ping.py mit.edu
Success: host WEB.MIT.EDU is listening on port 80
$ python www_ping.py smtp.google.com
Network failure: Connection timed out
$ python www_ping.py no-such-host.com
Name service failure: No address associated with hostname
Note three things about the source code.
First, it is completely general, and contains no mention either of IP as a protocol nor of TCP as a
transport. If the user happened to type a hostname that the system recognized as a host to which it was
connected through AppleTalk (if you can imagine that sort of thing in this day and age), then
Download from Wow! eBook <www.wowebook.com>
CHAPTER 4 ■ SOCKET NAMES AND DNS
61
getaddrinfo() would be free to return the AppleTalk socket family, type, and protocol, and that would be
the kind of socket that we would wind up creating and connecting.
Second, note that getaddrinfo() failures cause a specific name service error, which Python calls a
gaierror, rather than a plain socket error of the kind used for the normal network failure that we
detected at the end of the script. We will learn more about error handling in Chapter 5.
Third, note that the socket() constructor does not take a list of three items as its parameter. Instead,
the parameter list is introduced by an asterisk, which means that the three elements of the socket_args
list are passed as three separate parameters to the constructor. This is the opposite of what you need to
do with the actual address returned, which is instead passed as a single unit into all of the socket
routines that need it.
Better Living Through Paranoia
In certain high-security situations, people worry about trusting a hostname provided by an untrusted
organization because there is nothing to stop you from creating a domain and pointing the hostnames
inside it at the servers that actually belong to other organizations. For example, imagine that you provide
a load-testing service, and that someone from example.com comes along and asks you to perform a
murderously heavy test on their test.example.com server to see how their web server configuration holds
up. The first thing you might ask yourself is whether they really own the host at test.example.com, or
whether they have created that name in their domain but given it the IP address of the main web server
of a competing organization so that your “test” in fact shuts their competition down for the afternoon.
But since it is common to have service-specific hostnames like gatech.edu point to the IP address of
a real host like brahma2.gatech.edu, it can actually be rather tricky to determine if a reverse name
mismatch indicates a problem. Ignoring the first element can be helpful, as can truncating both
hostnames to the length of the shorter one—but the result might still be something that should be
looked at by a human before making real access-control decisions based on the result!
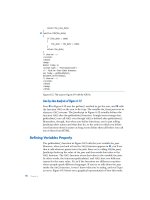
But, to show you the sort of checking that might be attempted, you can take a look at Listing 4–2 for
a possible sanity check that you might want to perform before starting the load test.
Listing 4–2. Confirming a Forward Lookup with a Reverse Lookup
#!/usr/bin/env python
# Foundations of Python Network Programming - Chapter 4 - forward_reverse.py
# Checking whether a hostname works both forward and backward.
import socket, sys
if len(sys.argv) != 2:
» print >>sys.stderr, 'usage: forward_reverse.py <hostname>'
» sys.exit(2)
hostname = sys.argv[1]
try:
» infolist = socket.getaddrinfo(
» » hostname, 0, 0, socket.SOCK_STREAM, 0,
» » socket.AI_ADDRCONFIG | socket.AI_V4MAPPED | socket.AI_CANONNAME,
» » )
except socket.gaierror, e:
» print 'Forward name service failure:', e.args[1]
» sys.exit(1)
info = infolist[0] # choose the first, if there are several addresses
CHAPTER 4 ■ SOCKET NAMES AND DNS
62
canonical = info[3]
socketname = info[4]
ip = socketname[0]
if not canonical:
» print 'WARNING! The IP address', ip, 'has no reverse name'
» sys.exit(1)
print hostname, 'has IP address', ip
print ip, 'has the canonical hostname', canonical
# Lowercase for case-insensitive comparison, and chop off hostnames.
forward = hostname.lower().split('.')
reverse = canonical.lower().split('.')
if forward == reverse:
» print 'Wow, the names agree completely!'
» sys.exit(0)
# Truncate the domain names, which now look like ['www', 'mit', 'edu'],
# to the same length and compare. Failing that, be willing to try a
# compare with the first element (the hostname?) lopped off if both of
# them are the same length.
length = min(len(forward), len(reverse))
if (forward[-length:] == reverse[-length:]
» or (len(forward) == len(reverse)
» » and forward[-length+1:] == reverse[-length+1:]
» » and len(forward[-2]) > 2)): # avoid thinking '.co.uk' means a match!
» print 'The forward and reverse names have a lot in common'
else:
» print 'WARNING! The reverse name belongs to a different organization'
Here, we are not only telling getaddrinfo()to perform the “forward” lookup that resolves a
hostname to an IP address, but also asking for the “reverse” lookup to discover what the actual owner of
the IP address says that he or she has named that machine.
Using this script, you can see that some hosts have quite straightforward names that reverse to
exactly the same string:
$ python forward_reverse.py smtp1.google.com
smtp1.google.com has IP address 216.239.44.95
216.239.44.95 has the canonical hostname smtp1.google.com
Wow, the names agree completely!
On the other hand, it is common for web site names that are designed to be short and pretty to
actually be served by physical machines with longer names:
$ python forward_reverse.py mit.edu
mit.edu has IP address 18.9.22.69
18.9.22.69 has the canonical hostname WEB.MIT.EDU
The forward and reverse names have a lot in common
CHAPTER 4 ■ SOCKET NAMES AND DNS
63
But very often a name is completely symbolic, and the site or services behind it are actually
provided by machines in a completely different domain for perfectly legitimate reasons, but there is no
way for our little script to know this:
$ python forward_reverse.py flickr.com
flickr.com has IP address 68.142.214.24
68.142.214.24 has the canonical hostname www.flickr.vip.mud.yahoo.com
WARNING! The reverse name belongs to a different organization
This means that unless you are writing code for a very specific situation in which you know that
hostnames and their reverse names should strictly correspond, something like Listing 4–2 will be far too
strict.
What, then, is the real usefulness of reverse lookups? The big reason is to have a second name to test
against whatever lists of allowed and disallowed hosts your user might have configured. Of course, if the
connection is an incoming one rather than an outgoing one, then the reverse name—which
getsockaddr() will fetch for you if you provide the remote socket name—will be the only name you have
to go on; forward names exist, of course, only when you are doing the connecting yourself based on a
name that a user has configured or typed.
And here we conclude our discussion of how you should best do name resolution in your Python
programs. But what if you need to go one level deeper—what if your application needs to speak to the
name service infrastructure on its own for some reason? Then keep reading, and we will soon learn
about DNS, which drives name resolution on IP networks!
A Sketch of How DNS Works
The Domain Name System, DNS, is a scheme by which millions of Internet hosts cooperate to answer
the question of what hostnames resolve to what IP addresses. The DNS is behind the fact that you can
type python.org into your web browser instead of always having to remember 82.94.164.162 for those of
you on IPv4, or 2001:888:2000:d::a2 if you are already enjoying IPv6.
THE DNS PROTOCOL
Purpose: Turn hostnames into IP addresses
Standard: RFC 1035 (1987) and subsequent
Runs atop: TCP/IP and UDP/IP
Default port: 53
Libraries: PyDNS, dnspython
Exceptions: See library documentation
The messages that computers send to perform this resolution form the “DNS Protocol,” which
operates in a hierarchical fashion. If your local computer and nameserver cannot resolve a hostname
because it is neither local to your organization nor has been seen recently enough to still be in the
nameserver's cache, then the next step is to query one of the world's top-level nameservers to find out
which machines are responsible for the domain you need to ask about. Once their IP addresses are
ascertained, they can then be queried for the domain name itself.
We should first step back for a moment and see how this operation is usually set in motion.
CHAPTER 4 ■ SOCKET NAMES AND DNS
64
For example, consider the domain name www.python.org. If your web browser needs to know this
address, then the browser runs a call like getaddrinfo() to ask the operating system to resolve that
name. Your system will know either that it is running a nameserver of its own, or that the network to
which it is attached provides name service. Nameserver information these days is typically learned
automatically through DHCP, whether in corporate offices, in schools, on wireless networks, or on home
cable and DSL connections. In other cases, the DNS server IP addresses will have been configured by
hand when a system administrator set up your machine. Either way, the DNS servers must typically be
specified as IP addresses, since you obviously cannot use DNS itself to find them!
Sometimes people are unhappy with their ISP's DNS behavior or performance and choose to
configure a third-party DNS server of their own choosing, like the servers at 8.8.8.8 and 8.8.4.4 run by
Google. And in some rarer cases, the local DNS domain nameservers are known through some other set
of names in use by the computer, like the WINS Windows naming service. But one way or another, a
DNS server must be identified for name resolution to continue.
Checking DNS for the hostname is not actually the first thing that an operating system usually does
when you make a call like getaddrinfo()—in fact, because making a DNS query can be time-consuming,
it is often the very last choice! Depending on the hosts entry in your /etc/nsswitch.conf if you are on a
POSIX box, or else depending on your Windows control panel settings, there might be one or several
other places that the operating system looks first before turning to DNS. On my Ubuntu laptop, for
example, the /etc/hosts file is checked first on every single hostname lookup; then a specialized
protocol called multicast DNS is used, if possible; and only if that fails or is unavailable is full-blown DNS
cranked up to answer the hostname query.
To continue our example, imagine that the name www.python.org has not, in fact, been recently
enough queried to be in any local cache on the machine where you are running your web browser. In
that case, the computer will look up the local DNS server and, typically, send it a DNS request packet
over UDP.
Now the question is in the hands of a real DNS server! For the rest of this discussion, we will call it
“your DNS server,” in the sense of “the DNS server that is doing work for you”; but, of course, the server
itself probably belongs to someone else, like your employer or your ISP or Google!
The first act of your DNS server will be to check its own cache of recently queried domain names to
see if www.python.org has already been checked by some other machine served by the DNS server in the
last few minutes or hours. If an entry is present and has not yet expired—and the owner of each domain
name gets to choose its expiration timeout, because some organizations like to change IP addresses
quickly if they need to, while others are happy to have old IP addresses linger for hours or days in the
world's DNS caches—then it can be returned immediately. But let us imagine that it is morning and that
you are the first person in your office or in the coffee shop to try talking to www.python.org today, and so
the DNS server has to go find the hostname from scratch.
Your DNS server will now begin a recursive process of asking about www.python.org at the very top of
the world's DNS server hierarchy: the “root-level” nameservers that know all of the top-level domains
(TLDs) like .com, .org, .net, and all of the country domains, and know the groups of servers that are
responsible for each. Nameserver software generally comes with the IP addresses of these top-level
servers built in, to solve the bootstrapping problem of how you find any domain nameservers before you
are actually connected to the domain name system! With this first UDP round-trip, your DNS server will
learn (if it did not know already from another recent query) which servers keep the full index of .org
domain.
Now a second DNS request will be m
ade, this time to one of the .org servers, asking who on earth
runs the python.org domain. You can find out what those top-level servers know about a domain by
running the whois command-line program on a POSIX system, or use one of the many “whois” web
pages online:
$ whois python.org
Domain Name:PYTHON.ORG
Created On:27-Mar-1995 05:00:00 UTC
Last Updated On:07-Sep-2006 20:50:54 UTC
CHAPTER 4 ■ SOCKET NAMES AND DNS
65
Expiration Date:28-Mar-2016 05:00:00 UTC
Registrant Name:Python Software Foundation
Name Server:NS2.XS4ALL.NL
Name Server:NS.XS4ALL.NL
And that provides our answer! Wherever you are in the world, your DNS request for any hostname
within python.org must be passed on to one of the two DNS servers named in that entry. Of course,
when your DNS server makes this request to a top-level domain nameserver, it does not really get back
only two names like those just given; instead, it is also given their IP addresses so that it can contact
them directly without incurring another round of DNS lookup.
Your DNS server is now finished talking to both the root-level DNS server and the top-level .org
DNS server, and can communicate directly with NS2.XS4ALL.NL or NS.XS4ALL.NL to ask about the
python.org domain—and, in fact, it will usually try one of them and then fall back to trying the other if
the first one is unavailable. This increases the chances of you getting an answer, but, of course, it can
increase the amount of time that you sit staring at your web browser before the page can actually be
displayed!
Depending on how python.org has its nameservers configured, the DNS server might require just
one more query to get its answer, or it might take several if the organization is a large one with many
departments and sub-departments that all run their own DNS servers to which requests need to be
delegated. In this case, the www.python.org query can be answered directly by either of the two servers
just named, and your DNS server can now return a UDP packet to your browser telling it which IP
addresses belong to that hostname.
Note that this process required four separate network round-trips. Your machine made a request
and got a response from your own DNS server, and in order to answer that request, your DNS server had
to make a recursive query that consisted of three different round-trips to other servers. No wonder your
browser sits there spinning when you enter a domain name for the first time!
Why Not to Use DNS
The foregoing explanation of a typical DNS query has, I hope, made clear that your operating system is
doing a lot for you when you need a hostname looked up. For this reason, I am going to recommend
that, unless you absolutely need to speak DNS for some quite particular reason, you always rely on
getaddrinfo() or some other system-supported mechanism for resolving hostnames. Consider the
benefits:
• The DNS is often not the only way that a system gets name information. If your
application runs off and tries to use DNS on its own as its first choice for resolving
a domain name, then users will notice that some computer names that work
everywhere else on your system—in their browser, in file share names, and so
forth—suddenly do not work when they use your application, because you are not
deferring to mechanisms like WINS or /etc/hosts like the operating system itself
does.
• The local machine probably has a cache of recently queried domain names that
might already know about the host whose IP address you need. If you try speaking
DNS yourself to answer your query, you will be duplicating work that has already
been done.
CHAPTER 4 ■ SOCKET NAMES AND DNS
66
• The system on which your Python script is running already knows about the local
domain nameservers, thanks either to manual intervention by your system
administrator or a network configuration protocol like DHCP in your office, home,
or coffee shop. To crank up DNS right inside your Python program, you will have
to learn how to query your particular operating system for this information—an
operating-system-specific action that we will not be covering in this book.
• If you do not use the local DNS server, then you will not be able to benefit from its
own cache that would prevent your application and other applications running on
the same network from repeating requests about a hostname that is in frequent
use at your location.
• From time to time, adjustments are made to the world DNS infrastructure, and
operating system libraries and daemons are gradually updated to accommodate
this. If your program makes raw DNS calls of its own, then you will have to follow
these changes yourself and make sure that your code stays up-to-date with the
latest changes in TLD server IP addresses, conventions involving
internationalization, and tweaks to the DNS protocol itself.
Finally, note that Python does not come with any DNS facilities built into the Standard Library. If
you are going to talk DNS using Python, then you must choose and learn a third-party library for doing
so.
Why to Use DNS
There is, however, a solid and legitimate reason to make a DNS call from Python: because you are a mail
server, or at the very least a client trying to send mail directly to your recipients without needing to run a
local mail relay, and you want to look up the MX records associated with a domain so that you can find
the correct mail server for your friends at @example.com.
So we are going to go ahead and take a look at one of the third-party DNS libraries for Python as we
bring this chapter to its close. There are at least two good ones available for Python at the moment. They
are available for quick installation into a virtual environment if you want to try them out. (See Chapter 1
to remember how to use virtualenv and pip.)
We will focus on the slightly more popular distribution, pydns, which descends from a DNS module
first written by Guido van Rossum, which at least gives it a glow of historical legitimacy. It makes a DNS
package available for you to import. Its competitor, the dnspython distribution, creates a lower-case dns
package instead, just so you can keep things straight! Both distributions have seen updates within the
past year, as of this writing—in fact, as I type this in September 2010, I can see that both packages were
updated within a few days of each other back in January 2010.
Note that neither project provides code that knows how to “start from scratch” and begin a query
with a search of the Internet root domain nameservers! Instead, each library uses its own tricks to find
out what domain nameservers your Windows or POSIX operating system is currently using, and then
asks those servers to go do recursive queries on its behalf. So not a single piece of code in this chapter
avoids needing to have a correctly configured host which an administrator or network configuration
service has already configured with working nameservers.
Since both are on the Python Package Index, you can install and try one of them out like this:
$ pip install pydns
Your Python interpreter will then gain the ability to run our first DNS program listing, shown in
Listing 4–3. Neither package seems to have any real documentation, so you will have to start with what is
shown here and extrapolate by reading whatever example code you can find on the Web.
CHAPTER 4 ■ SOCKET NAMES AND DNS
67
Listing 4–3. A Simple DNS Query Doing Its Own Recursion
#!/usr/bin/env python
# Foundations of Python Network Programming - Chapter 4 - dns_basic.py
# Basic DNS query
import sys, DNS
if len(sys.argv) != 2:
» print >>sys.stderr, 'usage: dns_basic.py <hostname>'
» sys.exit(2)
DNS.DiscoverNameServers()
request = DNS.Request()
for qt in DNS.Type.A, DNS.Type.AAAA, DNS.Type.CNAME, DNS.Type.MX, DNS.Type.NS:
» reply = request.req(name=sys.argv[1], qtype=qt)
» for answer in reply.answers:
» » print answer['name'], answer['classstr'], answer['typename'], \
» » » repr(answer['data'])
Running this against python.org will immediately teach us several things about DNS:
$ python dns_basic.py python.org
python.org IN A '82.94.164.162'
python.org IN AAAA ' \x01\x08\x88 \x00\x00\r\x00\x00\x00\x00\x00\x00\x00\xa2'
python.org IN MX (50, 'mail.python.org')
python.org IN NS 'ns2.xs4all.nl'
python.org IN NS 'ns.xs4all.nl'
As you can see from the program, each “answer” in the reply that has been returned is represented
by a dictionary in pydns, and we are here grabbing a few of its most important keys and printing them
out. In order, the keys that get printed on each line are as follows:
• The name that we looked up.
• The “class,” which in all queries you are likely to see is IN, meaning it is a question
about Internet addresses.
• The “type” of record; some common ones are A for an IPv4 address, AAAA for an
IPv6 address, NS for a record that lists a nameserver, and MX for a statement about
what mail server should be used for a domain.
• Finally, the “data” provides the information for which the record type was
essentially a promise: the address, or data, or hostname associated with the name
that we asked about.
In the query just quoted, we learn three things about the python.org domain. First, the A record tells
us that if we want to connect to an actual python.org machine—to make an HTTP connection, or start an
SSH session, or to do anything else because the user has supplied python.org as the machine he or she
wants to connect to—then we should direct our packets at IP address 82.94.164.162. Second, the NS
records tell us that if we want the names of any hosts beneath python.org, then we should ask the two
nameservers ns2.xs4all.nl and ns.xs4all.nl to resolve those names for us. Finally, if we want to send
e-mail to someone at the e-mail domain @python.org, then we will need to go look up the hostname
mail.python.org and connect to its SMTP port.
There is also a record type CNAME, which indicates that the hostname you have queried about is
actually just an alias for another hostname—that you then have to go and look up separately! Because it
CHAPTER 4 ■ SOCKET NAMES AND DNS
68
often requires two round-trips, this record type is unpopular these days, but you still might run across it
occasionally.
That MX record is crucial, by the way, and is something that newcomers to network programming
often get confused! Sending e-mail to a domain is a completely different act from trying to make an
HTTP or SSH connection to a domain; if you want to send e-mail to someone @python.org, then do not
try making an SMTP connection to the host named python.org! Always rely on MX records to point you to
your destination, if they exist; try making an SMTP connection to an A record for the domain named in
an e-mail address only if there are no MX records returned for that domain name.
Resolving Mail Domains
I mentioned previously that resolving an e-mail domain is a very legitimate use of raw DNS in most
Python programs. The rules for doing this resolution are specified most recently in RFC 5321. They are,
briefly, that if MX records exist, then you must try to contact those SMTP servers, and return an error to
the user (or put the message on a re-try queue) if none of them will accept the message. If instead no MX
records exist, but an A or AAAA record is provided for the domain, then you are allowed to try an SMTP
connection to that address. If neither record exists, but a CNAME is specified, then the domain name it
provides should be searched for MX or A records using the same rules.
Listing 4–4 shows how you might implement this algorithm. By doing a series of DNS queries, it
works its way through the possible destinations, printing out its decisions as it goes. By adjusting a
routine like this to return addresses rather than just printing them out, you could power a Python mail
dispatcher that needed to deliver e-mail to remote hosts.
Listing 4–4. Resolving an E-mail Domain Name
#!/usr/bin/env python
# Foundations of Python Network Programming - Chapter 4 - dns_mx.py
# Looking up a mail domain - the part of an email address after the `@`
import sys, DNS
if len(sys.argv) != 2:
» print >>sys.stderr, 'usage: dns_basic.py <hostname>'
» sys.exit(2)
def resolve_hostname(hostname, indent=0):
» """Print an A or AAAA record for `hostname`; follow CNAMEs if necessary."""
» indent = indent + 4
» istr = ' ' * indent
» request = DNS.Request()
» reply = request.req(name=sys.argv[1], qtype=DNS.Type.A)
» if reply.answers:
» » for answer in reply.answers:
» » » print istr, 'Hostname', hostname, '= A', answer['data']
» » return
» reply = request.req(name=sys.argv[1], qtype=DNS.Type.AAAA)
» if reply.answers:
» » for answer in reply.answers:
» » » print istr, 'Hostname', hostname, '= AAAA', answer['data']
» » return
» reply = request.req(name=sys.argv[1], qtype=DNS.Type.CNAME)
» if reply.answers:
CHAPTER 4 ■ SOCKET NAMES AND DNS
69
» » cname = reply.answers[0]['data']
» » print istr, 'Hostname', hostname, 'is an alias for', cname
» » resolve_hostname(cname, indent)
» » return
» print istr, 'ERROR: no records for', hostname
def resolve_email_domain(domain):
» """Print mail server IP addresses for an email address @ `domain`."""
» request = DNS.Request()
» reply = request.req(name=sys.argv[1], qtype=DNS.Type.MX)
» if reply.answers:
» » print 'The domain %r has explicit MX records!' % (domain,)
» » print 'Try the servers in this order:'
» » datalist = [ answer['data'] for answer in reply.answers ]
» » datalist.sort() # lower-priority integers go first
» » for data in datalist:
» » » priority = data[0]
» » » hostname = data[1]
» » » print 'Priority:', priority, ' Hostname:', hostname
» » » resolve_hostname(hostname)
» else:
» » print 'Drat, this domain has no explicit MX records'
» » print 'We will have to try resolving it as an A, AAAA, or CNAME'
» » resolve_hostname(domain)
DNS.DiscoverNameServers()
resolve_email_domain(sys.argv[1])
Of course, the implementation of resolve_hostname() shown here is rather fragile, since it should
really have a dynamic preference between A and AAAA records based on whether the current host is
connected to an IPv4 or to an IPv6 network. In fact, it is likely that our friend getsockaddr() should really
be deferred to here instead of trying to resolve the hostname ourselves! But since Listing 4–4 is designed
to show off how the DNS works, I thought I might as well follow through with the logic using pure DNS
so that you could see how the queries are resolved.
A real mail server implementation, instead of printing out the mail server addresses, would
obviously attempt to deliver mail to them instead, and stop once the first success was achieved. (If it
kept going through the server list after the success, then several copies of the e-mail would be generated,
one for each server to which it was delivered successfully!) But this simple script gives us a good idea of
the process. W
e can see that python.org at the moment has but a single mail server IP address:
$ python dns_mx.py python.org
The domain 'python.org' has explicit MX records!
Try the servers in this order:
Priority: 50 Hostname: mail.python.org
» Hostname mail.python.org = A 82.94.164.162
Whether that IP belongs to one machine, or is shared by a cluster of hosts, is, of course, something
that we cannot easily see from outside. Other organizations are more aggressive in giving incoming e-
mails several places to land; the IANA currently has no fewer than eight e-mail servers:
$ python dns_mx.py iana.org
The domain 'iana.org' has explicit MX records!
Try the servers in this order:
Priority: 10 Hostname: pechora1.icann.org
» Hostname pechora1.icann.org = A 192.0.43.8
CHAPTER 4 ■ SOCKET NAMES AND DNS
70
Priority: 10 Hostname: pechora2.icann.org
» Hostname pechora2.icann.org = A 192.0.43.8
Priority: 10 Hostname: pechora8.icann.org
» Hostname pechora8.icann.org = A 192.0.43.8
By trying this script against many different domains, you will be able to see how both big and small
organizations arrange for incoming e-mails to be routed to IP addresses.
Zeroconf and Dynamic DNS
There are two last technologies that you are perhaps not likely to implement yourself, but that deserve a
quick mention because they allow machines to find each other when they lack permanent and stable IP
addresses.
The Zeroconf standard combines three techniques so that computers thrown on to a network
segment with each other can discover each other's presence and names without a network
administrator needing to install and configure a DHCP and DNS server. Apple computers use this
technology extensively to find adjacent machines and printers, Linux machines often run an avahi
service that implements the protocol, and there is an old pyzeroconf project that offers a complete
Python implementation of the protocol suite. One of the technologies included in Zeroconf is “multicast
DNS” (mDNS), which allows all of the machines on the local network to answer when another machine
needs to look up a hostname.
Dynamic DNS services are Internet sites built to serve users whose machines are regularly changing
their IP address—perhaps because the address assigned by their ISP is not stable but is pulled from a
pool of free addresses with every reconnect. By offering an API through which the user can offer her
username, password, and new IP address, the DDNS service can update its database and point the user's
domain name at the new IP. This technology was pioneered by the dyndns.com site, and it absolves the
user of the need to rent and operate his or her own DNS server if he or she has only a few domain names
to maintain. There appears to be a dyndnsc project on the Package Index that offers a client that can
communicate with DDNS services.
Summary
Python programs often have to turn hostnames into socket addresses to which they can actually make
connections.
Most hostname lookup should occur through the getsockaddr() function in the socket module,
since its intelligence is usually supplied by your operating system and it will know not only how to look
up domain names, but also what flavor of address the local IP stack is configured to support.
Old IPv4 addresses are still the most prevalent on the Internet, but IPv6 is becoming more and more
common. By deferring all hostname and port name lookup to getsockaddr(), your Python program can
treat addresses as opaque strings and not have to worry about parsing or interpreting them.
Behind most name resolution is the DNS, a worldwide distributed database that forwards domain
name queries directly to the servers of the organization that owns a domain. While not often used
directly from Python, it can be very helpful in determining where to direct e-mail based on the e-mail
domain named after the @ sign in an e-mail address.
Download from Wow! eBook <www.wowebook.com>
C H A P T E R 5
■ ■ ■
71
Network Data and Network Errors
The first four chapters have given us a foundation: we have learned how hosts are named on an IP
network, and we understand how to set up and tear down both TCP streams and UDP datagram
connections between those hosts.
But what data should we then send across those lengths? How should it be encoded and formatted?
For what kinds of errors will our Python programs need to be prepared?
These questions are all relevant regardless of whether we are using streams or datagrams. We will
look at the basic answers in this chapter, and learn how to use sockets responsibly so that our data
arrives intact.
Text and Encodings
If you were watching for it as you read the first few chapters, you may have caught me using two
different terms for the same concept. Those terms were byte and octet, and by both words I always mean
an 8-bit number—an ordered sequence of eight digits, that are each either a one or a zero. They are the
fundamental units of data on modern computing systems, used both to represent raw binary numbers
and to stand for characters or symbols. The binary number 1010000, for example, usually stands for
either the number 80 or the letter P:
>>> 0b1010000
80
>>> chr(0b1010000)
'P'
The reason that the Internet RFCs are so inveterate in their use of the term “octet” instead of “byte”
is that the earliest of RFCs date from a very ancient era in which bytes could be one of several different
lengths—byte sizes from as little as 5 to as many as 16 bits were used on various systems. So the term
“octet,” meaning a “group of eight things,” is always used in the standards so that their meaning is
unambiguous.
Four bits offer a mere sixteen values, which does not come close to even fitting our alphabet. But
eight bits—the next-higher multiple of two—proved more than enough to fit both the upper and lower
cases of our alphabet, all the digits, lots of punctuation, and 32 control codes, and it still left a whole half
of the possible range of values empty. The problem is that many rival systems exist for the specific
mapping used to turn characters into bytes, and the differences can cause problems unless both ends of
your network connection use the same rules.
The use of ASCII for the basic English letters and numbers is nearly universal among network
protocols these days. But when you begin to use more interesting characters, you have to be careful. In
Python you should always represent a meaningful string of text with a “Unicode string” that is denoted
with a leading u, like this:
>>> elvish = u'Namárië!'
CHAPTER 5 ■ NETWORK DATA AND NETWORK ERRORS
72
But you cannot put such strings directly on a network connection without specifying which rival
system of encoding you want to use to mix your characters down to bytes. A very popular system is UTF-
8, because normal characters are represented by the same codes as in ASCII, and longer sequences of
bytes are necessary only for international characters:
>>> elvish.encode('utf-8')
'Nam\xc3\xa1ri\xc3\xab!'
You can see, for example, that UTF-8 represented the letter ë by a pair of bytes with hex values C3
and AB.
Be very sure, by the way, that you understand what it means when Python prints out a normal string
like the one just given. The letters strung between quotation characters with no leading u do not
inherently represent letters; they do not inherently represent anything until your program decides to do
something with them. They are just bytes, and Python is willing to store them for you without having the
foggiest idea what they mean.
Other encodings are available in Python—the Standard Library documentation for the codecs
package lists them all. They each represent a full system for reducing symbols to bytes. Here are a few
examples of the byte strings produced when you try encoding the same word in different ways; because
each successive example has less in common with ASCII, you will see that Python's choice to use ASCII
to represent the bytes in strings makes less and less sense:
>>> elvish.encode('utf-16')
'\xff\xfeN\x00a\x00m\x00\xe1\x00r\x00i\x00\xeb\x00!\x00'
>>> elvish.encode('cp1252')
'Nam\xe1ri\xeb!'
>>> elvish.encode('idna')
'xn namri!-rta6f'
>>> elvish.encode('cp500')
'\xd5\x81\x94E\x99\x89SO'
You might be surprised that my first example was the encoding UTF-16, since at first glance it seems
to have created a far greater mess than the encodings that follow. But if you look closely, you will see that
it is simply using two bytes—sixteen bits—for each character, so that most of the characters are simply a
null character \x00 followed by the plain ASCII character that belongs in the string. (Note that the string
also begins with a special sequence \xff\xfe that designates the byte order in use; see the next section
for more about this concept.)
On the receiving end of such a string, simply take the byte string and call its decode() method with
the name of the codec that was used to encode it:
>>> print '\xd5\x81\x94E\x99\x89SO'.decode('cp500')
Namárië!
These two steps—encoding to a byte string, and then decoding again on the receiving end—are
essential if you are sending real text across the network and want it to arrive intact. Some of the
protocols that we will learn about later in this book handle encodings for you (see, for example, the
description of HTTP in Chapter 9), but if you are going to write byte strings to raw sockets, then you will
not be able to avoid tackling the issue yourself.
Of course, many encodings do not support enough characters to encode all of the symbols in certain
pieces of text. The old-fashioned 7-bit ASCII encoding, for example, simply cannot represent the string
we have been working with:
>>> elvish.encode('ascii')
Traceback (most recent call last):
UnicodeEncodeError: 'ascii' codec can't encode character u'\xe1' in position 3: ordinal
not in range(128)
CHAPTER 5 ■ NETWORK DATA AND NETWORK ERRORS
73
Note that some encodings have the property that every character they are able to encode will be
represented by the same number of bytes; ASCII uses one byte for every character, for example, and
UTF-32 uses four. If you use one of these encodings, then you can both determine the number of
characters in a string by a simple examination of the number of bytes it contains, and jump to character
n of the string very efficiently. (Note that UTF-16 does not have this property, since it uses 16 bits for
some characters and 32 bits for others.)
Some encodings also add prefix characters that are not part of the string, but help the decoder
detect the byte ordering that was used (byte order is discussed in the next section)—thus the \xff\xfe
prefix that Python's UTF-16 encoder added to the beginning of our string. Read the codecs package
documentation and, if necessary, the specifications for particular encodings to learn more about the
actions they perform when turning your stream of symbols into bytes.
Note that it is dangerous to decode a partially received message if you are using an encoding that
encodes some characters using multiple bytes, since one of those characters might have been split
between the part of the message that you have already received and the packets that have not yet
arrived. See the section later in this chapter on “Framing” for some approaches to this issue.
Network Byte Order
If all you ever want to send across the network is text, then encoding and framing (which we tackle in the
next section) will be your only worries.
But sometimes you might want to represent your data in a more compact format than text makes
possible. Or you might be writing Python code to interface with a service that has already made the
choice to use raw binary data. In either case, you will probably have to start worrying about a new issue:
network byte order.
To understand the issue of byte order, consider the process of sending an integer over the network.
To be specific, think about the integer 4253.
Many protocols, of course, will simply transmit this integer as the string '4253'—that is, as four
distinct characters. The four digits will require at least four bytes to transmit, at least in any common text
encoding. And using decimal digits will also involve some computational expense: since numbers are
not stored inside computers in base 10, it will take repeated division—with inspection of the
remainder—to determine that this number is in fact made of 4 thousands, plus 2 hundreds, plus 5 tens,
plus 3 left over. And when the four-digit string '4253' is received, repeated addition and multiplication
by powers of ten will be necessary to put the text back together into a number.
Despite its verbosity, the technique of using plain text for numbers may actually be the most
popular on the Internet today. Every time you fetch a web page, for example, the HTTP protocol
expresses the Content-Length of the result using a string of decimal digits just like '4253'. Both the web
server and client do the decimal conversion without a second thought, despite the bit of expense. Much
of the story of the last 20 years in networking, in fact, has been the replacement of dense binary formats
with protocols that are simple, obvious, and human-readable—even if computationally expensive
compared to their predecessors.
(Of course, multiplication and division are also cheaper on modern processors than back when
binary formats were more common—not only because processors have experienced a vast increase in
speed, but because their designers have become much more clever about implementing integer math,
so that the same operation requires far fewer cycles today than on the processors of, say, the early
1980s.)
In any case, the string '4253' is not how your computer represents this number as an integer
variable in Python. Instead it will store it as a binary number, using the bits of several successive bytes to
represent the one's place, two's place, four's place, and so forth of a single large number. We can glimpse
the way that the integer is stored by using the hex() built-in function at the Python prompt:
>>> hex(4253)
'0x109d'
CHAPTER 5 ■ NETWORK DATA AND NETWORK ERRORS
74
Each hex digit corresponds to four bits, so each pair of hex digits represents a byte of data. Instead of
being stored as four decimal digits 4, 4, 2, and 3 with the first 4 being the “most significant” digit (since
tweaking its value would throw the number off by a thousand) and 3 being its least significant digit, the
number is stored as a most significant byte 0x10 and a least significant byte 0x9d, adjacent to one another
in memory.
But in which order should these two bytes appear? Here we reach a great difference between
computers. While they will all agree that the bytes in memory have an order, and they will all store a
string like Content-Length: 4253 in exactly that order starting with C and ending with 3, they do not share
a single idea about the order in which the bytes of a binary number should be stored.
Some computers are “big-endian” (for example, older SPARC processors) and put the most
significant byte first, just like we do when writing decimal digits; others (like the nearly ubiquitous x86
architecture) are “little-endian” and put the least significant byte first.
For an entertaining historical perspective on the issue, be sure to read Danny Cohen's paper IEN-
137, “On Holy Wars and a Plea for Peace,” which introduced the words “big-endian” and “little-endian”
in a parody of Jonathan Swift: www.ietf.org/rfc/ien/ien137.txt.
Python makes it very easy to see the difference between the two endiannesses. Simply use the struct
module, which provides a variety of operations for converting data to and from popular binary formats.
Here is the number 4253 represented first in a little-endian format and then in a big-endian order:
>>> import struct
>>> struct.pack('<i', 4253)
'\x9d\x10\x00\x00'
>>> struct.pack('>i', 4253)
'\x00\x00\x10\x9d'
We here used the code i, which uses four bytes to store an integer, so the two upper bytes are zero for a
small number like 4253. You can think of the struct codes for these two orders as little arrows pointing toward
the least significant end of a string of bytes, if that helps you remember which one to use. See the struct
module documentation in the Standard Library for the full array of data formats that it supports. It also
supports an unpack() operation, which converts the binary data back to Python numbers:
>>> struct.unpack('>i', '\x00\x00\x10\x9d')
(4253,)
If the big-endian format makes more sense to you intuitively, then you may be pleased to learn that
it “won” the contest of which endianness would become the standard for network data. Therefore the
struct module provides another symbol, '!', which means the same thing as '>' when used in pack()
and unpack() but says to other programmers (and, of course, to yourself as you read the code later), “I
am packing this data so that I can send it over the network.”
In summary, here is my advice for preparing binary data for transmission across a network socket:
• Use the struct module to produce binary data for transmission on the network,
and to unpack it upon arrival.
• Select network byte order with the '!' prefix if the data form
at is up to you.
• If someone else has designed the protocol and specified little-endian, then you
will have to use '<' instead.
• Always test struct to see how it lays out your data compared to the specification
for the protocol you are speaking; note that 'x' characters in the packing format
string can be used to insert padding bytes.
You might see older Python code use a cadre of awkwardly named functions from the socket
module in order to turn integers into byte strings in network order. These functions have names like
ntohl() and htons(), and correspond to functions of the same name in the POSIX networking library—
CHAPTER 5 ■ NETWORK DATA AND NETWORK ERRORS
75
which also supplies calls like socket() and bind(). I suggest that you ignore these awkward functions,
and use the struct module instead; it is more flexible, more general, and produces more readable code.
Framing and Quoting
If you are using UDP datagrams for communication, then the protocol itself takes the trouble to deliver
your data in discrete and identifiable chunks—and you have to reorder and re-transmit them yourself if
anything goes wrong on the network, as outlined in Chapter 2.
But if you have made the far more common option of using a TCP stream for communication, then
you will face the issue of framing—of how to delimit your messages so that the receiver can tell where
one message ends and the next begins. Since the data you supply to sendall() might be broken up into
several packets, the program that receives your message might have to make several recv() calls before
your whole message has been read.
The issue of framing asks the question: when is it safe for the receiver to finally stop calling recv()
and respond to your message?
As you might imagine, there are several approaches.
First, there is a pattern that can be used by extremely simple network protocols that involve only the
delivery of data—no response is expected, so there never has to come a time when the receiver decides
“Enough!” and turns around to send a response. In this case, the sender can loop until all of the outgoing
data has been passed to sendall() and then close() the socket. The receiver need only call recv()
repeatedly until the call finally returns an empty string, indicating that the sender has finally closed the
socket. You can see this pattern in Listing 5–1.
Listing 5–1. Sending a Single Stream of Data
#!/usr/bin/env python
# Foundations of Python Network Programming - Chapter 5 - streamer.py
# Client that sends data then closes the socket, not expecting a reply.
import socket, sys
s = socket.socket(socket.AF_INET, socket.SOCK_STREAM)
HOST = sys.argv.pop() if len(sys.argv) == 3 else '127.0.0.1'
PORT = 1060
if sys.argv[1:] == ['server']:
» s.setsockopt(socket.SOL_SOCKET, socket.SO_REUSEADDR, 1)
» s.bind((HOST, PORT))
» s.listen(1)
» print 'Listening at', s.getsockname()
» sc, sockname = s.accept()
» print 'Accepted connection from', sockname
» sc.shutdown(socket.SHUT_WR)
» message = ''
» while True:
» » more = sc.recv(8192) # arbitrary value of 8k
» » if not more: # socket has closed when recv() returns ''
» » » break
» » message += more
» print 'Done receiving the message; it says:'
» print message
» sc.close()
CHAPTER 5 ■ NETWORK DATA AND NETWORK ERRORS
76
» s.close()
elif sys.argv[1:] == ['client']:
» s.connect((HOST, PORT))
» s.shutdown(socket.SHUT_RD)
» s.sendall('Beautiful is better than ugly.\n')
» s.sendall('Explicit is better than implicit.\n')
» s.sendall('Simple is better than complex.\n')
» s.close()
else:
» print >>sys.stderr, 'usage: streamer.py server|client [host]'
If you run this script as a server and then, at another command prompt, run the client version, you
will see that all of the client's data makes it intact to the server, with the end-of-file event generated by
the client closing the socket serving as the only framing that is necessary:
$ python streamer.py server
Listening at ('127.0.0.1', 1060)
Accepted connection from ('127.0.0.1', 52039)
Done receiving the message; it says:
Beautiful is better than ugly.
Explicit is better than implicit.
Simple is better than complex.
Note the nicety that, since this socket is not intended to receive any data, the client and server both
go ahead and shut down communication in the other direction. This prevents any accidental use of the
socket in the other direction—use that could eventually queue up enough unread data to produce
deadlock, as we saw in Listing 3-2. It is really only necessary for either the client or server to call
shutdown() on the socket; it is redundant for both of them to do so. But since you someday might be
programming only one end of such a connection, I thought you might want to see how the shutdown
looks from both directions.
A second pattern is a variant on the first: streaming in both directions. The socket is initially left
open in both directions. First, data is streamed in one direction—exactly as shown in Listing 5–1—and
then that direction alone is shut down. Second, data is then streamed in the other direction, and the
socket is finally closed. Again, Listing 3-2 provides an important warning: always finish the data transfer
in one direction before turning around to stream data back in the other, or you could produce a client
and server that are deadlocked.
A third pattern, which we have already seen, is to use fixed-length messages, as illustrated in
Listing 3-1. You can use the Python sendall() method to keep sending parts of a string until the whole
thing has been transmitted, and then use a recv() loop of our own devising to make sure that you
receive the whole message:
def recvall(sock, length):
» data = ''
» while len(data) < length:
» » more = sock.recv(length - len(data))
» » if not more:
» » » raise EOFError('socket closed %d bytes into a %d-byte message'
» » » » » » % (len(data), length))
» » data += more
» return data