Suse Linux 9.3 For Dummies- P5 docx
Bạn đang xem bản rút gọn của tài liệu. Xem và tải ngay bản đầy đủ của tài liệu tại đây (648.51 KB, 15 trang )
system you want to use and press Enter. If the PC is set up to load SUSE Linux
by default, you don’t have to do anything — after a few seconds the boot
loader starts SUSE Linux.
You see a graphical boot screen that shows information about the progress
of the system startup. If you selected KDE as your desktop and enabled auto-
matic login during installation, you are automatically logged in and you get a
KDE desktop similar to the one shown in Figure 3-1.
By the way, SUSE Linux logs you in using the normal user account that you
set up during installation.
For a GNOME desktop, you get a graphical login screen, similar to the one
shown in Figure 3-2.
You can log in using the account you defined during the installation. Type
the username and press Enter. When prompted for it, type the password and
press Enter. You then see the initial GNOME graphical user interface (GUI —
pronounced gooey for short) appear.
Figure 3-1:
The initial
KDE
desktop.
40
Part I: Getting to Know SUSE
Please purchase PDF Split-Merge on www.verypdf.com to remove this watermark.
You should not normally log in as root. When you log in as root, you could
accidentally damage your system because you can do anything when you’re
root. Always log in as a normal user. When you need to perform any task
as
root, type su - in a terminal window and enter the root password.
Graphical system administration tools such as YaST prompt for the
root
password when needed.
Getting GUI
When you install SUSE Linux, you can install one of two GUI desktops —
GNOME or KDE. I provide a quick look at both KDE and GNOME desktops
in this section.
Figures 3-3 and 3-4 provide a snapshot of KDE and GNOME desktops, respec-
tively. In these figures, I point out the major components of each desktop.
Figure 3-2:
The graph-
ical login
window for
the GNOME
desktop.
41
Chapter 3: Starting SUSE for the First Time
Please purchase PDF Split-Merge on www.verypdf.com to remove this watermark.
Take a look at Figures 3-3 and 3-4 as I point out some of the noteworthy ele-
ments of these desktops:
SUSE logo
Main Menu button
Home
folder
Terminal program
SUSE Help Center
Desktop pager
Konqueror
Web browser
Kontact Personal Information Manager
Desktop Background
OpenOffice.org Office Suite
SUSE Release Notes and Support
Deleted Items
Browse Windows Network
Browse This Computer
Print Jobs
Hide
panel
Clock
SUSE Hardware tool
Volume Control
KInternet
SUSE Watcher
Clipboard tool
Power Management tool
Firefox Web browser
Figure 3-3:
Getting
familiar with
the KDE
desktop.
42
Part I: Getting to Know SUSE
Please purchase PDF Split-Merge on www.verypdf.com to remove this watermark.
ߜ Panel: The panel is like the Windows taskbar. KDE has one at the bottom
of the screen and GNOME has one at the top and one at the bottom. The
KDE panel and GNOME’s top panel are the places where you can access
the main menu of applications and launch programs by clicking icons on
the panel. The panel also shows information such as the date and time
and what applications are currently running.
ߜ Main Menu: This is the leftmost button on the KDE panel and GNOME’s
top panel. It brings up the Main menu (refer to Figure 3-5), from which
Main Menu
Places Menu
Desktop Menu
Volume Control
Clock
Window Selector
Top panel
SUSE Watcher
Display Information
Firefox Web browser
Workspace
Switcher
Show Desktop
Bottom
panel
Icons for applications
appear in this area
Deleted Items
View Contents of Floppy
Open Home folder
SUSE logo Desktop Background
Browse This Computer
Evolution OpenOffice.org Writer
SUSE Hardware tool
Ethernet Connection
Figure 3-4:
Getting to
know the
GNOME
desktop.
43
Chapter 3: Starting SUSE for the First Time
Please purchase PDF Split-Merge on www.verypdf.com to remove this watermark.
you can start applications and perform other tasks such as lock the
screen, get help, switch users, or log out. In GNOME, some of these
options are in separate menus — the Places menu and the Desktop menu.
ߜ Desktop Icons: The desktops display the usual desktop icons — a My
Computer icon for browsing the contents of the computer, a Trash icon,
and icons for accessing devices such as a floppy drive and a CD/DVD
drive or CD writer. The KDE desktop also has an icon for browsing the
local Windows network, as well as icons for support, Print Manager, and
the OpenOffice.org office suite.
ߜ Home Folder: Opens your home directory in a graphical file manager.
ߜ Terminal Program: Runs a program that provides a terminal window
where you can type Linux commands.
ߜ SUSE Help Center: Starts the SUSE Help Center, where you can get help
on various aspects of SUSE Linux.
ߜ Web Browser: Runs the Web browser.
ߜ Personal Information Manager: Starts a mail, calendar, and contact
manager. GNOME desktop provides Evolution as the personal informa-
tion manager.
ߜ Desktop Pager or Workspace Switcher: Click on a square to bring up a
different desktop.
ߜ Clipboard Tool: Click to see what has been cut and what you can paste
elsewhere.
ߜ Power Management Tool: Right-click to view a menu that you can use to
start the YaST Power Management module that enables you to edit power-
saver settings.
ߜ Volume Control: Click to change the sound volume.
ߜ SUSE Hardware Tool: Click to view information about devices in the PC
and configure them.
ߜ SUSE Watcher: Click to open a window you can use to both check for
online updates as well as start online updates.
ߜ Clock: Displays the current time. Clicking it brings up a calendar show-
ing the current date.
ߜ Hide Panel: Available in KDE, the end-point of the panel serves as a
“hide panel” button, which means that if you click this icon, the panel
slides to the right and disappears. Click again and the panel reappears.
You can hide the panel to create more room for other windows.
In addition to what you see on the KDE and GNOME desktops, you have many
more choices in the main menu that appears when you click Main Menu on
the panel. (See Figure 3-5.) Similar to the Windows Start button, the Main
Menu is where you start when you want to run an application.
44
Part I: Getting to Know SUSE
Please purchase PDF Split-Merge on www.verypdf.com to remove this watermark.
By the way, I refer to the menu selection shown in Figure 3-5 as Main Menu➪
Office➪Document Viewer➪KGhostView. If you take a moment to compare the
notation with Figure 3-5, I hope you’d agree that it’s quite logical.
When you’re done exploring KDE or GNOME, log out. To log out of KDE,
choose Main Menu➪Logout. In GNOME, choose Desktop Menu➪Log Out.
Select Log Out from the subsequent dialog box and click OK to really log out.
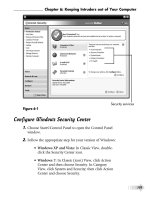
Setting Up Printers
During SUSE Linux installation, the installer — YaST — can detect any printer
connected to your PC and provide you with the opportunity to configure the
printer. If you did not configure your printer during installation, you can do
so using YaST by following these steps:
1. Make sure that your printer is connected to the PC and powered on.
This step is necessary so that YaST can automatically detect the printer.
2. Choose Main Menu➪System➪YaST and enter the root password when
prompted to do so. Then click Hardware on the left-hand side of the
YaST Control Center window.
The YaST Control Center displays information about various hardware
devices, as shown in Figure 3-6. As you can see, you can configure vari-
ous hardware devices, including printers, from YaST.
Figure 3-5:
A typical
Main Menu
on the KDE
desktop.
45
Chapter 3: Starting SUSE for the First Time
Please purchase PDF Split-Merge on www.verypdf.com to remove this watermark.
3. Click Printer on the right-hand side of the window.
YaST opens the Printer Configuration window and displays information
about any printers that it detects, as shown in Figure 3-7. In this case,
YaST has detected an Epson Stylus printer. If YaST has correctly
detected your printer, click Finish and you’re all done.
Figure 3-7:
YaST
displays this
Printer Con-
figuration
window.
Figure 3-6:
To config-
ure any
hardware,
start with
the YaST
Control
Center.
46
Part I: Getting to Know SUSE
Please purchase PDF Split-Merge on www.verypdf.com to remove this watermark.
4. If your printer is not detected, click Other and then click Configure.
YaST displays a list of printer connection types (see Figure 3-8) from
which you can select how your printer is connected to your PC (through
parallel, serial, USB, or network).
5. Select your printer type and click Next.
YaST prompts for more information, depending on the printer type you
selected. For example, for a parallel printer, you have to identify the par-
allel port to which the printer is attached.
6. Provide information about the printer connection and click Next.
7. Enter the name of the print queue as well as some descriptive infor-
mation about the printer and click Next.
YaST displays a list of printer makes and models.
8. Select your printer’s make and model. Then click Next.
YaST displays the current configuration information so that you can test
the configuration or edit it.
9. Review the configuration information and click OK.
10. Click Finish to save the settings and finish adding the printer.
Figure 3-8:
Select your
printer
connection
type from
this window.
47
Chapter 3: Starting SUSE for the First Time
Please purchase PDF Split-Merge on www.verypdf.com to remove this watermark.
Managing DVDs and CD-ROMs
The KDE and GNOME GUI desktops make using DVDs and CD-ROMs in SUSE
Linux easy. Just place a DVD or a CD-ROM in the drive (I am assuming it’s a
data disc), click the My Computer icon on your desktop, and then click the
icon for the DVD/CD drive. The contents of the CD or DVD data disc then
appear in a GUI file manager window. If you insert a DVD movie into the DVD
drive, an appropriate multimedia program opens the DVD.
If you see a DVD/CD-ROM icon on the desktop, right-click that icon for a con-
text menu. From that menu, you can eject the CD or DVD when you are done.
Playing with the Shell
Linux is basically UNIX, and UNIX just doesn’t feel like UNIX unless you can
type cryptic commands in a text terminal. Although GNOME and KDE have
done a lot to bring us into the world of windows, icons, mouse, and pointer
(affectionately known as WIMP), sometimes you’re stuck with nothing but a
plain text screen with a prompt that looks something like this (when I log in
with the username
naba):
naba@linux:~>
You see the text screen most often when something is wrong with the X
Window System, which is essentially the machinery that runs the windows
and menus that you normally see. In those cases, your first reaction might be,
“What do I do now?” And the answer is that you have to work with the shell
and know some of the cryptic Linux commands.
You can prepare for unexpected encounters with the shell by trying out some
Linux commands in a terminal window while you’re in the GNOME or KDE
GUI. After you get the hang of it, you might even keep a terminal window open,
just so you can use one of those cryptic commands simply because it’s faster
than pointing and clicking. (Those two-letter commands do pack some punch!)
Starting the bash shell
Simply put, the shell is the Linux command interpreter — a program that reads
what you type, interprets that text as a command, and does what the com-
mand is supposed to do.
Before you start playing with the shell, open a terminal window. In KDE, the
panel includes an icon that looks like a monitor covered by a sea shell (for a
shell, get it?). When you click that icon, a window with a prompt appears, like
48
Part I: Getting to Know SUSE
Please purchase PDF Split-Merge on www.verypdf.com to remove this watermark.
the one shown in Figure 3-9. That’s a terminal window, and it works just like
an old-fashioned terminal. A shell program is running and ready to accept
any text that you type. You type text, press Enter, and something happens
(depending on what you typed).
In GNOME, choose Programs Menu➪System➪Terminal➪Terminal. That
should then open up a terminal window.
The prompt that you see depends on the shell that runs in that terminal
window. The default Linux shell is called
bash.
Bash understands a whole host of standard Linux commands, which you can
use to look at files, go from one directory to another, see what programs are
running (and who else is logged in), and a whole lot more.
In addition to the Linux commands,
bash can run any program stored in an
executable file.
Bash can also execute shell scripts — text files that contain
Linux commands.
Understanding shell commands
Because a shell interprets what you type, knowing how the shell figures out
the text that you enter is important. All shell commands have this general
format:
command option1 option2 optionN
Such a single line of commands is commonly called a command line. On a com-
mand line, you enter a command followed by one or more optional parameters
Figure 3-9:
You can
type Linux
commands
at the shell
prompt in a
terminal
window.
49
Chapter 3: Starting SUSE for the First Time
Please purchase PDF Split-Merge on www.verypdf.com to remove this watermark.
(or arguments). Such command line options (or command line arguments)
help you specify what you want the command to do.
One basic rule is that you have to use a space or a tab to separate the com-
mand from the options. You also must separate options with a space or a tab.
If you want to use an option that contains embedded spaces, you have to put
that option inside quotation marks. For example, to search for two words of
text in the password file, I enter the following
grep command (grep is one of
those cryptic commands used to search for text in files):
grep “SSH daemon” /etc/passwd
When grep prints the line with those words, it looks like this:
sshd:x:71:65:SSH daemon:/var/lib/sshd:/bin/false
If you created a user account in your name, go ahead and type the grep com-
mand with your name as an argument, but remember to enclose the name
in quotes. For example, here is how I search for my name in the
/etc/
passwd
file:
grep “Naba Barkakati” /etc/passwd
Trying a few Linux commands
While you have the terminal window open, try a few Linux commands just for
fun. I guide you through some random examples to give you a feel for what
you can do at the shell prompt.
To see how long the Linux PC has been up since you last powered it up, type
the following (Note: I show the typed command in bold, followed by the
output from that command.):
uptime
3:52am up 29 days 55:53, 5 users, load average: 0.04,
0.32, 0.38
The part up 29 days, 55:53 tells you that this particular PC has been up
for nearly a month. Hmmm . . . can Windows do that?
To see what version of Linux kernel your system is running, use the
uname
command like this:
uname -srv
50
Part I: Getting to Know SUSE
Please purchase PDF Split-Merge on www.verypdf.com to remove this watermark.
This runs the uname command with three options -s, -r, and -v (these can
be combined as
-srv, as this example shows). The -s option causes uname
to print the name of the kernel, -r prints the kernel release number, and -v
prints the kernel version number. The command generates the following
output on one of my Linux systems:
Linux 2.6.8-24-default #1 Wed Oct 6 09:16:23 UTC 2004
In this case, the system is running Linux kernel version 2.6.8.
To read a file, use the
more command. Here’s an example that displays the
contents of the
/etc/passwd file:
more /etc/passwd
root:x:0:0:root:/root:/bin/bash
bin:x:1:1:bin:/bin:/bin/bash
daemon:x:2:2:Daemon:/sbin:/bin/bash
lp:x:4:7:Printing daemon:/var/spool/lpd:/bin/bash
lines deleted
To see a list of all the programs currently running on the system, use the ps
command, like this:
ps ax
The ps command takes many options and you can provide these options
without the usual dash (
-) prefix. This example uses the a and x options —
the
a option lists all processes that you are running and the x option displays
all the rest of the processes. The net result is that
ps ax prints a list of all
processes running on the system, as shown in the following sample output:
PID TTY STAT TIME COMMAND
1 ? S 0:00 init [5]
2 ? SN 0:00 [ksoftirqd/0]
3 ? S< 0:00 [events/0]
4 ? S< 0:00 [khelper]
5 ? S< 0:00 [netlink/0]
6 ? S< 0:00 [kblockd/0]
31 ? S 0:00 [kapmd]
lines deleted
Amazing how many programs can run on a system even when only you are
logged in as a user, isn’t it?
As you can guess, you can do everything from a shell prompt, but it does take
some getting used to.
51
Chapter 3: Starting SUSE for the First Time
Please purchase PDF Split-Merge on www.verypdf.com to remove this watermark.
Shutting Down
When you’re ready to shut down Linux, you must do so in an orderly manner.
Even if you’re the sole user of a SUSE Linux PC, several other programs are
usually running in the background. Also, operating systems such as Linux try
to optimize the way that they write data to the hard drive. Because hard
drive access is relatively slow (compared with the time needed to access
memory locations), data generally is held in memory and written to the hard
drive in large chunks. Therefore, if you simply turn off the power, you run the
risk that some files aren’t updated properly.
Any user (you don’t even have to be logged in) can shut down the system
from the desktop or from the graphical login screen. In KDE, choose Main
Menu➪Log Out. In GNOME, choose System Menu➪Log Out. A dialog box
appears (Figure 3-10 shows the example from the KDE desktop), providing
the options for restarting or turning off the system, or simply logging out. To
shut down the system, simply select Turn Off Computer (or Shut Down in
GNOME), and click OK. The system then shuts down in an orderly manner.
Figure 3-10:
Shutting
down your
SUSE Linux
system from
the KDE
desktop.
52
Part I: Getting to Know SUSE
Please purchase PDF Split-Merge on www.verypdf.com to remove this watermark.
If you are at the graphical login screen, you can shutdown the system by
selecting the shutdown option from the menus available at the login screen.
As the system shuts down, you see text messages about processes being shut
down. You may be surprised at how many processes exist, even when no one
is explicitly running any programs on the system. If your system does not
automatically power off on shutdown, you can manually turn off the power.
Note that shutting down or rebooting the system may not require
root access
or even the need to log into the system. This is why it’s important to make
sure that physical access to the console is protected adequately so that
anyone who wants to cannot simply walk up to the console and shut down
your system.
53
Chapter 3: Starting SUSE for the First Time
Please purchase PDF Split-Merge on www.verypdf.com to remove this watermark.
54
Part I: Getting to Know SUSE
Please purchase PDF Split-Merge on www.verypdf.com to remove this watermark.