Autodesk Revit Architecture 2011 No Experience Required - part 3 ppsx
Bạn đang xem bản rút gọn của tài liệu. Xem và tải ngay bản đầy đủ của tài liệu tại đây (177.4 KB, 10 trang )
I n t r o d u c t I o n
A
h! Why does one need a big, thick technical book? Well, it is true that the
best way to learn is to just do it! But do you ever just do it and not fully get
it? Books can serve either as the basis for learning or as a supplement for
your learning. No one book will teach you everything you need to know about a
specific application, but you may never learn everything you need to know about
an application without a book. When written appropriately, the book you pur-
chase starts you off using good practices. If you have already started, the book
serves as a desktop reference. And lastly, a book can merely serve as confirma-
tion that you are approaching an application in the correct manner.
Revit Architecture is no exception. Although this application has proven to be
easy to learn and easy to get the feel of, it is still a deep, sometimes complicated
application with many procedures that require step-by-step instruction to fully
understand. And to be honest, some of these features just don’t work in the real
world.
Also, this book has been written by an author who is “in the trenches” using
Revit Architecture, Revit Structure, and Revit MEP simultaneously every day.
So, yes, you could figure out all this information on your own, but sometimes it
is nice to let someone else figure it out for you and pass that knowledge along to
you in the form of a book.
Instead of lengthy paragraphs of text that ultimately lead to nontangible infor-
mation, this book addresses each subject in a step-by-step approach with literally
over a thousand pictures and screenshots to make sure you are on track.
Also, this book uses an actual project and will relate to real-world scenarios.
As you follow the step-by-step procedures in the book, you will be encouraged
to try many procedures on your own, and also to embellish the procedure to fit
your own needs. If you would rather stick to the instructions, this book allows
you to clearly do so as well. The book’s project uses a five-story office building
with a link (corridor) to a three-story multiuse building. The book’s website pro-
vides the model (plus additional families) you will need for each chapter so that
you can just open the book, jump to your chapter of interest, and actually learn
something! Also, this book is flexible enough that you can substitute your own
project if you do not want to follow the book’s examples.
Although there are more than 900 pages, this book does not waste time and
space with examples of other people’s triumphs, but is designed for you to open it
to any random page and learn something.
Introduction
xxii
Who Should Read This Book
Autodesk
®
Revit
®
Architecture 2011: No Experience Required. Does that mean if
you have used Revit you won’t find this book advanced enough? No. This book
is designed for anyone who wishes to learn more about Revit Architecture. Also,
this book is intended for architects, architectural designers, and anyone who is
using a CAD-based platform to produce architectural-based drawings.
What You Need
Building information modeling (BIM) can be tough on hardware. This book rec-
ommends that you have 4GB of RAM with a 4GB processor. Also, you should be
running at least 512MB for your graphics. If you are under these specifications
(within reason), in some cases you will be fine. Just realize, however, that when
your model gets loaded, you could start slowing down and crashing. All Revit
applications are intended to run on a PC-based system. Windows XP or higher is
recommended. If you are running on a 64-bit operating system such as Windows
Vista or Windows 7, be sure to load Revit as 64-bit to take full advantage of the
allocated RAM.
What Is Covered in This Book
Autodesk
®
Revit
®
Architecture 2011: No Experience Required covers the full
gamut of using the software; the book is organized as follows:
Chapter 1: The Revit World Chapter 1 introduces you to the Revit Architecture
2011 interface and jumps right into modeling your first building.
Chapter 2: Creating a Model Chapter 2 starts right off with placing walls, doors,
and windows. Also, this chapter is designed to point you in the right direction in
terms of using reference planes and all-around best practices.
Chapter 3: Creating Views Chapter 3 shows you how to navigate the Revit Project
Browser and how to create new views of the model. Also, you will learn how to cre-
ate specific views such as elevations, sections, callouts, plans, and of course our
favorite, 3D perspectives.
Chapter 4: Working with the Revit Tools In Chapter 4, you will learn how to use
the everyday drafting tools needed in any modeling application. You will become
familiar with such actions as trim, array, move, and copy. Although it seems
remedial, this is one of the most important chapters of the book. It gets you on
your way to the “Revit Feel.”
Introduction
xxiii
Chapter 5: Dimensioning and Annotating In Chapter 5 you will learn how to
annotate your model. This includes adding and setting up dimensions, adding and
setting up text, and using dimensions to physically adjust objects in your model.
Chapter 6: Floors Yes! Just floors. In Chapter 6, you will learn how to place a
floor. You will also learn how to add materials to a floor and how to pitch a floor
to a drain.
Chapter 7: Roofs In Chapter 7 we discuss the ins and outs of placing roofs. You
will learn how to model flat roofs, sloping roofs, pitched roofs, and roof dormers.
In addition, you will learn how to pitch roof insulation to roof drains.
Chapter 8: Structural Items In Chapter 8 you delve into the structural module
of Revit Architecture. The topics we cover include placing structural framing,
placing structural foundations, and creating structural views.
Chapter 9: Ceilings and Interiors Chapter 9 focuses predominately on interior
design. We cover placing and modifying ceilings as well as adding specific mate-
rials to portions of walls and floors. You will also learn how to create soffits.
Chapter 10: Stairs, Ramps, and Railings Chapter 10 focuses on the creation
of circulation items. You will learn how to create a simple U-shaped multistory
staircase to start; then we move on to creating a custom winding staircase. From
there you will learn how to create a custom wood railing. You will be adding
ramps to the model in this chapter as well.
Chapter 11: Schedules and Tags In Chapter 11 you will start bringing the BIM
into your model. This chapter focuses on adding schedules and adding annota-
tion tags to specific objects and materials in your model. Most importantly, in
this chapter you will learn how your model is parameter driven and how these
parameters influence the annotations.
Chapter 12: Detailing In Chapter 12 you will learn how to simply draft in Revit.
The procedures allow you to draft over the top of a Revit-generated section, or
create your own drafting view independent of the model. You will also learn how
to import CAD to use as a detail.
Chapter 13: Creating Specific Views and Match Lines In Chapter 13 you will
learn how to take advantage of the multitude of views you can create, and how
to control the visibility graphics of those views to create plans such as furniture
and dimensional plans.
Chapter 14: Creating Sheets and Printing Chapter 14 explores how to produce
construction documents using Revit. The procedures include creating a new
drawing sheet, adding views to a sheet, creating a title block and a cover sheet,
and plotting these documents.
Introduction
xxiv
Chapter 15: Creating Rooms and Area Plans The focus of Chapter 15 is to cre-
ate rooms and areas. The procedures lead you through the placement of rooms,
and you will learn how to set the properties of those rooms. We also discuss how
to create room separators and how to create gross area plans. This chapter also
guides you through the creation of a color fill floor plan.
Chapter 16: Advanced Wall Topics In Chapter 16 you will focus specifically
on the creation of compound walls. By using the Edit Assembly dialog, you will
learn how to add materials, split walls, and add sweeps and reveals such as para-
pet caps, brick ledges, and brick reveals. Creating stacked walls is also addressed.
Chapter 17: Creating Families Chapter 17 focuses on the topic of creating fami-
lies. The procedures start with a simple wall sweep family, and then move on to
creating a door family with an arched header. You will also learn how to create
an in-place family.
Chapter 18: Site and Topography In Chapter 18 you will learn how to place a
topographical surface into your model. We also discuss how to control point-by-
point elevations in your site. Splitting and then creating subregions to create
swales and berms will be covered. You will also learn how to utilize an imported
CAD site plan and place a toposurface over the top of the CAD lines. We also
explore rotating your project to true north.
Chapter 19: Rendering and Presentation In Chapter 19 you will learn how to
use the Revit rendering tools using the mental ray rendering engine built into
the Revit GUI. This chapter also shows you how to create walkthroughs as well
as solar studies.
Chapter 20: Importing and Coordinating Revit Models Chapter 20 focuses on
the ins and outs (pun intended) of importing and exporting CAD formats as well
as linking Revit Structure models. The procedures include configuring CAD lay-
ering settings as well as linking and importing AutoCAD for plans and sections.
You will also learn how to link Revit Structure and perform a copy/monitor
operation as well as use the Revit collision detection.
Chapter 21: Phasing and Design Options Chapter 21 explains how to create an
existing floor plan, then moves through demolition into new construction. You
will also learn how to create alternates using design options.
Chapter 22: Project Collaboration In Chapter 22 you will learn how to use Revit
in a multiuser environment. The procedures in the book will lead you through
activating worksharing, and then creating a central model. You will then move
on to creating local user files as well as saving to central and placing requests to
relinquish.
Introduction
xxv
Chapter 23: BIM Management Our final chapter, Chapter 23, shows you how
to create a Revit template you can use at the start of each Revit project. You will
also learn how to configure settings such as line weights, dimensions, text, and
custom tags, such as levels structural grids and view titles.
Included with the book are Revit Architecture project files that follow along with
the instruction. Each chapter will have one or more actual Revit models completed
up to the point of the instruction of that specific chapter—or even that specific sec-
tion of the chapter—to allow the reader to jump in at any moment. Also included
with the book are custom families that accompany the lessons, and additional fami-
lies and projects that can be downloaded as a bonus. You can download the accom-
panying files at www.sybex.com/go/revit2011ner.
Contacting the Author
As you are reading along, please feel free to contact me at , and
I will be glad to answer any question you have. In addition, if you would like me
to come speak or train at your firm, feel free to give me a shout. You can also visit
my company’s website at www.cscos.com and click the BIM link. You can also go
directly to www.bimnation.com.
Sybex strives to keep you supplied with the latest tools and information you need
for your work. Please check the website at www.sybex.com, where we’ll post addi-
tional content and updates that supplement this book if the need arises. Enter Revit
Architecture in the Search box (or type the book’s ISBN—9780470610114), and
click Go to get to the book’s update page.
CHAPTER 1
The Revit World
Before we get started, I think we should set the record straight. I’m sure
you have seen plenty of presentations on how wonderful and versatile this 3D
Revit revolution thing is. And I’m sure you may be thinking, “This all seems
way too complicated for what I do. Why do I need 3D anyway?”
The answer to that question is: you don’t. What do you do to get a job out —
that is, after the presentation has run its course and you are awarded the proj-
ect? Your first step is to redraw the plans. Next comes the detail round-up game
we have all come to love: we pull the specs together, and then we plot. This is
quite a simple process, and guess what? It works.
Well, it has worked up until this 3D thing showed up. Now the process
seems to be this convoluted approach in which we have no real clue where
things come from, drawings don’t look very good, and getting a drawing out
the door takes three times as long.
The Revit Architecture interface
The Project Browser
File types and families
Chapter 1 • The Revit World
2
The Revit Architecture Interface
Toto, we are not in CAD anymore!
If you just bought this book, then welcome to the Revit world. In Revit, you will
find that the vast majority of the processes you encounter are in a flat 2D platform.
Instead of drafting, you are placing components into the model. Yes, these compo-
nents have a so-called third dimension to them, but a logical methodology drives
the process. If you need to see the model in 3D, it is simply a click away. That being
said, remember this: there is a big difference between 3D drafting and modeling.
NOTE
The preceding paragraph will be the longest one of the book. This
book is designed to cut to the chase and show you how to use Revit Architecture
in a step-by-step fashion without having to read through paragraph after para-
graph just to find the answer you are looking for. Datasets are provided at the
book’s accompanying website (www.sybex.com/go/revit2011ner), but you
can also use your own model as you go through the book. If you do not wish to
read this book cover to cover, don’t! Although I recommend going from front to
back, you can use the book as a desk reference by jumping to a desired topic.
The datasets will be added in phases to accommodate this type of usage. Either
way, get ready to learn Revit Architecture!
With that preamble behind us, let’s get on with it.
First of all, Revit has no command prompt and no crosshairs. Stop! Don’t go
away just yet. You will get used to it, I promise. Unlike most CAD applications,
Revit Architecture is heavily pared down, so to speak. It’s this way for a reason.
Revit was designed for architects and architectural designers. You do not need
every command that a mechanical engineer would need. An electrical engineer
would not need the functionality that an architect would require.
What you will find as you start getting comfortable with Revit is that there are
many, many choices and options behind each command.
Let’s start at the beginning:
1. To open Revit Architecture, click the icon on your desktop (see
Figure 1.1), or choose Start
➢ All Programs ➢ Autodesk ➢ Autodesk
Revit Architecture 2011
➢ Autodesk Revit Architecture 2011 (see
Figure 1.2).
The Revit Architecture Interface
3
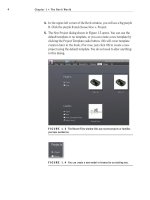
2. After you start Revit, you see the Recent Files window shown in
Figure 1.3. The top row lists any projects you have been working on;
the bottom row lists any families you have been working on.
FIGURE 1.1 You can launch Revit Architecture from the desktop icon.
FIGURE 1.2 You can also launch Revit Architecture using the Windows
Start menu (this shows the Windows Vista operating system).
3. If you are firing up Revit for the first time, both of these rows will
be blank. At the bottom of each row, you can choose to create a new
model or open an existing one (see Figure 1.4).