Adobe Illustrator CS5 bible PHẦN 5 pptx
Bạn đang xem bản rút gọn của tài liệu. Xem và tải ngay bản đầy đủ của tài liệu tại đây (1.19 MB, 68 trang )
Part II: Putting Illustrator to Work
258
Cross-Reference
For more on creating and modifying text, see Chapter 9.
Using a stacking order for strokes and fills
Try as you might, you can’t change the front/back relationship of strokes and fills. Strokes are
always in front of fills for the same path. To get the fill to cover or overlap the stroke, you must
copy the path, use the Paste in Front command by choosing Edit ➪ Paste in Front or pressing
Ctrl+F (Ô+F), and then remove the stroke from the path that you pasted.
Cross-Reference
For more on strokes and fills, see Chapter 10.
Pasting objects in front of and behind selected objects
Choosing Edit ➪ Paste in Front or pressing Ctrl+F (Ô+F) pastes any objects you have on the
Clipboard in front of any selected objects or at the top of the current layer if no objects are selected.
Choosing Edit ➪ Paste in Back or pressing Ctrl+B (Ô+B) pastes any objects on the Clipboard
behind any selected objects or at the bottom of the current layer if no objects are selected. When
you paste an object in front or behind, you’re also pasting the attributes of that object (such as the
stroke and fill).
In addition, both Paste in Front and Paste in Back paste objects in the same location as the copied
object, even from document to document. If the documents are different sizes, Illustrator pastes
them in the same location relative to the center of each document. If the Clipboard is empty, or if
type selected with a Type tool is on the Clipboard, these options aren’t available.
Note
Copied items in Illustrator retain their layer names and related layer information. When you copy an item
that’s on layer X-Flies and paste that item in another document that contains an X-Flies layer, the item appears
on the X-Flies layer. If the document doesn’t contain that layer, Illustrator creates a new layer with that name
and then the item appears on that layer. This works only if you select the Paste Remembers Layers option item
from the Layers panel’s popup menu.
Creating and Deconstructing Groups
Grouping is the process of putting together a series of objects that need to remain spatially constant
in relationship to each other. You generally group objects if you intend to move them, flatten them,
or perform one effect on all of them at once. Your group may contain as little as one path to an
unlimited number of objects. You generally ungroup a group of objects when you no longer need
the grouping. For example, you may ungroup objects so that you can edit one of them. When you
have objects that go together, such as the figure of a person you created, you may want to group
all parts of that person to keep the figure neatly together. That way, when you want to move the
13_584750-ch08.indd 25813_584750-ch08.indd 258 6/3/10 7:50 PM6/3/10 7:50 PM
Chapter 8: Using Illustrator to Organize Objects
259
person, all pieces move together as one unit. Often, you try to move a collection of objects, and
you miss one or more pieces. When you group the pieces together, they all move together when
one object is selected. Ungrouping is necessary when you want to separate the objects to make
them a part of another group or you want them to stand individually. When applying transforma-
tions or special effects, you should ungroup them so that a specific object can have the effect
applied.
Grouping objects
In any illustration, objects are much easier to manipulate if they’re grouped. Grouping similar areas
is helpful for moving entire areas forward or backward as well as for doing any type of horizontal
or vertical movement or transformation upon a set of objects. Suppose that you drew a tree with a
bunch of apples. You want to group the apples together so you can edit the apples all at one time,
such as changing the color or the size.
To group objects together, follow these steps:
1. Select the items you want to group with any of the selection tools. For more on the
selection tools, see Chapter 6.
2. Choose Object ➪ Group or press Ctrl+G (Ô+G). This command makes the separate
objects stay together when you select them.
Now, when you select any object in a group with the Selection tool, Illustrator selects all the
objects in that group and makes all the points in a path solid (selected).
Not only can you group several objects together but you can also group groups together to form a
group of groups in which there’s a hierarchical series of grouped groups. In addition, groups can
be grouped to individual objects or to several other objects.
After a set of objects or groups is grouped together, grouping it again produces no effect. The
computer doesn’t beep at you, display a dialog box, or otherwise indicate that the objects or
groups you’re attempting to group together are already grouped. Of course, it never hurts to again
choose Object ➪ Group if you’re not sure whether they’re grouped. If they weren’t grouped before,
they now are, and if they were grouped before, nothing unusual or unexpected happens.
Caution
If you group several objects that are on different layers, all the objects move to the topmost layer that contains
one of the grouped objects and form a group there. This means that the perceived stacking order may change,
which can change the appearance of your Illustration.
Ungrouping
If you want to apply a specific effect to one object in the group, you have to ungroup the object so
the whole group isn’t affected. Suppose, in the apple tree, that you want to make one apple really
big and rotten looking. First, ungroup the apples, regroup all but one of the other apples (to keep
them organized), and then apply the effect to just one apple. To ungroup groups (separate them
into individual paths and objects), follow these steps:
13_584750-ch08.indd 25913_584750-ch08.indd 259 6/3/10 7:50 PM6/3/10 7:50 PM
Part II: Putting Illustrator to Work
260
1. Select the group with either the Group Selection tool or the Selection tool.
2. Choose Object ➪ Ungroup or press Ctrl+Shift+G (Ô+Shift+G). Any selected groups
become ungrouped.
Ungrouping, like grouping, works on one set of groups at a time. For example, if you have two
groups that are grouped together, ungrouping that outer group results in the two original groups.
If you again choose Ungroup, Illustrator also ungroups those two groups. Another way to understand
grouping is to think of nesting. Each operation adds or subtracts only one level of nesting.
Tip
When you absolutely don’t want anything in a group grouped with anything else — and you suspect that there
may be several mini-groups within the group you have selected — simply press Ctrl+Shift+G (Ô+Shift+G)
several times. You don’t need to select the subgroups individually to ungroup them. To eliminate all the groups
in your illustration, choose Select ➪ All or press Ctrl+A (Ô+A) and then proceed to ungroup by pressing
Ctrl+Shift+G (Ô+Shift+G) several times. To remove certain objects from a group or compound path, select just
those objects, cut them, and then Paste in Front (or Paste in Back).
Layering Your Artwork
Illustrator’s layering feature provides an easy and powerful way to separate artwork into individual
sections. A layer is a separate section of the document that’s on its own level or is above, under, or
in between other layers but never on the same level as another layer. You can view these sections
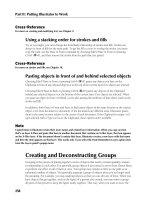
separately, locked, hidden, or rearranged around each other. Figure 8.4 shows the Layers panel
displaying various layers that I use for my comic strips. In this case, the layers have been named to
make it easier to keep track of what is on each layer.
Having the various elements of your illustration on separate layers helps you organize them. Each
area of the illustration has its own layer. You use these layers to create the stacking order as well as
to keep the text on one layer for easier editing. Artists use layers to organize the different grouped
objects, shadows, borders, and backgrounds. You can also turn layers off and on to give a client
different options on a logo, Web site, or business theme. Using the Layers panel, you can create,
control, and manipulate layers to suit your needs. Another use for layers is to trace placed images.
Cross-Reference
For more on Live Trace, see Chapter 13.
For my comic strip, I pretty much always keep the title and frames, ground, and sky layers locked
so I don’t accidentally move the elements on those layers when I marquee-select objects. Keeping
distinct elements on separate layers, such as the lines for text and the characters, ensures the
proper stacking order at all times, so there’s no chance a line becomes hidden behind a character.
The biggest advantage for layers is that you can color-code them to further organize your work. By
choosing Select ➪ All or pressing Ctrl+A (Ô+A), you can quickly see which objects are on which
layers just by the color of the paths and points. The selection boxes for each layer match the color
13_584750-ch08.indd 26013_584750-ch08.indd 260 6/3/10 7:50 PM6/3/10 7:50 PM
Chapter 8: Using Illustrator to Organize Objects
261
shown in the right column of the Layers panel (which is displayed when objects on that layer are
selected). Using the same colors for all layers makes you miss out on half the power of layers. Use
vivid, distinct colors for each layer.
Of course, having too many layers can pose problems. Layers take up RAM and computer power.
Therefore, the more layers you have, the slower your system operates. For this reason, you should
create layers only when they help you better organize an illustration. Even setting up one addi-
tional layer can dramatically ease selection and moving problems.
Tip
You can create as many layers as you want, up to the limitations of application memory. Suffice it to say,
however, that the more layers you create after a certain point (several hundred), the slower Illustrator runs.
FIGURE 8.4
The Layers panel for my comic strip. Keeping elements on separate layers allows for faster editing and
fewer mistakes.
Toggle Visibility
Delete Selection
Create New Layer
SublayerMake/Release Clipping Mask
Display Sublayers
Toggle Lock
Getting started with layers
After you realize that you need to use layers, what do you do? The only way to manipulate, create,
and delete layers is by using the Layers panel. If the Layers panel isn’t showing, choose Window ➪
Layers or press F7. When you open the Layers panel for the first time in a new document, you see
only Layer 1 listed.
13_584750-ch08.indd 26113_584750-ch08.indd 261 6/3/10 7:50 PM6/3/10 7:50 PM
Part II: Putting Illustrator to Work
262
To create a new layer, follow these steps:
1. Click the Create New Layer button at the bottom of the panel. The button looks like a
piece of paper with the bottom-left corner folded over and is to the left of the trash icon in
Figure 8.4. You can also click the triangle in the upper right of the panel to display a popup
menu. Clicking the first item, New Layer, displays the Layer Options dialog box, as shown
in Figure 8.5. You can also display this dialog box by double-clicking a layer’s name.
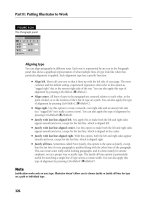
2. Change the name of your layer. In the Layer Options dialog box, the name of the new
layer is highlighted. To change this name, type a new name to replace the generic name.
FIGURE 8.5
The Layer Options dialog box lets you name the layer.
3. Select any of the options that you want for this layer. The options below the name in
the Layer Options dialog box affect how you view the layer and make it function. The
options are as follows:
l
Color. The first option is the color of the paths and points when objects on that layer
are selected. Choose one of the preset colors from the drop-down list (popup menu)
or select the Other option to use a Custom Color. Each time you create a new layer, a
different color (going in order from the list) is applied to that layer.
l
Template. Use this option when you want to trace something but not have it print. If
you click the Template check box, Illustrator automatically deselects the Print option
and allows the Dim Images option.
l
Show. This option makes the objects in the layer visible.
l
Preview. This option lets you see a preview of objects on this layer.
l
Lock. This option prevents objects on this layer from being selected and prevents any
objects from being put on this layer.
l
Print. This option allows you to print objects that are on this layer.
l
Dim Images to. This option dims any placed images on the layer. The default value is
50% lighter or you can type a value.
13_584750-ch08.indd 26213_584750-ch08.indd 262 6/3/10 7:50 PM6/3/10 7:50 PM
Chapter 8: Using Illustrator to Organize Objects
263
4. Click OK. The new layer appears above the existing layer in the Layers panel.
If you want the objects on the new layer to appear below the objects on the existing layer, click the
name of the new layer and then drag it below the existing layer. Be careful not to drop the new layer
on top of the existing layer — doing so makes the new layer into a sublayer of the existing layer.
To modify the existing layer, double-click it. The Layer Options dialog box opens again. Make the
changes and select the options that you want for this layer and then click OK.
Using the Layers panel
The Layers panel is the control center where all layer-related activities take place. Most activities
occur in the main section of the Layers panel, which is always visible when the Layers panel is
on-screen. Other activities take place in the popup menu that appears when you click the triangle
in the upper right of the panel.
Illustrator has wonderful options in the Layers panel. First is the capability to thin the display of
layers in the panel for those illustrations with tons of layers. Second is the capability to drag to a
hidden layer. Third is that Illustrator displays in italic those layers that you don’t have set to print
so that you can see quickly what will and what won’t print.
Click the Close button to close the Layers panel. You can also close the Layers panel by choosing
Window ➪ Layers or by pressing F7. To bring the Layers panel back to the screen, choose
Window ➪ Layers or press F7 again.
Using the Layers panel columns
Aside from the standard Minimize and Close (Zoom and Close) buttons at the top of the panel, the
following is a list of the options in the Layers panel:
l
Show/Hide column. The far-left column controls how you view each layer. If this column
has a solid eye icon, the layer is in Preview mode. The hollow eye icon means that the
layer is in Outline mode. No eye indicates a hidden layer. Clicking a solid or hollow eye
icon toggles it from showing to hidden. Clicking in the Show/Hide Column when no eye
is present shows the layer. Pressing Ctrl (Ô) and clicking the eye toggles it from solid
(Preview mode) to hollow (Outline mode) and then back again. Pressing Alt (Option) and
clicking an eye shows or hides all other layers. Layers that are set as template layers dis-
play a little icon with an overlaid square, triangle, and ellipse to indicate a template layer.
l
Lock/Unlock column. The second column is the Lock/Unlock column. The lock icon
indicates whether a layer is locked. An empty column means that the layer isn’t locked. A
lock icon means that the layer is locked from use.
l
Layer Names. The column in the center of the panel lists the names of all the layers in the
document. When no documents are open, no layers are listed. If one layer is highlighted
and has a triangle in the upper-right corner, that layer is active. All new objects are created
on the active layer. You can select a range of layers by Shift+clicking the first and last
layers in the range. Pressing Ctrl (Ô) allows you to select or deselect additional layers.
The layer at the top of the column is the layer that’s on top of all the other layers. The
13_584750-ch08.indd 26313_584750-ch08.indd 263 6/3/10 7:50 PM6/3/10 7:50 PM
Part II: Putting Illustrator to Work
264
layer at the bottom of the column is the layer that’s at the bottom of all the other layers.
To move a layer, click and drag it up or down. As you drag, a dark horizontal line indi-
cates where the layer is placed when you release the mouse button.
Tip
Ctrl+Alt+click (Ô+Option+click) on a specific eye icon to turn all layers into Outline mode, except the
selected layer.
Tip
You can undo all layer changes after they happen by choosing Edit ➪ Undo or by pressing Ctrl+Z (Ô+Z)
immediately afterward.
l
Target icon. When an object is selected, the target icon (to the right of the layer name)
displays as a double ring. It appears as a single ring when the object is not selected. You
can also click the icon to select the object.
l
Object status. To the right of the target icon is the object status of the layer. If a square
appears in that column, at least one object on that layer is selected.
Using the Layers panel buttons
The four buttons along the bottom of the Layers panel make layer manipulation very easy. This
section explains what these buttons do:
l
Make/Release Clipping Mask. This button, which looks like an overlapping rectangle
and circle, lets you create a clipping mask in the layer. The topmost object in the layer acts
as the masking shape. The difference between using Make/Release Clipping Mask from the
Layers panel rather than choosing Object ➪ Clipping Mask ➪ Make is that the objects
won’t be grouped when using the Layers panel.
Cross-Reference
For more on clipping masks, see Chapter 12.
l
Create New Sublayer. You use this button, which looks like an arrow pointing to a piece
of paper with the bottom-left corner turned down, to add sublayers. To do so, select the
layer and then click the Create New Sublayer button or choose Create New Sublayer from
the popup menu in the Layers panel. You can have as many sublayers inside a layer as you
want. To see the sublayers, click the triangle to the left of the layer name. You can also
change a layer into a sublayer by dragging it under the layer you want it to go to. Figure
8.6 shows the sublayers within a layer. A sublayer is indicated by brackets (< >) and is
indented. Some sublayers have a triangle indicating that there are more sublayers within
that sublayer. The sublayers also tell you what is in that layer, such as <Path>,
<Compound Path>, and so on.
l
Create New Layer. Clicking this button, which looks like a piece of paper with the bottom-
left corner turned down, creates a new layer instantly, without the New Layer dialog box
appearing. If you press Alt (Option) and then click the New Layer button, Illustrator
13_584750-ch08.indd 26413_584750-ch08.indd 264 6/3/10 7:50 PM6/3/10 7:50 PM
Chapter 8: Using Illustrator to Organize Objects
265
creates a new layer by way of the Layer Options dialog box. Dragging a layer to the New
Layer button duplicates that layer and everything on it.
l
Delete Selection. Clicking this button, which looks like a trash can, deletes the selected
layers. If there’s art on a layer that’s about to be deleted, a dialog box appears to ensure
that you really want to delete that layer; Figure 8.7 shows the warning you receive. Alt
(Option)+clicking the trash icon deletes selected layers without a warning dialog box,
whether or not art is on the selected layers. You can also drag layers to the trash icon;
Illustrator deletes the layers without a warning dialog box.
FIGURE 8.6
The sublayers of a layered illustration show you the document layout.
FIGURE 8.7
If you attempt to delete a selected layer that contains artwork, Illustrator warns you
before actually deleting the layer.
Moving and layers
You can move selected objects to another layer. A selected object appears on its layer with a square
in the upper-right corner of that layer. Dragging that square to another layer moves the selected
object to that layer. Figure 8.8 shows a selection marker being dragged to another layer. You can
drag only to a layer that isn’t hidden or locked. Only one object at a time can be moved to another
layer.
13_584750-ch08.indd 26513_584750-ch08.indd 265 6/3/10 7:50 PM6/3/10 7:50 PM
Part II: Putting Illustrator to Work
266
FIGURE 8.8
The selected object is being moved to another layer.
This box shows the items being dragged.
Using the Layers panel’s menu
Clicking the triangle in the upper right of the Layers panel displays a menu that shows the different
options that are available relative to the selected layers; Figure 8.9 shows this menu. These options
are available:
l
New Layer. This option creates a new layer above the currently selected layer, or, if no
layer is selected, at the top of the list. When you select this option, the Layer Options
dialog box opens. When you create a new layer, Illustrator automatically assigns the next
color in the color list.
Tip
If you press Alt (Option) before you click the menu triangle, the first menu item reads New Layer Above First
Layer or New Layer Above whatever the name of the active layer is.
l
New Sublayer. This option creates a new sublayer below the selected layer.
l
Duplicate Layer. This option duplicates selected layers, along with any objects that are on
those layers. You can also duplicate layers by dragging them to the New Layer icon at the
bottom of the Layers panel.
l
Delete Layer. This option deletes the layer and any artwork on the layer. If the layer you
want to delete contains artwork, a dialog box warns you that you’re about to delete it. If
one or more objects are selected, the menu says Delete Selection. If you select several
layers, the entry reads Delete Layers, and all selected layers are deleted. You can undo
layer deletions using the Edit ➪ Undo command.
13_584750-ch08.indd 26613_584750-ch08.indd 266 6/3/10 7:50 PM6/3/10 7:50 PM
Chapter 8: Using Illustrator to Organize Objects
267
l
Options for Layer. This option is called Options for whatever the name of the active layer
is. The menu item reads Options for Selection if you select more than one layer. Clicking
Options for Selection displays the Layer Options dialog box. If more than one layer is
selected, the layer options affect all selected layers.
l
Make/Release Clipping Mask. This option creates a clipping mask in the layer. The
topmost object in the layer acts as the masking shape.
l
Locate Object. Use this to find where an object is located in the Layers panel. Choose an
object in the document and then select this option to see where it is in the Layers panel.
l
Merge Selected. This option combines selected layers into one. Merging layers does two
important things: First, in just one step, it places art together that you want on the same
layer. Second, it automatically eliminates all those empty layers.
l
Flatten Artwork. This option takes all your layers and combines them into one layer.
l
Collect in New Layer. This option moves the selected objects to a new layer.
l
Release to Layers (Sequence). Use this option to move the selected objects to new
individual layers.
l
Release to Layers (Build). Use this option to move the selected objects to layers in a
cumulative sequence. You mainly use this option to create animation sequences where the
first layer contains the first object, the second layer contains the first and second objects,
the third layer contains the first three objects, and so on.
l
Reverse Order. Use this to reverse the stacking order of the selected layers. The layers
must be adjoining in the Layers panel.
l
Template. You use this option to make your selection a template.
l
Hide Others. This option hides all the layers except the selected ones.
l
Outline Others/Preview All Layers. This option changes all unselected layers to Outline
view or changes all unselected layers to Preview view.
l
Lock Others/Unlock All Layers. This option locks all layers except the selected ones or
unlocks all layers except the selected ones.
l
Paste Remembers Layers. This option causes Illustrator to paste all objects on the layer
from which you copied them, regardless of which layer is currently active. Deselecting this
menu item causes objects on the Clipboard to be pasted on the current layer.
l
Panel Options. Use this option to change the Row Size, Thumbnail views, and whether to
Show Layers Only.
Tip
Double-clicking a layer name displays the Layer Options dialog box.
13_584750-ch08.indd 26713_584750-ch08.indd 267 6/3/10 7:50 PM6/3/10 7:50 PM
Part II: Putting Illustrator to Work
268
FIGURE 8.9
The Layers panel’s menu gives you more options for working with layers.
Working with Templates in Illustrator
It’s often much easier to create artwork in Illustrator by starting with something to trace, whether
it’s a logo, a floor plan, or your cousin Fred’s disproportionate profile. Even the best artists use
some form of template when they draw to keep proportions consistent, to get angles just right, and
for other reasons that help them to achieve the best possible results.
This section discusses methods and techniques for manually tracing different types of artwork
within Illustrator. First, you place an image — the image that you eventually want to trace — on a
layer, which is your template layer. Next, you use the template layer to trace your image.
Cross-Reference
For more on Live Trace, see Chapter 13.
Placing a template on a layer
You can create a template in Illustrator by placing any image into a template layer. That image can
then be used for tracing or as a guide for creating or adjusting artwork.
13_584750-ch08.indd 26813_584750-ch08.indd 268 6/3/10 7:50 PM6/3/10 7:50 PM
Chapter 8: Using Illustrator to Organize Objects
269
Follow these steps to create a template layer:
1. Double-click the layer that you want to modify. The Layer Options dialog box opens.
2. In the Layer Options dialog box, click the Template check box. By default, the Dim
Images check box is selected and all other options are grayed out.
3. Type a value in the Dim Images text field. The lower the percent value, the lighter the
image appears in Illustrator.
4. Click OK to apply the change. Illustrator creates a template layer from the image you
selected.
Note
Paths that you place on template layers don’t appear when they’re selected. Instead, an icon appears in the
Layers panel’s view column to indicate that the current layer is a template layer. Template layers don’t print.
Tip
You can make any vector artwork into a template by rasterizing it and then placing that layer into a template
layer.
Figure 8.10 shows an image before and after dimming.
Placed images work well as templates because their resolutions are independent of the Illustrator
document. You can scale placed images up or down, changing their on-screen resolution as you
change their size. For example, if you scale a 72 dpi (dots per inch) image down to one-fourth of
its imported size (making the dpi of the placed image 4 × 72, or 288 dpi), you can zoom in on the
image in Illustrator at 400%. At 400%, the placed image still has a 72 dpi resolution because
one-fourth of 288 dpi is 72 dpi. The more you increase the placed image’s dpi by scaling it down,
the more you can zoom in to see the details of the image. Here’s another plus: A placed image
template is a full-color template that keeps all the shading and colors and allows you to see all the
fine details easily. That way, you can trace all the tiny details that the color brings out.
Using a template to trace an image
Now that you have your template (placed image) all set up, you’re ready to trace it — or so you
would think. You can go about tracing in lots of different ways, and I include the best of the best
techniques in this section to help you muddle through this mess.
You can trace templates in two ways: manually and automatically. Manually tracing consists of
using the Pencil and Pen tools to tediously trace the edges of a template — often a very time-
consuming task. You manually trace an image when you have lots of time on your hands and when
you want to retain every single detail of the traced image. As an alternative, you can use the Live
Trace function, as discussed in Chapter 13, to speed up the process.
13_584750-ch08.indd 26913_584750-ch08.indd 269 6/3/10 7:50 PM6/3/10 7:50 PM
Part II: Putting Illustrator to Work
270
FIGURE 8.10
The original image (left) and after dimming (right)
Some designers prefer manually tracing templates. Using the Pen and Pencil tools allows illustrators
to add detail, remove oddities, and change curves, angles, and so on, to their satisfaction. Using a
pressure-sensitive tablet makes for clean, accurate tracing. The Pencil tool is great to use when
creating more bumpy lines, as in map drawing. The Pen tool is fantastic for creating smoother,
more accurate lines.
Cross-Reference
For more on using the Pen and Pencil tools, see Chapter 4.
Note
If you use a pressure-sensitive drawing tablet, you may find that manually tracing a printed copy of an image
that you place under the clear plastic overlay on the surface of the tablet is easier than attempting to trace the
image on the screen. You may need to experiment to see which method best suits your working style.
13_584750-ch08.indd 27013_584750-ch08.indd 270 6/3/10 7:50 PM6/3/10 7:50 PM
Chapter 8: Using Illustrator to Organize Objects
271
Using Align and Distribute
The Align panel contains several buttons for aligning and distributing objects with a simple click of
a button. Align treats paths, type objects, and groups as single objects, allowing for quite a bit of
flexibility when aligning and distributing. Aligning objects moves them to line up along a specified
area (horizontal left, horizontal middle, horizontal right, vertical top, vertical center, and vertical
bottom). Select the objects first; then choose an alignment. Figure 8.11 shows a bunch of objects
before and after being horizontally aligned. Distribute takes the selected objects and evenly moves
them a specified amount from each other (vertical distribute top, vertical distribute center, vertical
distribute bottom, horizontal distribute left, horizontal distribute center, and horizontal distribute
right).
FIGURE 8.11
Objects before horizontal alignment (top) and after (bottom)
To use the Align panel, follow these steps:
1. Select the objects you want to align and/or distribute. For more on selecting objects,
see Chapter 6.
2. Click the appropriate button in the panel. The panel has two areas: Align Objects and
Distribute Objects:
13_584750-ch08.indd 27113_584750-ch08.indd 271 6/3/10 7:50 PM6/3/10 7:50 PM
Part II: Putting Illustrator to Work
272
l
The Align area. In order from left to right, the buttons in this area are Horizontal
Align Left, Horizontal Align Center, Horizontal Align Right, Vertical Align Top,
Vertical Align Center, and Vertical Align Bottom.
l
The Distribute areas. In order from left to right, the buttons in this area are Vertical
Distribute Top, Vertical Distribute Center, Vertical Distribute Bottom, Horizontal
Distribute Left, Horizontal Distribute Center, and Horizontal Distribute Right.
Tip
Each click in the panel counts as a change in Illustrator, which means that if you click 20 times, you need to
undo 20 times to return to where you started.
Measuring an Image
So, you’re drawing the blueprints for that new civic center downtown, and your boss wants
everything to scale. Wouldn’t it be great if Illustrator helped you with your gargantuan task? But
wait! It does! You can measure objects or distances between objects in Illustrator in several ways:
l
Using the Measure tool
l
Using the Transform panel
l
Using the rulers along the side of the document window
l
Placing objects whose dimensions are known against the edges
l
Using Offset Path
l
Eyeballing it (popular since the first artist painted his recollections of the preceding day’s
battle with the saber-toothed animals of his time)
Different methods of measuring are appropriate for different needs. For example, you want to use
the Measure tool to check the accuracy between objects or the size of the objects. When using
the Transform panel, you can type exact measurements of scaling, moving, rotating, shear, and
reflecting. The rulers let you drag out guidelines for keeping your objects accurately sized and
aligned. Offset Path duplicates the selected path, offsetting it from the original by the specified
distance. Eyeballing is fine as long as accuracy isn’t a condition of your illustration.
The default unit of measure for all the measurement methods in the preceding list is points. Before
I discuss the various ways to measure, I want to mention how to change units.
Changing the measurement units
The default of using points for measurement is great for type, but when was the last time your art
director said, “I’d like you to design a 360-point × 288-point ad and make the logo at least 144
points high.” And your grandmother isn’t likely to say to you, “Gosh, you must be at least 5,600
points tall, maybe taller. You’ve grown at least 100 points since I last saw you. Does your mother
let you wear that to school?!”
13_584750-ch08.indd 27213_584750-ch08.indd 272 6/3/10 7:50 PM6/3/10 7:50 PM
Chapter 8: Using Illustrator to Organize Objects
273
Points don’t work for everything, so Adobe lets you change the measurement units to picas, inches,
centimeters, millimeters, or pixels. The way to choose from these measurements is to temporarily
indicate a different unit of measurement each time you type a value by appending a character or
two to the end of your numerical value.
In the metric system, there are 100 centimeters in a meter and 10 millimeters in a centimeter. The
other system, which is much more significant to Illustrator users, is the pica/point system. When
the pica measurement system is selected in the Units & Display Performance section of the
Preferences dialog box, measurements are displayed using the common (common to typesetters
and designers, anyway) system of picas followed by points. So, a distance of 3 picas and 6 points is
displayed as 3p6. Such a measurement is displayed as 42 points using the point system.
You can change to a different unit of measure in one of three ways:
l
Using the Preferences dialog box. Choose Edit (Illustrator) ➪ Preferences ➪ Units &
Display Performance and then select the measurement system you want by using the
General list box. This permanently alters your measurement units. In other words, all
dialog boxes in all new documents express their measurements in the specified units, not
points (unless you choose points).
l
Using the Document Setup menu. Choose File ➪ Document Setup and then choose the
appropriate unit of measure from the Units list box. This changes the units in that docu-
ment only.
l
Using any dialog box. Type the appropriate unit abbreviation, as listed in Table 8.1, after
the number in whatever dialog box you open, even if the text fields show points.
Illustrator does conversions from points to inches and centimeters (and vice versa) on the
fly, so after you type a point value, the program converts the points into inches as soon
as you press Tab. This little feature can be an excellent way for you to become more
comfortable with points and picas. To get picas, type p0 after the number.
TABLE 8.1
Illustrator Unit Abbreviations
Unit of Measure Abbreviation Example
Inches inch, in, or " For 2 inches, type 2 inch, 2 in, or 2".
Millimeters mm For 2 millimeters, type 2 mm.
Centimeters cm For 2 centimeters, type 2 cm.
Points pt For 2 points, type 2 pt or 0p2.
Picas p For 2 picas, type 2p.
Picas and points p For 2 picas 6 points, type 2p6.
Pixels px For 2 pixels, type 2px.
13_584750-ch08.indd 27313_584750-ch08.indd 273 6/3/10 7:50 PM6/3/10 7:50 PM
Part II: Putting Illustrator to Work
274
A quick refresher on measurement units and their relations:
1" = 6p = 72 pt = 25.4 mm = 2.54 cm
.16667" = 1p = 12 pt = 4.2 mm = .42 cm
.01389" = 0p1 = 1 pt = .35 mm = .035 cm
.03931" = p2.83 = 2.83 pt = 1 mm = .1 cm
.39305" = 2p4.35 = 28.35 pt = 10 mm = 1 cm
Pixels can’t be directly related to the other measurement units because the size of each pixel varies
according to screen resolution.
Using the Measure tool
The fastest way to obtain a precise, exact measurement in Illustrator is to use the Measure tool, as
shown in Figure 8.12. Follow these steps to use the tool:
1. Click and hold the Eyedropper tool. The Measure tool is a tool found with the
Eyedropper and Paint Bucket tools.
2. Click the Measure tool. The icon looks like a ruler.
3. Click an object where you want to begin measuring with the Measure tool. The Info
panel of the Measure tool opens.
4. Click where you want to end your measurement. The Info panel shows the distance
between the location first clicked and the next location clicked or the distance between
where the tool was first clicked and where the mouse was released after dragging.
Double-clicking the Measure tool displays the Guides & Grid section of the Preferences dialog box,
where you can set the distance between grid lines if you use the grid to help in making more
accurate drawings. For more on the Guides & Grid options, see the section on this topic later in
this chapter.
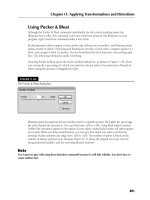
You can use the measurements that you obtain with the Measure tool to move your object the
distance you want. As soon as the Measure tool measures a distance, it routes that information to
the Move dialog box, as shown in Figure 8.13. The next time you open the Move dialog box, it
holds the values sent by the Measure tool. You open the Move dialog box by choosing Object ➪
Transform ➪ Move or by double-clicking the Selection tool. If you hold Shift, you can constrain the
movement of the measuring line to 45 degrees or 90 degrees.
13_584750-ch08.indd 27413_584750-ch08.indd 274 6/3/10 7:50 PM6/3/10 7:50 PM
Chapter 8: Using Illustrator to Organize Objects
275
FIGURE 8.12
The Measure tool allows you to make very precise measurements.
FIGURE 8.13
The Move dialog box allows you to move objects with great precision.
13_584750-ch08.indd 27513_584750-ch08.indd 275 6/3/10 7:50 PM6/3/10 7:50 PM
Part II: Putting Illustrator to Work
276
Sizing objects with the Transform panel
A great way to resize objects is by using the Transform panel. When you have an object selected,
you can type a new height and width in the Transform panel, and the object immediately changes
to match the new measurements. The Transform panel also lets you know the placement of the
object via the X and Y values. The Transform panel, which you open by choosing Window ➪
Transform, shows the height, width, and location of any selected path or paths, as shown in
Figure 8.14.
FIGURE 8.14
Use the Transform panel to set objects to specific sizes.
The options for the Transform panel are:
l
X and Y. These two options show the location of the object on the page, measured from
the lower-left corner.
l
W. This option shows the width of the selected object (or the total width of the selected
objects when more than one is selected).
l
H. This option shows the height or total height of the selected object or objects.
l
Rotate. Located on the bottom left of the panel, you use this option to rotate an object by
typing a value in degrees.
l
Shear. Located on the bottom right, you can type a value to slant the object along a
horizontal or vertical axis.
To change the object’s size, select the object first and then type a new value for the height and
width in the Transform panel. If you want the object to move, type new X and Y values in the
Transform panel.
Using rulers
You can toggle rulers on and off by choosing View ➪ Show/Hide Rulers or by pressing Ctrl+R
(Ô+R). Normally, the rulers measure up and across from the artboard’s lower-left corner; however,
you can alter this orientation by dragging the ruler origin (where the zeros are) from its position in
the upper-left corner, between where the two rulers meet. Because rulers take up valuable on-
screen real estate, it’s usually a good idea to leave them turned off unless you’re constantly measuring
things or you want to display your illustration at a higher magnification. Rulers are easy to show
and hide — just press Ctrl+R (Ô+R) when you want to see them and press Ctrl+R (Ô+R) again to
hide them. To reset the rulers to their original location, double-click in the origin box of the rulers.
13_584750-ch08.indd 27613_584750-ch08.indd 276 6/3/10 7:50 PM6/3/10 7:50 PM
Chapter 8: Using Illustrator to Organize Objects
277
Cross-Reference
If you change the ruler origin to the middle of the document page, move it back to a corner when you’re
finished. When you zoom in, rulers may be the only indicator of your location within the document.
One of the rulers’ neatest features is the display of dotted lines on the rulers that correspond to the
cursor’s position. And yet, at times, measuring with rulers works no better than eyeballing;
although the process requires precision, you’re limited by the rulers’ hash marks in pinpointing the
cursor’s exact position. The rulers are best suited for measuring when the document is at a very
high zoom level.
If you have multiple artboards in a document, each document will have its own ruler origin. As a
reminder, always show artboards (View ➪ Show Artboards) when you have more than one, or you
can get very confused quite quickly.
Measuring with objects
Using objects to compare distances can be more effective than using either the Measure tool or the
rulers, especially when you need to place objects precisely — for example, when you want several
objects to be the same distance from one another.
If you place a circle adjacent to an object (so that the objects’ edges touch), you know that the
second object is placed correctly when it’s aligned to the circle’s other side. (A circle is the object
most commonly used because the diameter is constant.)
You can use other objects for measuring, including:
l
Squares. When you need to measure horizontal and vertical distances
l
Rectangles. When the horizontal and vertical distances are different
l
Lines. When the distance applies to only one direction
To gain better precision, turn the measuring object into a guide by choosing View ➪ Guides ➪
Make Guides. Guides are discussed later in this chapter.
Using Offset Path (for equidistant measuring)
Suppose that you want to place several objects the same distance from a central object. You may
find that using any of the previously mentioned measuring techniques is time consuming and even
inaccurate, especially when you deal with complex images. However, Illustrator’s Offset Path dialog
box allows you to automatically align objects equidistantly from a central object.
To use Offset Path to measure objects that are equally spaced apart, follow these steps:
1. Select the central object. For more on selecting objects, see Chapter 6.
2. Choose Object ➪ Path ➪ Offset Path. The Offset Path dialog box, as shown in Figure 8.15,
opens.
13_584750-ch08.indd 27713_584750-ch08.indd 277 6/3/10 7:50 PM6/3/10 7:50 PM
Part II: Putting Illustrator to Work
278
3. Type the desired distance in the Offset text field. You can type a distance in points,
millimeters, inches, or pixels.
Cross-Reference
For more on the Offset Path dialog box and its settings, see Chapter 6.
FIGURE 8.15
The Offset Path dialog box creates an offset path you can use for the precise placement
of objects.
4. Click OK. Illustrator creates the new Offset Path.
5. Change the new path into a guide.
6. Align your objects to this guide.
Working with Grids
Nothing I’ve found is more useful on a day-to-day basis than the Grid feature. Grids act as a
framework for your artwork, providing an easy method for aligning and positioning images.
Figure 8.16 shows an Illustrator document that has grids turned on. One advantage of using grids
is the Snap to Grid feature. With this feature, you can move objects near a gridline, and Illustrator
automatically snaps the object directly on the grid line.
Grids start from the origin of your artboard (usually the lower-left corner). If you want to change
the position of the grid, you can do so by dragging the origin point (at the Origin Marker where
the rulers meet) to the new starting position for the grid. You reset the grid position (and the ruler
origin) by double-clicking the Origin Marker.
Instead of gridlines, you may want to use guides for layout purposes. For example, you may need a
few lines in different locations to set a page for a flyer advertisement. Use guides by dragging them
out from the rulers to the exact locations where you want to place art and enter type. Gridlines are
great for using lines that are set a specific distance apart. Use gridlines to create a perspective
drawing or to place objects a specific distance apart.
This list shows the commands for displaying gridlines and the various Snap to Grid features, which
are available only when gridlines are displayed:
13_584750-ch08.indd 27813_584750-ch08.indd 278 6/3/10 7:50 PM6/3/10 7:50 PM
Chapter 8: Using Illustrator to Organize Objects
279
l
Display grid lines. Choose View ➪ Show Grid or press Ctrl+" (Ô+").
l
Turn off grids. Choose View ➪ Hide Grid or press Ctrl+" (Ô+").
l
Snap to Grid. Choose View ➪ Snap to Grid or press Ctrl+Shift+" (Ô+Shift+"). This feature
snaps the object to the nearest grid.
l
Snap to Point. Choose View ➪ Snap to Point or press Ctrl+Alt+" (Ô+Option+"). This
feature snaps the dragged object to another object’s point. More importantly, you can see
this happen. As you drag, the cursor turns from black to white when you’re directly over
another point.
Tip
If you want to display grids in each new document, open your Illustrator startup file and then turn on grids in
that document. Then save the startup file. All new documents display grids when you first create them.
FIGURE 8.16
A document with Illustrator’s Grid function turned on
Creating grid color, style, and spacing
You can customize the way grids look by changing the Grid preferences. Choose Edit (Illustrator) ➪
Preferences ➪ Guides & Grid to display the Guides & Grid section of the Preferences dialog box, as
seen in Figure 8.17. Here, you can change the grid color, style, and spacing.
These options are available in the Grid section of the Preferences dialog box:
l
Color. In this area, you can pick a new color from the list of colors. If you choose Other,
you can use the color picker to the right of the Color area to pick a new color for your
grids.
13_584750-ch08.indd 27913_584750-ch08.indd 279 6/3/10 7:50 PM6/3/10 7:50 PM
Part II: Putting Illustrator to Work
280
l
Style. You can also choose between lines and dots as the grid style. I prefer to use lines for
my grid because dots can turn an already busy-looking page into one with all sorts of,
well, dots all over the place.
l
Gridline every. Type the distance you want between gridlines. To change the space
between the major (darker) gridlines, type a value in the Gridline every text field.
l
Subdivisions. To create subdivisions (minor) between the dark values, type a number for
how many sections should be created between the main lines. If you type 1 as the value,
no subdivisions are created. Because you’re defining the number of divisions, not the
number of lines, typing 2 creates one line between the two main lines. The standard
1-inch gridline with eight subdivisions creates
1
⁄8-inch squares.
l
Grids In Back. You can deselect the Grids in Back check box to make your gridlines
appear in front of your artwork. The box is selected by default so that the gridlines aren’t
running on top of your artwork.
FIGURE 8.17
The Guides & Grid section of the Preferences dialog box allows you to set up the
appearance options.
Spinning grids
Your grid doesn’t have to consist of just vertical and horizontal lines. You can rotate the grid to any
angle you want by changing the Constrain Angle in the General section of the Preferences dialog
box. This is perfect for working with angled artwork; even if only a portion of the artwork is at an
angle, the Constrain Angle can be set temporarily to the angle of the artwork.
13_584750-ch08.indd 28013_584750-ch08.indd 280 6/3/10 7:50 PM6/3/10 7:50 PM
Chapter 8: Using Illustrator to Organize Objects
281
Perspective grids
The strange thing about perspective grids is that while yes, there’s a grid there and it’s in place to
show perspective, this grid is really a perspective plane tool. . . it allows you to work in perspective,
which is exceedingly cool and fun.
The idea behind perspective is that because the world isn’t flat, your artwork shouldn’t be, either.
If you want to create something (or change something) so that it appears on the side of a building,
on the ground, or up in the sky (think Fringe location titles), it can’t appear flat. Instead, it needs to
conform to the plane of the object you want it to appear on. That can be done in Illustrator using
traditional distortion tools, but it’s challenging. The Perspective Grid tool makes this process fun
and very, very easy.
Figure 8-18 shows text aligned to one of the preset perspective grids. This was done in just seconds
using the new Perspective Grid tool to quickly align each word to a different plane.
FIGURE 8.18
A default perspective grid with words assigned to two of the planes
To use the Perspective grid tool, select it in the Toolbox. As soon as you do, a perspective grid
appears, like the one in Figure 8-18. To manipulate the grid, click any of the handles along the
grid. You can change the height, location, and depth of the grid in this way.
13_584750-ch08.indd 28113_584750-ch08.indd 281 6/3/10 7:50 PM6/3/10 7:50 PM
Part II: Putting Illustrator to Work
282
Next, select any artwork you have, and click the side of the cube (in the upper left) that you want
it to align to. Finally, choose the Perspective Selection tool (hidden in the same slot behind the
Perspective Grid tool) and drag the selected artwork toward the plane you selected. As soon as part
of it reaches the grid, it automatically changes perspective to match that grid. When you release the
mouse button, the artwork “snaps” to that perspective. You can manipulate it as an object using
the Perspective Selection tool and it stays snapped there.
Figure 8-19 shows two words aligned to the plane of a building.
FIGURE 8.19
Two words aligned to the plane of a building
13_584750-ch08.indd 28213_584750-ch08.indd 282 6/3/10 7:50 PM6/3/10 7:50 PM