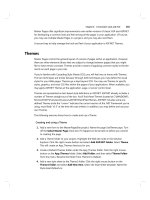
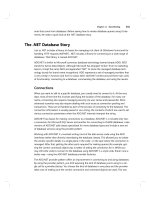
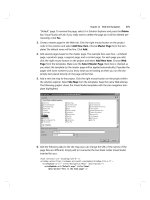
ASP.NET 3.5 for Dummies phần 3 pdf
Bạn đang xem bản rút gọn của tài liệu. Xem và tải ngay bản đầy đủ của tài liệu tại đây (1.09 MB, 43 trang )
Chapter 5
Handling User Input and Events
In This Chapter
ᮣ Gathering data and pushing buttons
ᮣ Using drop-down lists and list boxes
ᮣ Presenting multiple choices
ᮣ Sending data with forms
E
ven in science fiction, you can’t escape manual data input. During an
attack, spaceship navigators converse comfortably with computers, use
console controls, and type quadrant coordinates.
This chapter looks at some key ASP.NET controls, forms, and events. Some
concepts are easier to understand if you know a programming language;
however, there’s no reason you can’t pick this stuff up while you go along.
Accepting Data in a TextBox Control
The ASP.NET TextBox control accepts keyboard input. As shown in Figure 5-1,
the control appears as (depending on the TextMode property) a normal text
box, a password variation, or a multiline version.
See Chapter 15 for enhancements to the TextBox control such as a prompting
effect and masked input.
09_195925 ch05.qxp 1/11/08 9:48 PM Page 61
Creating a regular text box
You add an ASP.NET TextBox to your page by dragging it from the Standard
group of the Toolbox and dropping it on the page in Design view or Source
view. By default, a text box accepts one line of text. You can limit the number
of characters the user can enter by opening the properties page (F4) and
setting the MaxLength value.
Accepting passwords
(somewhat) securely
When you set the TextMode property to Password, the text box hides the
password from onlookers by substituting asterisks or bullets. In Figure 5-1, the
second text box from the top shows the effect in the browser.
Capturing text with MultiLine mode
When you set the TextMode property to MultiLine, ASP.NET generates an
HTML Textarea control. As shown in the bottom text box (refer to Figure 5-1),
you set the number of visible lines with the value of the Rows property.
You can’t restrict the number of characters the user types into the TextBox
control in MultiLine mode. See Chapter 19 for how to handle this.
Figure 5-1:
The TextBox
control in
single line,
password,
and
multiline
versions.
62
Part I: Getting to Know ASP.NET and Visual Web Developer
09_195925 ch05.qxp 1/11/08 9:48 PM Page 62
Allowing creativity with rich text
An ASP.NET TextBox actively discourages rich text such as italic and bold.
If you enter the following markup, ASP.NET complains about a “potentially
dangerous” value.
I’m <i>entering</i> markup the <b>hard</b> way.
For details on dealing with the built-in protection, see Chapter 19.
Text editor add-ons give you word processor-like capabilities in a text box.
You can download the free Rich Text Editor (RTE) from www.codeplex.
com/rte. Another popular control is FCKeditor.Net. (The name’s not rude!
It’s composed of the initials of the developer, Frederico Caldeira Knabben.)
Look for FCKeditor.Net at />Pushing for Choices with
the RadioButton Control
ASP.NET RadioButton controls work as a team; however, only one player
can be “on” at a time. Figure 5-2 shows three RadioButton controls acting as
a group. All three share the same GroupName value. When a user clicks the
Submit button, an event handler subroutine (refer to the “Bingo! And events”
sidebar) executes and reports which radio button is checked.
Follow these steps to create a group of RadioButton controls and display
which one a user has pushed:
1. From the Toolbox, add to the ASP.NET page three RadioButton
controls, a Button control (Button1) and a Label control (lblText).
Figure 5-2:
You can
select only
one radio
button in a
group at a
time.
63
Chapter 5: Handling User Input and Events
09_195925 ch05.qxp 1/11/08 9:48 PM Page 63
2. Set the RadioButton control’s ID values to radTo, radMtl, and
radVcr; the Text properties to Toronto, Montreal, and Vancouver;
and the GroupName properties to cities.
3. Double-click the button to create a handler for the Button control’s
Click event and use the following code inside the Click event
handler subroutine:
If radTo.Checked Then
lblText.Text = “Choice: “ & radTo.Text
ElseIf radMtl.Checked Then
lblText.Text = “Choice: “ & radMtl.Text
ElseIf radVcr.Checked Then
lblText.Text = “Choice: “ & radVcr.Text
Else
lblText.Text = “No choice made.”
End If
The code tests whether the Toronto radio button’s Checked property is
True (that is, whether the button is pushed). If so, it assigns a text value to the
Label and the work is done. If the first button’s Checked property is False,
the logic continues to the ElseIf keyword (it drops through in geekspeak) and
tests the Montreal button, and so on. If the code reaches the Else part with-
out finding a button that’s pushed, it reports the failure to make a choice.
Collecting RadioButtonList Controls
The ASP.NET RadioButtonList control allows you to create many radio
buttons with one control. In this section, you build a survey form, work with
the Collection editor, and hook up an event handler.
Creating the basic page interface
The survey interface consists of a prompt, a set of radio buttons as choices, a
button, and an area for a response. Follow these steps to create the basic
interface.
1. In the ASP.NET page Design view, add a Label control with the ID
lblPrompt and set the Text value to Rate Your Fear of the Borg.
2. From the Toolbox, drop a RadioButtonList control on the design
surface and set its ID to rblBorg.
3. Add another Label with the ID lblResponse and a Button control.
64
Part I: Getting to Know ASP.NET and Visual Web Developer
09_195925 ch05.qxp 1/11/08 9:48 PM Page 64
You add questions to the survey’s user interface in the next section.
Adding list items with a Collection editor
You can add items to a RadioButtonList control at design-time by using
a designer called Collection editor. Collection editors mostly work alike,
regardless of the collection type. Follow these steps to design options for a
questionnaire:
1. Click the RadioButtonList control’s Smart Tag arrow, and from the
menu, choose Edit Items.
The ListItem Collection editor opens.
2. Click the Add button (on the lower-left side).
As shown in Figure 5-3, ListItem appears in the Members area on
the left. Notice the 0 preceding the ListItem. The first item in a .NET
collection is numbered zero. See the “The Borg and .NET collections”
sidebar for more.
3. In the properties area on the right, set the Text value to Plenty and
the Value property to 3.
65
Chapter 5: Handling User Input and Events
Bingo! And events
Think of a game of Bingo where players are filling
their cards with markers. Suddenly, a hand shoots
into the air and a player shouts, “Bingo!” That’s an
event
.
Consider the player with the filled card as an
ASP.NET control that raises an event called
Bingo. The game’s assistants are
event handlers
who intervene when someone claims to have a
full card. The following
pseudo-code
(unusable
code that represents a programming idea) shows
how you might handle a Bingo event.
Protected Sub
BingoPlayer1_Bingo _
(ByVal player As Object, _
ByVal e As _
System.BingoEventArgs)
Dim blnIsValidBingo as _
boolean
Dim walker as New _
Assistant()
blnIsValidBingo = _
walker.Verify(e.Card)
End Sub
In ASP.NET, when someone clicks a button, the
button doesn’t shout, “Bingo!” It raises a Click
event. If no code is on the page to handle the
event, nothing much happens. However, if a des-
ignated event handler for the mouse click is on
the page, the handler subroutine goes into action.
That action could be changing a label’s color from
blue to red or sending the accumulated data to a
database.
09_195925 ch05.qxp 1/11/08 9:48 PM Page 65
4. Add three more items to the collection and set their Text and Value
properties as follows:
Text Value
Somewhat 2
Whatever 1
Zilch 0
5. Click OK to close the ListItem Collection editor.
As shown in Figure 5-4, the user interface elements are in place. In the next
section, you add some logic and interactivity.
Capturing the survey choice
So far, the survey form is just a (Vulcan-like) interface with no logic. Follow
these steps to capture the user’s choice and show that choice in the browser:
Figure 5-4:
The opinion
survey at
design-time.
Figure 5-3:
A collection
editor
allows you
to add,
remove, and
change
individual
items within
a collection.
66
Part I: Getting to Know ASP.NET and Visual Web Developer
09_195925 ch05.qxp 1/11/08 9:48 PM Page 66
1. In Design view, double-click an empty part of the page to create an
event handler for the Page object’s Load event.
The IDE automatically inserts the following event handler code (formatted
differently here) into the page:
Protected Sub Page_Load(ByVal sender As Object, _
ByVal e As System.EventArgs)
End Sub
2. In the line above the End Sub keywords, insert the following code:
lblResponse.Text = rblBorg.SelectedValue
When you run the page and click the button, the click causes the page to
submit its data (a postback). A Page Load event occurs (fires in geekspeak) just
before ASP.NET completes construction of the page. The Load event handler
code looks at the RadioButtonList (rblBorg) and extracts whatever is in
its SelectedValue property. The code assigns the SelectedValue value as
the Text property of the Label so the user can see the results.
Checking CheckBox and
CheckBoxList Controls
The CheckBox and CheckBoxList controls permit multiple choices. Unlike
radio buttons, you can switch a check box on or off without affecting any of
the other check boxes on the page.
67
Chapter 5: Handling User Input and Events
The Borg and .NET collections
Fans of the science fiction series
Star Trek
know
all about the Borg, those gray technoinvaders who
wander around muttering, “Resistance is futile.” A
.NET collection resembles The Borg Collective in
that items within a collection are similar but have
distinguishing characteristics (such as different
machine parts).
You deal with members of a collection as a set or
group. Your code can examine each member one
by one from first to last. In geekspeak, the action
of flipping through the set is
iterating
through a col-
lection. The For Each loop is frequently used to
give collections an efficient once-over. Like you
can with cyborgs, you can refer to members of a
.NET collection by an index number that reflects
their position within the collective,
er
collection.
One notable thing about collections in .NET is that
their numbering is
zero-based
. That means the
index number of the first item is 0. The index
number of the second item is 1. Imagine the chaos
within the Borg Collective when you infuse it with
the knowledge that Seven of Nine is actually a Six
of Nine in .NET’s zero-based counting.
09_195925 ch05.qxp 1/11/08 9:48 PM Page 67
Creating an arbitrary number
of check boxes
The CheckBoxList control (like the RadioButtonList) is well suited to
database applications where the number of items varies. In this section, you
hook up (bind in geekspeak) a CheckBoxList to data.
To create a data-driven CheckBoxList, follow these steps:
1. From the Toolbox, drop a CheckBoxList control, Button control,
and Label control on a Web form.
2. In the Properties window for the CheckBoxList control, set the
RepeatColumns value to 2 and set the RepeatDirection value to
Horizontal.
These settings display the data in a two-column table.
3. Double-click a blank area of the page to create a handler for the Page
object’s Load event and insert the following code:
If Not IsPostBack Then
Dim arrlGames As New ArrayList
arrlGames.Add(“Scrabble”)
arrlGames.Add(“Crosswords”)
arrlGames.Add(“WonderWord”)
arrlGames.Add(“Sudoku”)
arrlGames.Sort()
CheckBoxList1.DataSource = arrlGames
CheckBoxList1.DataBind()
End If
The preceding adds items to a list, sorts the list, and tells the CheckBox
to use the list for its data. Notice that the whole routine is wrapped in an
If End If sequence that tests the IsPostBack property. You want
to fill the data only when the page first loads, not on each postback.
Otherwise, you get duplicate games.
For a discussion of the logic used in the keyword Not, see Chapter 14.
4. Switch to Design view, and double-click the Button to create a handler
for its Click event and add the following code in the line above the
End Sub:
Dim strSel As String = “”
For Each chbx As ListItem In CheckBoxList1.Items
If chbx.Selected Then
strSel = strSel & chbx.Text & “<br />”
End If
Next
Label1.Text = strSel
68
Part I: Getting to Know ASP.NET and Visual Web Developer
09_195925 ch05.qxp 1/11/08 9:48 PM Page 68
The preceding uses a For Each loop to look through the collection of
TextBox items and create a string of text.
Run the page, check some games, and click the button to see what’s selected.
For Each and the collection
The sidebar, “The Borg and .NET collections,” refers to the For Each loop
that you see in action inside the Button1_Click routine. Here’s the line of
code from Step 4 that begins the sequence:
For Each chbx As ListItem In CheckBoxList1.Items
It helps to parse the line starting at the far right to put the code into English.
It says, “Here’s a collection of items. You know that each of these items is a
ListItem type. Let the variable chbx (at least for now) represent the first
ListItem in this collection. Now move to the next line of code.”
With chbx representing the first item within the collection, you can examine
the item’s Selected property. If the CheckBox has been checked, the
Selected property’s value is True and you therefore proceed inside the If
statement to find the following line:
strSel = strSel & chbx.Text & “<br />”
Again, it helps to look to the right side of the code to describe what’s happen-
ing. Here, you peer into the value of the Text property for the CheckBox (for
example, “Crosswords”). You take that text, attach an HTML carriage return,
and add this onto whatever is in the strSel variable. (On the first loop,
nothing is in strSel.)
After exiting the End If statement, you run into the keyword Next. Next
says, “Okay folks, we’re done with that member of the collection, let’s do
the same thing with the next one.” The sequence repeats until the For
Each Next combination announces, “It’s quittin’ time ‘cause we’re fresh
outta check boxes.”
Using the DropDownList Control
The ASP.NET DropDownList control displays a large number of items in a
very little space because it drops down to display its list when the user clicks
the arrow. (Sometimes, it rises upward to display the items.)
69
Chapter 5: Handling User Input and Events
09_195925 ch05.qxp 1/11/08 9:48 PM Page 69
At design-time, you can add static items to the DropDownList control by
using the ListItem collection editor. At runtime, you can fill a DropDownList
control with almost any data as long as you can get it into a simple list. To
put color names in a DropDownList control, follow these steps:
1. From the Toolbox, add a DropDownList, Label, and Panel control to
an ASP.NET page.
2. Select the DropDownList control and set its AutoPostBack property
to True.
AutoPostBack causes a page to submit its data to the Web server (and
cause a postback) when the user merely selects a different item. No
Submit button is required.
3. Double-click the DropDownList control to create its default event
handler and use the following code inside the
SelectedIndexChanged subroutine:
Dim strClr As String
strClr = DropDownList1.SelectedValue
Dim objColor As System.Drawing.Color
objColor = _
System.Drawing.ColorTranslator.FromHtml(strClr)
Panel1.BackColor = objColor
Label1.Text = strClr
4. Return to Design view and double-click a blank area of the surface to
create an event handler for the Page object’s Load event and then
add the following code above the final line of the Page_Load routine:
If Not IsPostBack Then
Dim enClr As System.Drawing.KnownColor
Dim clrs As New _
System.Collections.Generic.List _
(Of System.Drawing.KnownColor)
clrs.AddRange(System.Enum.GetValues _
(enClr.GetType()))
DropDownList1.DataSource = clrs
DropDownList1.DataBind()
Panel1.Height = Unit.Pixel(200)
Panel1.Width = Unit.Pixel(300)
End If
When you browse to the page, the drop-down list fills with dozens of color
names. Make a selection. The name and its color swatch appear on the
screen. Walk through the code to see how it works.
70
Part I: Getting to Know ASP.NET and Visual Web Developer
09_195925 ch05.qxp 1/11/08 9:48 PM Page 70
Understanding namespaces
The .NET system (on which ASP.NET is based) is thousands of useful chunks
of code organized into categories called namespaces. For example, in the
code for the Page Load event, you see this line:
Dim enClr As System.Drawing.KnownColor
The namespace used in the preceding code is System.Drawing. The Web
server’s hard drive has a system.drawing.dll file, which is where the
System.Drawing code resides. In geekspeak, system.drawing.dll is
known as an assembly. Within this namespace is a list of system-defined
colors, such as YellowGreen.
Retrieving a list of colors
When the page loads the first time, you declare the variable enClr as a
KnownColor type. Next, you create a generic list that works easily with
ASP.NET controls. You stuff the color values into the list. Finally, you instruct
the DropDownList control to get its data from the list. When you fill the
DropDownList with data, the control automatically retains the values
(persists in geekspeak). Therefore, you fill the data on the initial page load,
not on each postback.
Displaying the color name
and showing the color
When the user changes the DropDownList, the SelectedIndexChanged
event fires and your event handler goes into action. In this routine, you cap-
ture the name of the selected color in the variable strColor. Next, you
declare the variable objColor as a System.Drawing.Color type so it can
hold that type of content.
Converting a color name, such as YellowGreen into a Color type is a little
tricky. Inside the System.Drawing namespace is a useful chunk of code
(a class in geekspeak) called ColorTranslator. One of the capabilities of
ColorTranslator (the FromHtml() method) takes a name or value
that’s in an HTML format (such as #ff00aa or White) and converts it to
a .NET Color.
After you convert the ordinary color name into something that the Panel
control understands, you tell the Panel control to use that for its background
color (BackColor). As for the Label control, you already have the name of
the color, so you instruct the Label to display the name as its Text property.
71
Chapter 5: Handling User Input and Events
09_195925 ch05.qxp 1/11/08 9:48 PM Page 71
Getting Multiple Choices from a ListBox
The ListBox control shows several items at a time inside a box. You set the
number of visible items by using the Rows property. Users can select more
than one item by holding down the Ctrl key while clicking the items. This
example allows users to choose and display font names. Follow these steps
to create the font list box:
1. From the Toolbox, add a ListBox, Button, and Label control to the
Web page.
2. Select the ListBox and, in its Properties window (F4), set the
SelectionMode property to Multiple.
3. Double-click an empty area of Design view to create a handler for the
Page Load event and add the following LINQ query to fill the
ListBox with font names from a built-in .NET collection:
If Not IsPostBack Then
Dim q=From f In System.Drawing.FontFamily.Families _
Select f.Name
ListBox1.DataSource = q
ListBox1.DataBind()
End If
For details on LINQ syntax, see Chapter 7 and this book’s cheat sheet.
4. Add the following Imports directive to the top of the page in Source
view:
<%@ Import Namespace=”System.Linq” %>
5. Return to Design view and double-click the Button control to create a
Click event handler and add the following code:
Dim strItems As String = “”
For Each itm In ListBox1.Items
If itm.Selected Then
strItems = strItems & itm.Text & “<br />”
End If
Next
Label1.Text = strItems
When you browse the page, the ListBox displays the server’s fonts. Select a
few fonts and click the button to show their names.
72
Part I: Getting to Know ASP.NET and Visual Web Developer
09_195925 ch05.qxp 1/11/08 9:48 PM Page 72
Understanding ASP.NET Forms
In ASP.NET, server controls, such as the TextBox and DropDownList, must
reside within a server-side form. In Design view, the development environment
knows this rule and inserts controls in the right place.
To understand forms, it helps to analyze the behind-the-scenes markup.
Listing 5-1 shows the code that appears in Source view when you add a single
page called myform.aspx to your project.
Listing 5-1: The myform.aspx Source Code
<%@ Page Language=”VB” %>
➝
1
<!DOCTYPE html PUBLIC “-//W3C//DTD XHTML 1.0
➝
3
Transitional//EN”
“ />transitional.dtd”>
➝
6
<script runat=”server”>
➝
7
</script>
➝
9
<html xmlns=” />➝
11
<head runat=”server”>
➝
12
<title>Untitled Page</title>
</head>
➝
14
<body>
<form id=”form1” runat=”server”>
➝
16
<div>
➝
17
</div>
</form>
</body>
</html>
➝
22
➝
1 The line <%@ Page Language=”VB” %> is a Page directive. It
provides important information to ASP.NET while it compiles and
assembles the page on the server. In this case, the Language
attribute’s value is VB, meaning ASP.NET should expect Visual
Basic code. This and other directives aren’t sent as HTML to the
browser.
➝
3-6 The markup starting with <!DOCTYPE and ending with dtd”> is
sent to the browser as is. It describes the HTML standard to which
this page conforms.
➝
7-9 The markup <script runat=”server”></script> includes
the important runat attribute with the value server. Computer
code within these tags is processed on the Web server. The
browser sees the results of the process.
73
Chapter 5: Handling User Input and Events
09_195925 ch05.qxp 1/11/08 9:48 PM Page 73
➝
11 The <html> tag goes directly to the browser without processing
because runat=”server” isn’t present.
➝
12-14 The <head> tag includes runat=”server”, which means that
the Web server’s process knows about the tag’s contents.
➝
16 After the familiar HTML <body> tag, comes the all-important
<form id=”form1” runat=”server”> markup.
➝
17-22 The rest of the markup is standard HTML and mainly closing tags.
Even though this page does absolutely nothing, it’s instructive to run it and
look at what the browser sees. Follow these steps to run the page and view
the HTML:
1. In Visual Web Developer, add a Web form called myform.aspx to
your application (File➪New File➪Web Form (myform.aspx)➪Add).
2. Browse to the page and view the source code. (In IE 7, choose
View➪Source. If Windows Vista asks for permission, give it.)
Some strange things happen to the code during the server processing:
ߜ The page directive (@ Page) is missing. That’s a server-side instruction
so the browser doesn’t see it.
ߜ The <script runat=”server”> markup is gone. It’s another server-
side instruction.
ߜ The <form> tag survived but has method and action attributes that
weren’t there before. The server has generated these and pointed the
action attribute at the myform.aspx filename.
ߜ As the following code shows, there’s now a hidden <input> tag
called __VIEWSTATE with a long encoded value that wasn’t in the
ASP.NET source page:
<input type=”hidden” name=”__VIEWSTATE” id=”__VIEWSTATE” value=
“/wEPDwUKMTUxMzcyMjQyN2RkCzHRdRR1uHRoA8uH8qQCo0hGTaI=” />
Viewstate is ASP.NET’s sleight of hand. It encodes information about the
current state of the page and its controls. The next time the server sees
the page, it reads the encoded information; and from that, figures out
what changed, what was clicked, and what was selected.
This drives home the fact that server-side code and client-side code are
somewhat the same but live in different worlds.
74
Part I: Getting to Know ASP.NET and Visual Web Developer
09_195925 ch05.qxp 1/11/08 9:48 PM Page 74
Part II
Immersing
Yourself in Data
10_195925 pt02.qxp 1/11/08 9:48 PM Page 75
In this part. . .
I
n this data-rich part, prepare for something old, some-
thing new, something borrowed, and something blue.
The old is in Chapter 6, where you use the SqlData
Source control to manipulate the Northwind database.
The new is the exciting introduction of LINQ, which I
cover in Chapters 7 and 8. The marriage of Visual Basic
and a dedicated query language is worth celebrating. If
you find the SQL language difficult and error-prone, vow
to embrace LINQ syntax until death you do part. By the
way, to get your head around the new LINQ query syntax,
tear out the handy cheat sheet inside the front cover and
tape it to the bottom of your monitor.
The borrowed appears in Chapter 9, where you display an
RSS data feed borrowed from another site. Finally, blue
enters the picture in the Web service sample that calcu-
lates red, blue, and green values from a color name.
10_195925 pt02.qxp 1/11/08 9:48 PM Page 76
Chapter 6
Fetching and Presenting Data
with SqlDataSource
In This Chapter
ᮣ Using SQL Server Express as a data source
ᮣ Building connection strings
ᮣ Using the SqlDataSource control
ᮣ Passing parameters from controls and other sources
ᮣ Creating a master/detail page
I
n Chapter 3, I show you how to create a database and, using the power of
the Visual Web Developer environment, generate a data-driven Web page.
This chapter still emphasizes letting the tools do the work, but the approach
is different. The goal is to understand what the wizards are doing so you can
use them more effectively in a variety of situations.
Connecting to SQL Server Express
Data connections are easy on days when your biorhythms are running high.
Fortunately, after you get a connection working, you can set it and forget it.
Checking whether SQLExpress is running
This section assumes that you installed SQL Server 2005 Express
(SQLExpress) on your workstation. Installation is covered in Chapter 2.
Before you try connecting to SQL Server Express it helps to know whether
the SQL software is running. Follow these steps to use a command line utility
to check your system for a running instance of SQL Express:
11_195925 ch06.qxp 1/11/08 9:48 PM Page 77
1. Open a command prompt:
• If you’re using Windows XP, choose Start➪Run; enter cmd and
press Enter.
• If you’re using Windows Vista, choose Start, enter cmd in the
search box, and press Ctrl+Shift+Enter.
2. At the command prompt, type the following command:
sqlcmd -S(local)\SQLExpress
3. Press Enter.
If SQLExpress is running, the program responds with a prompt that
looks like
1>
If SQLExpress isn’t running, the program reports a connection error and
quits.
4. Type exit and press Enter to exit the sqlcmd utility and then type exit
and press Enter again to close the command line utility.
If SQLExpress shows no sign of life, rerun the VWD installer to repair it. If you
know SQLExpress is installed but hasn’t started, try the following command
from the command prompt:
net start “SQL Server (SQLExpress)”
Microsoft’s Web site has several articles to help with starting SQL Server. Try
a search for mssql$sqlExpress faq as a, er, starting point.
Finding a copy of the Northwind database
You can follow along in this chapter using almost any SQL Server 2005
database, including one that you build yourself. However, it’s much easier to
compare your results if you use Microsoft’s ever-popular Northwind database.
Browse to and search for
Northwind and pubs Sample Databases for SQL Server 2000. After double-
clicking the downloaded file to run its installer, you should find the north
wnd.mdf file in C:\SQL Server 2000 Sample Databases.
Adding the Northwind database
to your application
Visual Web Developer reserves a special folder called App_Data for storing
SQL Express database files. To add the Northwind database to your Web
application, do the following:
78
Part II: Immersing Yourself in Data
11_195925 ch06.qxp 1/11/08 9:48 PM Page 78
1. Add an App_Data folder to the project if it doesn’t exist (Website➪Add
ASP.NET Folder➪App_Data).
2. In Solution Explorer, click the App_Data folder and choose Website➪
Add Existing Item.
3. Navigate to the Northwind database file (for example, C:\SQL Server
2000 Sample Databases \northwnd.mdf) and click Add.
Connecting to the database
Your Web pages — or more accurately, your data controls — must be able to
find the database engine along with the data file. Follow these steps to check
for and add a data connection:
1. In Visual Web Developer, open Database/Server Explorer (View➪
Database/Server Explorer).
2. Expand the Data Connections node and look for a node called north
wnd.mdf.
A red X on the database icon indicates the connection might not be
open or working. It might just be resting.
3. If the northwnd.mdf node exists, expand the node (it can take a few
seconds to respond) and then expand the Tables node, as shown in
Figure 6-1, to confirm that the connection is working.
If it’s working, you’re connected, and you can skip the remaining steps.
4. If there’s no working connection, right-click the Data Connections
node, and choose Add Connection from the context menu.
The Add Connection dialog box appears, as shown in Figure 6-2.
Figure 6-1:
Expand the
Tables node
to check the
connection.
79
Chapter 6: Fetching and Presenting Data with SqlDataSource
11_195925 ch06.qxp 1/11/08 9:48 PM Page 79
5. Next to the Data Source box, click the Change button.
The Change Data Source dialog box appears, as shown in Figure 6-3.
6. Select Microsoft SQL Server Database File and then click OK.
7. In the Add Connection dialog box, next to the Database File Name
box, click the Browse button and navigate to the copy of the
Northwind database that’s in your App_Data folder.
You can determine the path by selecting northwnd.mdf in Solution
Explorer and looking at the Full Path property in its Properties window.
8. To make sure that you have a good connection, click Test Connection
in the lower left of the Add Connection dialog box, and then click OK.
At this point, you have a working data connection and you’re ready to use the
SqlDataSource control.
Figure 6-3:
The Change
Data Source
dialog box.
Figure 6-2:
The Add
Connection
dialog box.
80
Part II: Immersing Yourself in Data
11_195925 ch06.qxp 1/11/08 9:48 PM Page 80
Using the SqlDataSource Control
The SQLDataSource control is a user-friendly way of working with
Microsoft’s ADO.NET data handling technology. It does much of the grunt
work for you, such as opening a connection to the database, executing a SQL
statement, fetching the data, and closing the data connection.
Adding and configuring a
SqlDataSource control
You need a working SqlDataSource control so that other controls, such as
GridView, FormView, and ListView, can use it for their data needs. To add
a SqlDataSource control to your page, follow these steps:
1. Add a single file ASP.NET Web Form (don’t use the Place Code in
Separate File option) called starter.aspx to your project.
2. Drag a SqlDataSource control from the Data category of the Toolbox
and drop it on the page.
3. Click the Smart Tag button and select Configure Data Source.
The Configure Data Source Wizard appears.
4. From the drop-down list, choose the northwnd.mdf data connection
and then click Next.
5. Accept (that is, leave checked) the offer to save the connection string
in the Save the Connection String screen, and then click Next.
6. In the Configure the Select Statement dialog box, choose the
Customers table from the drop-down list.
The columns (fields) in the Customers table appear in the Columns box.
7. In the Columns box, select the check box for the asterisk.
This indicates that you want to select all the columns for the query.
8. Click the Advanced button.
The Advanced SQL Generation Options dialog box appears, as shown in
Figure 6-4.
9. Select the Generate INSERT, UPDATE, and DELETE Statements check
box (do they need to shout?), and then click OK.
81
Chapter 6: Fetching and Presenting Data with SqlDataSource
11_195925 ch06.qxp 1/11/08 9:48 PM Page 81
10. Back in the Configure the Select Statement screen, click Next.
11. In the Test Query screen, click Test Query, and then click Finish.
You now have a SqlDataSource configured to fetch and update data. At
this point, nothing on the starter.aspx page allows users to see or inter-
act with the data control. You fix that later in this chapter in the section
“Consuming Data with the DetailsView Control.”
In the preceding steps, the SqlDataSource Wizard inserted declarative
markup — the HTML- or XML-like code into the .aspx file. To view the
generated code, select the SqlDataSource control in Design view and then
switch to Source or Split view.
The ConnectionString attribute
The SqlDataSource control needs to know where to get its data. To follow
the trail, open the page in Source view and locate the following markup:
ConnectionString=”<%$ ConnectionStrings:ConnectionString %>”
In plain English, the markup says, “At runtime, go look in the web.config
file for a section called ConnectionStrings. After you find it, look for an
attribute called ConnectionString and bring back its value. Jam that value
between the quotation marks you see here. When I need to know where to get
my data, I’ll refer to that source.”
The first ConnectionString is the attribute declaration. After the equal
sign (=) comes the value in quotations marks. The stuff inside the quotation
marks isn’t the connection string; it’s a just placeholder for a future connec-
tion string. Here’s the deal: The tags <% %> tell ASP.NET to wait until
runtime to evaluate the content. The dollar sign ($) indicates that the part to
be evaluated is found in the web.config file. The ConnectionStrings:
portion (note the final “s”) describes the section of the web.config, and the
final ConnectionString points to the attribute where the connection string
is stored.
Figure 6-4:
The SqlData
Source
control’s
Advanced
option.
82
Part II: Immersing Yourself in Data
11_195925 ch06.qxp 1/11/08 9:48 PM Page 82
The connectionStrings section of the web.config file
The following snippet from the web.config file shows all the required parts
of a connection string. Granted, it looks messy, but it makes sense to the
SqlDataSource control (after all, its wizard wrote this code), and that’s
what matters.
<connectionStrings>
<add name=”ConnectionString” connectionString=
“Data Source=.\SQLEXPRESS;AttachDbFilename=Æ
|DataDirectory|\northwnd.mdf;Integrated Security=Æ
True;Persist Security Info=True;Æ
Connect Timeout=30;User Instance=True”
providerName=”System.Data.SqlClient” />
</connectionStrings>
At runtime, ASP.NET replaces |DataDirectory| with the physical path to
the special App_Data folder.
The Command attributes in the markup
In starter.aspx, you probably recognize the SQL in the DeleteCommand,
InsertCommand, SelectCommand, and UpdateCommand attributes
embedded in the SqlDataSource control’s markup. The DeleteCommand’s
value looks like this:
DELETE FROM [Customers] WHERE [CustomerID] = @CustomerID
The @CustomerID part is a fill-in parameter. Parameters are handy when you
don’t know what the value is going to be until the last instant. For example,
you have to wait until a user clicks a Delete button to know which
CustomerID they want to remove.
Defining parameters
The declarative markup defines parameters for each type of command.
Here’s the definition for the @CustomerID parameter used by the
DeleteCommand:
<deleteparameters>
<asp:parameter Name=”CustomerID” Type=”String” />
</deleteparameters>
Each asp:parameter provides you its name (CustomerID) and type
(String). In some cases, you can include the DefaultValue attribute to
indicate the value to use when the control doesn’t supply one.
83
Chapter 6: Fetching and Presenting Data with SqlDataSource
11_195925 ch06.qxp 1/11/08 9:48 PM Page 83
Consuming Data with the
DetailsView Control
So far, in this chapter, you’ve installed the database, connected the
SqlDataSource to the database, and configured the SqlDataSource
control so it can fetch, update, and insert records. In this section, you con-
nect an ASP.NET DetailsView control to the SqlDataSource control
to create a user interface.
The ASP.NET DetailsView control displays details one record at a time
from a data source. It has built-in support for updating, inserting, deleting,
and paging through data. Follow these instructions to add a DetailsView
control to your page and hook it up to the data:
1. Open the starter.aspx page (created previously) in Design view.
2. Drag a DetailsView control from the Data category of the Toolbox,
and drop it on the page.
Figure 6-5 shows the DetailsView control with its initial Tasks menu.
3. From the drop-down list, choose the SqlDataSource control that you
configured in the earlier section, “Adding and configuring a
SqlDataSource control.”
As shown in Figure 6-6, the DetailsView scans the contents of the
SqlDataSource control and includes the fields in its list.
4. Select the options to enable paging, inserting, editing, and deleting.
When you run the page, the DetailsView control shows the first customer
with navigation links to the remaining records. Figure 6-7 shows the Edit,
Delete, and New buttons near the bottom of the page.
Figure 6-5:
The
DetailsView
control’s
Tasks menu
prompts you
to choose a
data source.
84
Part II: Immersing Yourself in Data
11_195925 ch06.qxp 1/11/08 9:48 PM Page 84
The DetailsView control is clumsy when navigating through many records.
By displaying only one record at a time, you spend a long time paging to the
last customer in the database.
Figure 6-7:
The
DetailsView
control
shows only
one record
at a time.
Figure 6-6:
Enabling
paging,
inserting,
and editing
DetailsView.
85
Chapter 6: Fetching and Presenting Data with SqlDataSource
Database orders: Don’t delete my customers!
If you try to delete a customer in the Northwind
database, you’ll likely get this error:
The DELETE statement
conflicted with the
REFERENCE constraint
“FK_Orders_Customers”.
SQL Server complains because the database con-
tains a list of orders in the Orders table that belongs
to the customer you’re trying to delete. The reference
to the customer is a
foreign key
(FK for short). If you
delete the customer first, the database ends up with
a messy pile of orphaned orders and order details.
You work around a deletion constraint in Chapter 8.
11_195925 ch06.qxp 1/11/08 9:49 PM Page 85
