Tài liệu Mastering Revit Architecture 2008_ Part 19 docx
Bạn đang xem bản rút gọn của tài liệu. Xem và tải ngay bản đầy đủ của tài liệu tại đây (793.71 KB, 15 trang )
Chapter 19
Tracking Changes in Your Model
Once a project is under way in the construction document phase, design changes need to be
tracked. This is typically done on a per-sheet basis by adding revision clouds around elements that
are changing and documenting those changes in the title block. The revision history of each sheet
is then tracked in the title block with a number, description, and issue date. In this chapter, we will
look at how to add new revisions, how to add clouds to sheets, how to assign a cloud to a revision,
and some best practice tips and tricks. We will also look at how to use the Autodesk Design Review
application to pass comments and markups back and forth.
In this chapter you’ll learn to do the following:
◆
Add revisions that automatically get tracked on sheets
◆
Create revision clouds
◆
Export your designs in a lightweight file format for review
Adding Revisions to Your Project
Revisions allow designers and builders to track changes made to a set of construction documents.
Typically, these changes begin getting recorded after a set of documents has been issued and per-
mitted. Since the construction documents typically consist of many, many sheets, this methodology
allows everyone on the team to track and identify which changes were made and at what time in
the construction process. The purpose is not only correct construction but also creation of “as built”
documentation at the end of the construction process.
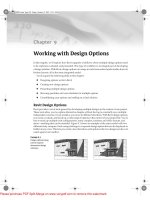
In a typical workflow, the revisions will look something like Figure 19.1 when they are created
in Revit and issued as part of the drawing set.
Figure 19.1
A revision cloud and
triangle tag
44831.book Page 601 Friday, October 12, 2007 12:31 AM
Please purchase PDF Split-Merge on www.verypdf.com to remove this watermark.
602
CHAPTER 19
TRACKING CHANGES IN YOUR MODEL
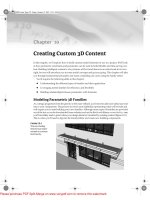
To create a Revision, choose Settings
Revisions. This opens the Revisions dialog (Figure 19.2).
From here you can add, delete, merge, issue, and define the behavior of revisions. Let’s quickly go
through the major elements of this important dialog.
Figure 19.2
The Revisions dialog
The numbering method
You can choose to number revisions
By Sheet
or
By project
, and this is
a global setting. Which method you choose mainly depends on how your firm tracks revisions,
but most firms tend to use the By Sheet option. By Sheet allows you to have as many revisions
as you want, but on each sheet, the revision numbers always start with 1. In the example shown
in Figure 19.2, the tags and revision schedule are unique for each sheet, depending on what revi-
sions are on each sheet. The revisions on each sheet are presented sequentially, depending on
which revisions are on the sheet. Using By Project will tag your revision clouds based on the glo-
bal sequence established within the project as a whole. In this example, all revisions with the
same issue date within the model would have the same revision number. So you might skip a
revision number on any given sheet.
We recommend using the By Sheet setting at the beginning of each project. You can also set this
up in your default office templates.
The revision table
The Revision Setting dialog starts with one default revision already in
place, even though you may have not made a revision yourself. This is just so that you have a
place to start—no revision will appear in your title blocks until you add revision clouds to your
drawings. Each revision has a fixed number of parameters that you can fill out. As you can see
in the dialog, they are fairly self-explanatory and include Release Date, Description, and an
Issued check box in addition to an Issued To column and Cloud and Tag visibility options.
Creating new revisions
To create a new revision, click the New button. The new revision will
automatically be placed in sequential order. Only the sequence number will be automatically
updated. You’ll need to add your own description and date.
Issuing a revision
To issue a revision, click the check box in the Issued column. This will lock
the revision clouds placed on sheets or in views associated with that revision from being moved,
deleted, or otherwise edited. The parameter values will gray out and become non-editable. This
44831.book Page 602 Friday, October 12, 2007 12:31 AM
Please purchase PDF Split-Merge on www.verypdf.com to remove this watermark.
ADDING REVISIONS TO YOUR PROJECT
603
is to guarantee that the clouds and data do not change downstream once you issue a set of draw-
ings. Keep this in mind: while the clouds can become fixed in the project, the model will not be.
So, if you need to maintain an archive of all project phases and of each revision, be sure to export
the sheets either as DWF or PDF files as a snapshot of the sheets at time of issuance.
Visibility of revision clouds and tags
The visibility of revision clouds and tags related to
issued revisions is controlled from this dialog. As issues occur, you may want to hide clouds or
tags of previous revisions. This is where the Visible parameter comes in handy. For example, if
you’ve issued a revision and then have additional revisions later, and want to de-clutter your
drawing, you can choose to show the issued revision as the tag only (typically a small triangle
with the revision number inside it, as in Figure 19.3) or not show anything at all by using the
None option (Figure 19.4).
Figure 19.3
A revision tag
Figure 19.4
Use the Visible
parameter to hide
clouds and tags of
issued revisions on
your sheets.
Combining revisions
If you need to combine two revisions into one, use the Combine With
Previous or Combine With Next button. All associated revisions on sheets and tags will update
automatically.
Placing Revision Clouds
To place a revision, open a view in which changes to the model have occurred and to use the Revision
Cloud tool found in the Drafting design tab. Once you activate the tool, you will be dropped
directly into sketch mode. Start drawing lines around the area you are calling out as a revision in a
clockwise direction. Revit automatically creates a line that makes a “cloud” (or arc) as shown in
Figure 19.5. When you’re finished creating the cloud, click Finish Sketch in the Design bar.
44831.book Page 603 Friday, October 12, 2007 12:31 AM
Please purchase PDF Split-Merge on www.verypdf.com to remove this watermark.
604
CHAPTER 19
TRACKING CHANGES IN YOUR MODEL
Figure 19.5
Clouds are drawn for
you as you sketch.
The graphics for revision clouds are controlled in the Object Styles dialog on the Annotation
Objects tab, shown in Figure 19.6.
Use this dialog to make revision clouds have thicker line weights, change patterns, or colors. As
we mentioned in Chapter 4, this should be set up in your office templates in advance to guarantee
consistency between projects.
By default, each new revision cloud will be assigned to the last revision in the Revision Settings
dialog. If you need to change what revision a cloud belongs to, select the cloud and navigate to its
element properties. From there you can change the Revision parameter, as shown in Figure 19.7.
As soon as you have placed a revision cloud onto a sheet, the revision schedule in your title
block will update to include revision number, description, and the date that you assigned in the
Revisions dialog box earlier.
Tracking Revisions in the Title Block
The revision is typically a part of the architectural sheet and is located in a prominent position in the
title block to alert readers to changes made in the documents. These revisions can be incorporated into
your title block design so they are parametrically read from the sheet into a revision table. To see how
to add a revision schedule to a custom title block, refer to chapter 4.
44831.book Page 604 Friday, October 12, 2007 12:31 AM
Please purchase PDF Split-Merge on www.verypdf.com to remove this watermark.
ADDING REVISIONS TO YOUR PROJECT
605
Figure 19.6
You can change the
graphic appearance of
revision clouds globally
using the Object
Styles dialog.
Figure 19.7
The revision cloud
properties dialog
44831.book Page 605 Friday, October 12, 2007 12:31 AM
Please purchase PDF Split-Merge on www.verypdf.com to remove this watermark.
606
CHAPTER 19
TRACKING CHANGES IN YOUR MODEL
Tagging a Revision Cloud
Revision clouds can be tagged like many other elements in Revit. The tags are intelligent and
designed to report the revision number that has been assigned to the cloud. Place a revision tag
using the Tag
By Category option on the Drafting tab.
If a tag for Revisions is not in your template, you will be warned that no tag exists in your
project. To continue, simply load an appropriate tag. The default Revit tag is named Revision
Tag.rfa and is located in the default Annotations folder that is created with a standard installation
(Figure 19.8).
Figure 19.8
Load a revision tag if
it’s not already part of
your template.
Once you have a tag loaded, you are ready to go. Simply hover the cursor over a revision cloud
and click to place the tag. You will see a preview of the tag prior to placing. Once the tag is placed,
you can drag it around the cloud to reposition it and it will stay associated with the cloud.
Customizing the Tag
If you want to customize the appearance of the default revision tag, simply select a tag already
placed in the project and click the Edit Family button in the Options bar. You could also follow the
steps presented in Chapter 4 to make a custom annotation tag from scratch. Editing the tag within
the project will take you to the Family Editor where you can tweak its size, font, and appearance.
Updates in Custom Title Blocks
If you are using the default Revit title blocks, updates will happen automatically. If you are using custom
title blocks, be sure you’ve added a revision schedule to them in the appropriate location so you can take
full advantage of using a parametric model. (See Chapter 4 for how to add revision schedules to your title
block families.)
44831.book Page 606 Friday, October 12, 2007 12:31 AM
Please purchase PDF Split-Merge on www.verypdf.com to remove this watermark.