Tài liệu MCSE Windows server 2003- P19 pdf
Bạn đang xem bản rút gọn của tài liệu. Xem và tải ngay bản đầy đủ của tài liệu tại đây (2.76 MB, 50 trang )
Lesson 1 Installing Hardware Devices and Drivers
10
-
9
3. A user wants to install a USB printer connected to his or her local computer. The
driver is provided by the vendor, and is not included with Windows Server 2003.
The driver is digitally signed. Can the user install the printer?
Lesson Summary
■
Device Manager lists all detected devices, and indicates problems with identifica-
tion or driver configuration.
■
Driver configuration can be output to a printed document using Device Manager,
or to a CSV file using the Driverquery command.
■
Users can connect and install any completely PnP device. If any user intervention
is required, a user will not be able to install a device.
■
Interface access points to device and driver configuration can be disabled through
local and domain-based Group Policies.
■
Unsigned Driver Installation behavior has three settings: Ignore, Warn, and Block.
Please purchase PDF Split-Merge on www.verypdf.com to remove this watermark.
10-10
Chapter 10 Managing Hardware Devices and Drivers
Lesson 2: Configuring Hardware Devices and Drivers
Devices may require updated drivers due to changes in the Windows Server 2003 oper-
ating system or changes in the way that a vendor programs a device to function. Driv-
ers can be updated through Device Manager.
To minimize the impact of possible problems with a new driver, a feature of Device
Manager allows for a return to the previous driver. This rollback feature is accessible
through the Properties page of the device.
Occasionally, the automatic resource configuration within Windows Server 2003 is
insufficient to accommodate a unique pattern of device use on a particular computer.
If a device needs to have static resources (IRQ, I/O Port, DMA, or Memory Range) set,
Device Manager can be used to remove the Automatic Settings use in favor of a setting
configured by the user/administrator.
After this lesson, you will be able to
■
Use Device Manager to update, roll back, and uninstall drivers
■
Use Device Manager to analyze and configure resource use by devices
Estimated lesson time:
15 minutes
Updating Drivers
In Device Manager, most devices can have their drivers updated. The driver update
process is a manual one, whether the device is PnP or not, and must be accomplished
by an administrator—assuming that the user has not been granted elevated privilege to
do so—at the console of the local computer.
Note
An exception to the requirement for local installation with administrative credentials
exists if the driver is provided through Windows Update. See Chapter 9, “Maintaining the
Operating System,” for more information about the Software Update Services (SUS) and
Windows Updates.
The process to update a driver is nearly the same as for a device that has been detected
properly, but whose driver was not available at installation. After initiating the driver
update process for a device from within Device Manager, the Add Hardware Wizard
asks for the new driver’s location and the driver is installed. Some core system drivers
will require a restart of the computer after installation, but most peripheral devices will
not. The Properties page where the update of a driver is started is shown in Figure 10-2.
Please purchase PDF Split-Merge on www.verypdf.com to remove this watermark.
Lesson 2 Configuring Hardware Devices and Drivers
10
-
11
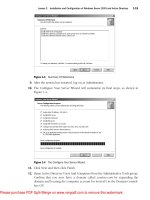
Figure 10-2 Driver update
Note
If you choose to uninstall a device that was configured through PnP, you must scan for
hardware changes in Device Manager to have the device reinstalled because Windows Server
2003 removes the device from the configuration even if the device is still connected to the
computer.
Rolling Back Drivers
Occasionally, a new driver will not function properly and cannot be kept in the con-
figuration for the device. If the replaced driver was performing properly, then rolling
back to the previous driver can be accomplished through Device Manager. Windows
Server 2003 automatically backs up the driver that is being replaced through the update
driver process, making it available through the Roll Back Driver option. The Properties
page where the rollback of a driver can be initiated is shown in Figure 10-3. The con-
trast between this feature and the Last Known Good Configuration option is discussed
in the next lesson.
Please purchase PDF Split-Merge on www.verypdf.com to remove this watermark.
10-12
Chapter 10 Managing Hardware Devices and Drivers
Figure 10-3 The Roll Back Driver option
Uninstalling Drivers
Drivers may be uninstalled using Device Manager. The Uninstall Driver process is ini-
tiated from the Properties page, as shown in Figure 10-4.
Figure 10-4 Uninstall Driver
Please purchase PDF Split-Merge on www.verypdf.com to remove this watermark.
Lesson 2 Configuring Hardware Devices and Drivers
10
-
13
Uninstalling a driver has different effects depending on whether the device was
detected and configured through the PnP process. If the device was configured
through PnP, then removal of the driver will result in the removal of the device from
Device Manager as well. If the driver for the device was added manually, the device
will remain in Device Manager, but will not be configured with a driver.
Resource Configuration
Devices and their drivers require system resources to communicate with and process
data through the operating system. These resources are configured automatically by
Windows Server 2003, sometimes in a shared capacity with other devices within the
system. In circumstances where resources must be statically configured, Device Man-
ager allows for some control of the resources assigned for use by a device. If configu-
ration is not available, the resources used by a device and its driver cannot be
configured manually. The Resources tab of a device’s Properties page of a manually
configurable resource is shown in Figure 10-5.
Figure 10-5 The Resources tab of a device’s configurable Properties
To configure a resource assignment manually, the Use Automatic Settings check box
must first be cleared, then the resources can be set.
Caution
Any resources set manually make both the resource and device unavailable for
automatic configuration, limiting the ability of Windows Server 2003 to make adjustments.
This may cause problems with other devices.
Please purchase PDF Split-Merge on www.verypdf.com to remove this watermark.
10-14
Chapter 10 Managing Hardware Devices and Drivers
Control Panel and Device Configuration
Several devices have Control Panel applications associated with them that allow con-
figuration of hardware devices. The same Device Manager limitations, which are based
on user rights, for the installation, updating, or removal of device drivers exist within
the Control Panel applications.
Such Properties pages are administered separately through Group Policies, and can be
removed from user view and access. This setting is in the User Configuration section of
a Group Policy.
Practice: Configuring Devices
In the following practice, you will temporarily change the configuration of a network
card to remove it from service without uninstalling the device.
Exercise 1: Disable a Device
1. Open Device Manager, then select a network card configured for your computer.
2. In Device Manager, double-click the listing of the network card.
3. Select the Device Usage drop-down list and then select Do Not Use This Device
(Disable).
The device is now disabled from operation within this Hardware profile.
4. Open the Properties page for the network card, and choose Use This Device
(Enable) to re-enable the network card for use in this Hardware profile. Alterna-
tively, you can right-click the device and select Enable or Disable, depending on
the current state of the device.
Lesson Review
The following questions are intended to reinforce key information presented in this
lesson. If you are unable to answer a question, review the lesson materials and try the
question again. You can find answers to the questions in the “Questions and Answers”
section at the end of this chapter.
1. Under what circumstances would you adjust the resource settings for a device?
Please purchase PDF Split-Merge on www.verypdf.com to remove this watermark.
Lesson 2 Configuring Hardware Devices and Drivers
10
-
15
2. You need to remove a PnP device from a configuration temporarily, but want to
leave it physically connected to the computer. You want to minimize the amount
of work required to use the device later. Which of the following is the best option
to accomplish your goal?
a. From the Properties page of the device, choose Do Not Use this Device
(Disable).
b. From the Properties page of the device, choose Uninstall.
c. Using the Safely Remove Hardware utility, choose to remove the device.
3. Greg’s computer has an external USB Hard Disk connected to a USB hub on his
computer. He is reporting that the disk is connected properly, but the drive (G)
normally associated with the disk is not available. Upon investigation, you dis-
cover that the indicator light on the hub is not illuminated and the device does not
appear in Device Manager. Disconnecting and re-connecting the device has no
effect. What is likely the quickest way to return the disk to proper functionality?
Lesson Summary
■
Device Manager can be used to Disable/Enable individual devices.
■
Manual resource configuration is possible for some devices, but should be done
only when there is a conflict with other resources on the computer. Manual con-
figuration should be kept to a minimum so as to allow Windows Server 2003 the
greatest amount of flexibility in automatically configuring resources for all devices.
■
Driver Updating is done through Device Manager.
■
Driver Roll Back is done through Device Manager, and allows for use of a driver
that was previously configured for a device.
■
Uninstalling a PnP device requires rescanning of the computer to re-enable the
device. Uninstalling a non-PnP device requires reinstallation to enable the device.
Please purchase PDF Split-Merge on www.verypdf.com to remove this watermark.
10-16
Chapter 10 Managing Hardware Devices and Drivers
Lesson 3: Troubleshooting Hardware Devices and Drivers
Problems with drivers will arise, particularly when driver configuration is not possible
through PnP means, or when core system component drivers are updated. When a
device configuration is not possible through strictly PnP means, the chance of mis-
matching devices and their drivers increases. With core system component driver
updates, which require a computer restart, any problems with the driver will not be
known until the computer restarts.
After this lesson, you will be able to
■
Understand how to use Disaster Recovery Methods for Devices
■
Understand and analyze driver-related problems
Estimated lesson time:
15 minutes
Recovering from Device Disaster
Occasionally, when you install or upgrade a driver for a device, there is a problem with the
functioning of that device on your system. Depending on the importance of the device,
the effect of the problem will range from annoying to catastrophic. Particularly for such
core system components as video drivers, a faulty configuration can render the computer
unusable. Rolling back the driver, after all, is difficult if you cannot see the screen.
Thankfully, there are multiple methods of recovery from faulty driver configuration.
The tools available are specifically suited to different purposes, and have varying
chances of success. Tools that can be used in the event of incorrect driver configuration
are listed in Table 10-3.
Table 10-3
Driver Recovery Tools
Tool Severity Use
Driver Rollback
(Device
Manager)
Last Known
Good
Configuration
Low. Most system
functions remain
intact.
Medium/High. The
device driver update
requires a restart, and
the computer will not
resume to the point
of allowing you to
log on.
Use the Property page for the device to go back to
the last driver that was working properly. Contact the
vendor to resolve the issue with the new driver.
When you change drivers that require a restart, the
Registry Key HKLM\System\CurrentControlSet can be
restored with the old driver information. By pressing
F8 as the system restarts, you can select the Last
Known Good Configuration, which restores the key.
If the problem does not surface until you have suc-
cessfully logged on (which is often the case with an
updated video driver), Last Known Good will be of
little use because it is overwritten upon successful
logon.
Please purchase PDF Split-Merge on www.verypdf.com to remove this watermark.
Lesson 3 Troubleshooting Hardware Devices and Drivers
10
-
17
Table 10-3
Driver Recovery Tools (Continued)
Tool Severity Use
Safe mode Medium/High.
System is unusable.
Recovery High. Last Known
Console Good and Safe
modes do not
work.
By pressing F8 as the system restarts, you can select
Safe mode as a boot option. This mode uses only
minimal system and device drivers—enough to start
the computer and log on—which allows you to
access Device Manager and disable the offending
device.
The Recovery Console allows you to log on and
access limited parts of the file system from a com-
mand prompt. From the Recovery Console, you can
disable the device driver that is causing the problem,
but you must know the correct name of the device or
driver (or both), which can be cryptic.
Device Manager Status Codes
When a device fails, an error message is usually reported in Device Manager with an
exclamation point in a yellow icon next to the device. If you double-click the device
(or right-click the device and then click Properties), a dialog box is displayed and any
error messages that Device Manager detects are listed. This Device Status has some
friendly text with it, but troubleshooting may require that you understand more than
the text message delivers. Often, there is a code listed with the text that gives a better
idea of how to troubleshoot the problem. These codes and suggested troubleshooting
strategies are listed in Table 10-4.
Table 10-4
Device Failure Troubleshooting
Code Friendly Text Troubleshooting Strategy
1 This device is not configured
correctly.
To update the drivers for this
device, click Update Driver. If
that doesn’t work, see your
hardware documentation for
more information.
3 The driver for this device
might be corrupted, or your
system may be running low
on memory or other
resources.
Use Update Driver to update the driver.
The driver may be corrupted. If you attempt to
load a file that is corrupted the system may
think that it needs more memory.
Use Task Manager to confirm that your system is
not low on memory.
Please purchase PDF Split-Merge on www.verypdf.com to remove this watermark.
10-18
Chapter 10 Managing Hardware Devices and Drivers
Table 10-4
Device Failure Troubleshooting (Continued)
Code Friendly Text Troubleshooting Strategy
10 The device cannot start. Try
updating the device drivers for
this device.
12 This device cannot find
enough free resources that it
can use. If you want to use this
device, you will need to dis-
able one of the other devices
on this system.
Most other Various
codes
Run the Hardware Update Wizard using the
Update Driver button, but do not let Windows
Server 2003 automatically detect devices.
Instead, select Install From A List Or Specific
Location (Advanced), and manually point the
wizard to the appropriate driver.
Click the Resources tab on the Properties page
containing the error. Windows Server 2003 will,
likely, be able to enumerate the associated
device that is in conflict with the device in ques-
tion. Either disable or remove the device that is
in conflict. You can then add the device you
removed back into the system and see if the
device can take new resources on its own, or if
you will have to assign resources manually.
Most other codes involve an inappropriate
driver, which should be reinstalled.
Tip
Remember, if a driver is signed, it is verified to work with Windows Server 2003. You
can get a list of signed drivers under Software Environment of the System Information utility.
System Information is accessible through the System Tools program group, or by typing
winmsd at the Run line.
Lesson Review
The following questions are intended to reinforce key information presented in this
lesson. If you are unable to answer a question, review the lesson materials and try the
question again. You can find answers to the questions in the “Questions and Answers”
section at the end of this chapter.
1. You have finished configuring a new display driver, and are prompted to restart
the computer for the changes to take effect. Shortly after logging on, the computer
screen goes blank, making working on the computer impossible. Which trouble-
shooting techniques or tools will allow you to recover most easily from the prob-
lem with the display driver?
a. Last Known Good Configuration
b. Driver Rollback
c. Safe mode
d. Recovery Console
Please purchase PDF Split-Merge on www.verypdf.com to remove this watermark.
Lesson 3 Troubleshooting Hardware Devices and Drivers
10
-
19
2. In Device Manager, you have a device that displays an error icon. On the Proper-
ties page for the device, you read that the Device Status is: “device could not start.”
What course of action will solve the problem?
3. The vendor for a wireless network card installed in your computer has released a
new driver. You want to test the driver for proper functionality. Which Device
Manager option will you select to test the new driver?
Lesson Summary
■
The Last Known Good Configuration option is useful for reverting to a previously
used, non-PnP driver, but only if you have not logged on to the system after
restarting.
■
Starting the computer in Safe mode loads a minimal set of drivers, allowing for
access to Device Manager to either disable, uninstall, or roll back a driver that is
prohibiting the system from functioning properly.
■
Most driver problems occur during manual configuration of an inappropriate
driver.
■
Resource settings should only be adjusted manually when conflicting settings can-
not be resolved by the operating system.
■
All manually configured resource allocations must be unique.
Case Scenario Exercise
If a computer is experiencing hardware resource allocation conflicts, hardware profiles
allow for the selection of devices to be enabled in different circumstances. As an alter-
native to manually attempting to configure which device should be assigned what
resource, and perhaps never determining a working configuration, defining a hardware
profile in which a device is not enabled allows for resources to be used for other
devices.
Hardware profiles also allow for the optimization of performance and some control of
power usage through the disabling of devices and services that are not used in a par-
ticular situation. A laptop computer, for example, can have its battery life extended
through the creation of a “mobile” profile, which disables devices that are not needed
when the computer is disconnected from the network.
Please purchase PDF Split-Merge on www.verypdf.com to remove this watermark.
10-20
Chapter 10 Managing Hardware Devices and Drivers
In this exercise, you will disable the network card for use in a hardware profile on a
laptop computer.
1. On the Hardware tab of System Properties, click Hardware Profiles.
2. Copy the current profile to a new profile. Name the profile “mobile” and leave the
Hardware Profiles Selection setting at the default (selects the first profile in the list
if a selection is not made within 30 seconds).
3. Restart the computer. When prompted for selection of a Hardware profile, choose
Mobile as the hardware profile for the system to use.
4. Log on, and open Device Manager from the Hardware tab in System Properties.
5. Right-click the network card reported in Device Manager and choose Properties.
6. In the Device Usage drop-down list on the Properties page for the network card,
select Do Not Use This Device In The Current Hardware Profile (disable).
You have now disabled the network card for use in a single profile. This technique can
be used in many different situations, including troubleshooting devices, by creating
Hardware profiles that enable or disable different devices whose combined interac-
tions and resource usage you are testing.
Troubleshooting Lab
The distribution files for Windows Server 2003 include most of the drivers needed to
configure the latest hardware devices, and misconfiguration is very rare. For configu-
ration conflicts that must be resolved manually, however, misconfiguration is a more
common occurrence.
When a device configuration change causes the computer to fail on restart, the Last
Known Good Configuration allows for rollback to use of a driver that was last in use.
Assuming that logon has not been accomplished since the problematic device driver
was installed, the Last Known Good Configuration is a usable option.
If logon is accomplished, the Last Known Good Configuration is overwritten with the
current configuration. If a driver fails, making the computer unusable after logon, then
Safe mode is a boot option that loads only a minimal set of drivers to allow configura-
tion of malfunctioning devices and drivers.
In this lab, you will activate the Last Known Good Configuration and Safe mode
options during the startup of your computer.
1. Restart your computer.
2. As the computer is starting up, press F8.
Please purchase PDF Split-Merge on www.verypdf.com to remove this watermark.
Chapter 10 Managing Hardware Devices and Drivers
10
-
21
3. Activate the Last Known Good Configuration (last configuration that worked).
At this point, all non-PnP drivers installed since the last restart and logon will have
reverted to their previous state.
4. Restart your computer.
5. As the computer is starting up, press F8.
6. Start the computer in Safe mode.
7. Log on to the computer, then start Device Manager.
You can now configure devices and their drivers for booting in Normal mode.
Chapter Summary
■
You must have administrative privileges on a computer to install non-PnP devices
and their drivers.
■
Users are able to install true PnP devices. If the drivers need to be added to the
computer, or any additional configuration or input is necessary during the instal-
lation, the user will not be able to install the device.
■
Device Manager will indicate, with one of several types of icons, any devices that
cannot be configured due to driver identification or resource conflict problems.
■
The Device Manager and any Control Panel applications that configure hardware
can be made unavailable to the user through Group Policies.
■
Updated drivers can be rolled back to the previously used driver with the Roll
Back Driver function of Device Manager.
■
Devices can be disabled or enabled through Device Manager.
■
PnP devices that have signed drivers on the Windows Server 2003 distribution CD
will configure automatically, requiring no user intervention.
Exam Highlights
Before taking the exam, review the key points and terms that are presented below to
help you identify topics you need to review. Return to the lessons for additional prac-
tice and review the “Further Readings” sections in Part 2 for pointers to more informa-
tion about topics covered by the exam objectives.
Please purchase PDF Split-Merge on www.verypdf.com to remove this watermark.
10-22
Chapter 10 Managing Hardware Devices and Drivers
Key Points
■
Review the use of Device Manager to install device drivers, update device drivers,
roll back device drivers, and disable or enable devices in a hardware profile.
Remember that Device Manager can change settings only on a local system—
remote use of Device Manager is limited to read-only mode.
■
Users can only install PnP devices.
■
Administrative credentials are required to install non-PnP and vendor-supplied
PnP drivers.
■
Reinstallation of a driver is needed unless a resource conflict is being resolved.
■
Resource conflicts are resolved by first clearing the Use Automatic Settings check
box, then configuring the required resource settings.
■
Last Known Good Configuration is only useful before a system restart /user logon
cycle is complete.
■
Safe mode will load a minimal set of drivers so that appropriate configuration can
be made.
Key Terms
Roll Back Driver vs. Last Known Good Configuration A driver rollback requires
logon, whereas a logon invalidates Last Known Good Configuration. Roll Back
Driver and Last Known Good Configuration both revert to a previous configura-
tion of a device driver.
Uninstalling vs. disabling a device Uninstalling a device will remove the device
from all configurations. Depending on the type of device, a PnP detection might
occur on the next system restart or Scan for Hardware changes. Configuration of
the device on the next system restart or Scan for Hardware changes will treat the
device as new.
Disabling a device maintains the driver as configured the next time that the device
is enabled, but makes the device unavailable for use until enabled.
Safe Mode vs. Last Known Good Configuration Logging on in Safe mode loads a
minimal set of drivers, but will not reset any drivers, whereas the Last Known
Good Configuration will revert to the previous driver configuration.
Please purchase PDF Split-Merge on www.verypdf.com to remove this watermark.
Questions and Answers
10
-
23
Questions and Answers
Page
10-8
Page
10-14
Lesson 1 Review
1. You want to make certain that no unsigned drivers are used on the desktop com-
puters in your environment. What Driver Signing settings and related configura-
tion will assure this condition?
In a Group Policy for the desktop computers, set the Security Option for Devices: Unsigned
Driver Installation Behavior to Do Not Allow Installation. You can also use domain based Group
Policies to deny access to hardware Properties pages and the MMC Device Manager snap-in for
the users of the desktop computers.
2. A user wants to install a USB printer connected to their his or her computer. The
drivers for the printer are included with Windows Server 2003. Can the user install
the printer?
Yes. A USB printer with drivers included with Windows Server 2003 is a PnP printer, and the
driver is signed, so installation should be possible with no intervention from the user. This
assumes that there are no resource conflicts on that computer.
3. A user wants to install a USB printer connected to his or her local computer. The
driver is provided by the vendor, and is not included with Windows Server 2003.
The driver is digitally signed. Can the user install the printer?
No. The driver must be queried by the Add Hardware Wizard in Windows Server 2003, which
requires user interaction through the interface, which (by default) is not permitted.
Lesson 2 Review
1. Under what circumstances would you adjust the resource settings for a device?
Adjustments to a driver are usually necessary for resolution of device conflicts involving devices
that cannot be completely configured automatically by the operating system, such as older
Industry Standard Architecture (ISA) devices or devices bridged to Peripheral Component Inter-
connect (PCI).
2. You need to remove a PnP device from a configuration temporarily, but want to
leave it physically connected to the computer. You want to minimize the amount
of work required to use the device later. Which of the following is the best option
to accomplish your goal?
a. From the Properties page of the device, choose Do Not Use this Device (Disable).
b. From the Properties page of the device, choose Uninstall.
c. Using the Safely Remove Hardware utility, choose to remove the device.
The correct answer is a. This method will allow for the temporary disabling of the device. All that
needs to be done for the device to be usable again is to Enable it. Other options require either
a reinstallation or rescanning of the computer to reactivate the device.
Please purchase PDF Split-Merge on www.verypdf.com to remove this watermark.
10-24
Chapter 10 Managing Hardware Devices and Drivers
3. Greg’s computer has an external USB Hard Disk connected to a USB hub on his
computer. He is reporting that the disk is connected properly, but the drive (G)
normally associated with the disk is not available. Upon investigation, you dis-
cover that the indicator light on the hub is not illuminated and the device does not
appear in Device Manager. Disconnecting and re-connecting the device has no
effect. What is likely the quickest way to return the disk to proper functionality?
In Device Manager, right-click the USB Hub and choose Scan for Hardware Changes. This action
will force a detection of the Hard Disk connected to the Hub as if it were a newly connected
device.
Page
Lesson 3 Review
10-18
1. You have finished configuring a new display driver, and are prompted to restart
the computer for the changes to take effect. Shortly after logging on, the computer
screen goes blank, making working on the computer impossible. Which trouble-
shooting techniques or tools will allow you to recover most easily from the prob-
lem with the display driver?
a. Last Known Good Configuration
b. Driver Rollback
c. Safe mode
d. Recovery Console
The correct answers are b and c. The Last Known Good Configuration option is useless
because you have logged on to the computer, making the last changes permanent. Safe mode
will allow you to roll back the driver by using Device Manager.
2. In Device Manager, you have a device that displays an error icon. On the Proper-
ties page for the device, you read that the Device Status is: “device could not start.”
What course of action will solve the problem?
Install the appropriate driver for the device with the Update Driver function in Device Manager.
3. The vendor for a wireless network card installed in your computer has released a
new driver. You want to test the driver for proper functionality. Which Device
Manager option will you select to test the new driver?
The Device Manager option you should select is Update Driver. Although the Reinstall Driver
option would allow for the new driver to be used, selecting the Update Driver option will allow
for the creation of a backup file containing the current driver, making driver rollback an option
in the event that the driver does not perform properly.
Please purchase PDF Split-Merge on www.verypdf.com to remove this watermark.
11 Managing Microsoft
Windows Server 2003
Disk Storage
Exam Objectives in this Chapter:
■
Manage basic disks and dynamic disks
■
Optimize server disk performance
■
Implement a RAID solution
■
Defragment volumes or partitions
■
Monitor and optimize a server environment for application performance
■
Monitor disk quotas
■
Recover from server hardware failure
Why This Chapter Matters
If there’s one truism about information technology, it’s that no matter how much
storage you have today, it will be full tomorrow. You probably remember when
hard drives were measured in megabytes. Many organizations are now talking ter-
abytes. And with all that data, and all those users needing all that information
comes an enormous strain on the storage subsystems on your servers.
Large organizations are turning to storage area networks (SANs) made up of fiber-
connected, fault-tolerant arrays of disk drives. But storage that is actually attached
to your servers won’t disappear quite yet, so you will want to make sure that you
have configured server storage to provide the optimum balance of storage capac-
ity, performance, and fault tolerance.
In this chapter, you will learn how to do just that: leverage one or more physical
disks to address your storage requirements. You will learn about the storage
options that Microsoft Windows Server 2003 provides, including flexible structures
that make it easy to extend capacity, provide redundancy, and boost perfor-
mance—usually without a restart! You’ll also learn to configure and recover fault-
tolerant disk sets created by Windows Server 2003’s redundant array of independent
disks (RAID) support. Finally, you will examine Check Disk, Disk Quotas and
Disk Defragmenter, which will keep those drives working smoothly and perhaps
delay the inevitable exhausting of their capacity.
11-1
Please purchase PDF Split-Merge on www.verypdf.com to remove this watermark.
11-2
Chapter 11 Managing Microsoft Windows Server 2003 Disk Storage
Lessons in this Chapter:
■
Lesson 1: Understanding Disk Storage Options. . . . . . . . . . . . . . . . . . . . . . 11-3
■
Lesson 2: Configuring Disks and Volumes . . . . . . . . . . . . . . . . . . . . . . . . 11-11
■
Lesson 3: Maintaining Disk Storage Volumes . . . . . . . . . . . . . . . . . . . . . . 11-24
■
Lesson 4: Implementing RAID . . . . . . . . . . . . . . . . . . . . . . . . . . . . . . . . . 11-33
Before You Begin
This chapter presents the skills and concepts related to disk storage. You are able to
apply several concepts and skills using hands-on exercises that require the following
configuration:
■
A computer installed with Windows Server 2003, Standard Edition or Enterprise
Edition.
■
The server should have at least one disk drive with a minimum of 1 gigabyte (GB)
of unallocated space.
■
The computer should be named Server01 and should be a domain controller in
the contoso.com domain.
Please purchase PDF Split-Merge on www.verypdf.com to remove this watermark.
Lesson 1 Understanding Disk Storage Options
11
-
3
Lesson 1: Understanding Disk Storage Options
Before you tackle the installation of a disk drive and the configuration of that drive,
you must understand several important storage concepts. This lesson will introduce
you to the concepts, technologies, features, and terminology related to disk storage in
Windows Server 2003. You will learn about differences between basic and dynamic
disk storage types, and the variety of logical volumes they support.
After this lesson, you will be able to
■
Understand disk-storage concepts and terminology
■
Distinguish between basic and dynamic storage
■
Identify the strengths and limitations of basic and dynamic disks
■
Identify the types of storage volumes supported on Windows Server 2003 managed
disks
Estimated lesson time:
15 minutes
Physical Disks
Physical disks are the conglomeration of plastic, metal, and silicon that enable users to
store enormous quantities of useless data and MP3s, and the occasional business doc-
ument. Of course I’m being sarcastic here, but it is important to understand the differ-
ence between the physical disk, and its logical volume(s), which are discussed in the
next paragraph. It is also helpful to remember that an advanced disk subsystem, such
as hardware-based redundant array of independent disks (RAID) system, may consist
of several physical disks, but its dedicated hardware controllers abstract the physical
composition of the disk set so that Windows Server 2003 perceives and represents the
disk system as a single physical disk.
Logical Volumes
A logical volume is the basic unit of disk storage that you configure and manage. A log-
ical volume may include space on more than one physical disk. Logical volumes (also
called logical disks in the context of performance monitoring) are physically distinct
storage units, allowing the separation of different types of information, such as the
operating system, applications, and user data. Logical volumes have traditionally been
represented by a single drive letter.
As you dig into disk-related terminology, you will learn about partitions, logical drives,
and volumes. Many resources will use all these terms interchangeably, which is possi-
ble because the technical distinctions between the terms are minuscule, and the user
interface and command-line tools guide you clearly by exposing only the appropriate
Please purchase PDF Split-Merge on www.verypdf.com to remove this watermark.
11-4
Chapter 11 Managing Microsoft Windows Server 2003 Disk Storage
type of logical volume based on the task you are performing. Don’t get too hung up on
the distinctions between the terms; they will become clear through experience if not
through analysis.
Mounted Volumes
You noticed that we said, “Logical volumes have traditionally been represented by a
single drive letter.” That structure severely limited (to 26, says my kindergarten teacher)
the number of volumes you could create on a system, and the flexibility with which
those volumes could be used. Windows Server 2003’s NTFS file system allows you to
assign one or no drive letter to a volume. In addition, you can mount a volume to one
or more empty folders on existing NTFS volumes. For example, you might create an
empty folder Docs, on an existing volume with the drive letter X:, and mount a new
120 GB logical volume to that folder. When users navigate to X:\Docs, the disk sub-
system redirects the input/output (I/O) requests to the new volume. All of this is trans-
parent to the user.
The possibilities using this powerful feature are, as they say, “limitless.” By mounting
a volume to a folder path, you can extend the available drive space on an existing vol-
ume. If the existing volume is not fault-tolerant, but the new volume is fault-tolerant,
the folder to which the volume is mounted, X:\Docs, represents a fault-tolerant portion
of the existing volume’s namespace. You could, theoretically, mount all logical vol-
umes on a server to folders on the server’s C or D drive and thereby unify enormous
storage capacity under the namespace of a single drive letter.
Fault Tolerance
Fault tolerance refers to a system’s ability to continue functioning when a compo-
nent—in this case, a disk drive—has failed. Windows Server 2003 allows you to create
two types of fault-tolerant logical volumes: mirrored (RAID-1) and striped with parity
(RAID-5). You will learn more about the details of these configurations later in the
chapter, but it is important to remember several facts about Windows Server 2003 fault
tolerance, often called software RAID:
■
In fault-tolerant disk configurations, two or more disks are used, and space is allo-
cated to store data that will enable the system to recover in the event of a single
drive failure.
■
The fault tolerance options supported by Windows Server 2003 do not provide a
means for a disk volume to continue functioning if two or more disks fail.
■
The operating system allows you to use any two or more disk drives to create
fault-tolerant volumes. You do not have to purchase any additional hardware or
software to benefit immediately from fault-tolerant server configurations. However,
if you use Windows Server 2003 mirrored or RAID-5 volumes, it is best practice to
Please purchase PDF Split-Merge on www.verypdf.com to remove this watermark.
