Tài liệu Windows Server 2008 Inside Out- P26 ppt
Bạn đang xem bản rút gọn của tài liệu. Xem và tải ngay bản đầy đủ của tài liệu tại đây (1.21 MB, 50 trang )
granted. In practice, you will almost always use security groups, because they include
distribution group functionality and are the only types of groups that have DACLs.
Domain Local Groups
Consider using domain local groups fi rst when you are giving groups or users access to
local domain resources. For instance, if you have a domain named northwind.com and
you want users or groups in that local domain to access a shared folder in the north-
wind.com local domain, you could create a domain local group called SalesPersons,
insert in the SalesPersons group the users and global groups you want to give access to
the shared folder, and then assign the SalesPersons group permissions on the resource.
Access policies for domain local groups are not stored in Active Directory. This means
that they do not get replicated to the global catalog and thus queries performed on the
global catalog will not return results from domain local groups. This is because domain
local groups cannot be determined across domains.
Global Groups
Use global groups to give users or groups access to resources according to how they
have been organized. For instance, users from the Marketing or Development depart-
ments could be put in separate global groups in order to simplify administration of
their need to access resources like printers and network shares. Global groups can be
nested in order to grant access to any domain in the forest.
Universal Groups
Universal groups have very few fundamental restrictions. Universal groups can be a
tempting shortcut for administrators to use, because they can be used across domains
in the forest. Memberships in universal groups can be drawn from any domain, and
permissions can be set within any domain. However, using universal groups as your
main method of grouping users, groups, and computers has a signifi cant caveat.
Universal groups are stored in the global catalog, and whenever changes are made to a
universal group, the changed properties must be replicated to other domain controllers
confi gured as global catalog servers. The replication of individual property changes
rather than entire objects is an improvement for Windows Server 2008 that should
allow wider use of universal groups without causing network bottlenecks or slowed
performance during authentication and global catalog changes.
Which Group Scope Should You Use?
There is a strategy in choosing when to use a group scope and which group scope to
use. A common strategy is to organize user accounts into logical groups based on the
permissions they need to access specifi c resources. In a business model, this often can
be determined according to the department the user belongs to. For instance, the Devel-
opment department of a software business may put all their developers in a Dev group,
and then assign permissions to a network share to the Dev group. On the other hand,
in a Windows Server 2008 environment it becomes more complex than this, because
there are different scopes for groups. Furthermore, groups may contain not only users,
but also computers and even other groups, and can be nested to any scale.
Managing Groups 1217
Chapter 35
Please purchase PDF Split-Merge on www.verypdf.com to remove this watermark.
Some important constraints on group scope in Windows Server 2008 include the
following:
Universal groups are stored in the global catalog and replicated across the net-
work. However, Windows Server 2008 has new features that allow caching of the
global catalog and replication of only the changes in it.
Global groups can be included in an object’s security data structure only if that
object is in the same domain as the global group. In Windows 2000 native func-
tional level or higher, global groups can be nested in order to grant access to any
domain in the forest.
Domain local groups cannot be processed in other domains.
Group scope functionality and limitations include member inclusion and permissions.
Table 35-4 lists how the three scopes function.
Table 35-4 How Group Scope Functions Using Windows Server 2003 and Higher Domain
Functional Levels
Group Member Inclusion Permissions
Universal You can include users, computer
accounts, global groups, and
universal groups from any domain.
Within any domain, universal
groups can be added to other
groups and granted permissions.
Global You can put in a global group
any user or computer account or
other global groups from the same
domain.
Global groups can be added
to other global groups in any
domain in the forest and assigned
permissions.
Domain local Same as universal groups, but
you can also include domain local
groups from the same domain.
Domain local groups can be added
only to other domain local groups
in the same domain and assigned
permissions.
In native mode, Windows Server 2008 groups have nesting limitations that are depen-
dent on the group scope. Limitations for nesting are listed in Table 35-5.
Table 35-5 Group Scope Nesting in Windows 2000 Native Functional Level
Group Type
Can Nest in
Universal? Can Nest in Global?
Can Nest in
Domain Local?
Universal No Yes Yes
Global Yes Yes (only in the same domain) Yes
Domain local No No No
Why Use Domain Local Groups?
Domain local groups are used when you want to give users, computers, or specifi c
groups access to resources in a single local domain. In a domain local group, you can
include other domain local groups with domain local scope, global groups, or univer-
sal groups. You can also include single accounts in the domain local group. However,
Chapter 35
1218 Chapter 35 Managing Users, Groups, and Computers
Please purchase PDF Split-Merge on www.verypdf.com to remove this watermark.
including single user accounts can increase the amount of administration for you
instead of reducing it, so unless management has specifi cally requested a special per-
mission, this may not be the best route.
A common scenario for using domain local groups is to provide access to printers for
members of a department (such as the Developers department).
In this scenario, you would use Active Directory Users And Computers:
1. Create a domain local group by right-clicking an OU, and then selecting New,
Group.
2. Assign permissions to use the printer by adding the new domain local group to
the printer by opening Control Panel, Printers And Faxes, then right-clicking
Properties, selecting the Security tab, and fi nally adding the domain local group
to the printer.
3. Create a global group.
4. Add the user accounts from the Development department to the global group
5. Add the global group to the domain local group you created at the beginning.
This way, if you ever add a new printer, all you have to do is add access to it in the
domain local group, and the developers automatically get access because their global
group is part of the domain local group.
If a new domain is added, all you have to do to give the people in the new domain
access to the printer is add the new global groups from the new domain to the domain
local group.
Why Use Global Groups?
An important aspect of global groups is they are not replicated outside their own
domain. They are not part of the global catalog replication. Thus, you should use
global group membership for objects that need high regular maintenance or modifi ca-
tions. These changes will not be replicated across your network and thus will not slow
network traffi c over slow links. Therefore, a main reason to use global groups is to
organize users with similar needs within a domain to give them access to resources.
For instance, you have two domains, one in the United States, the other in India. In
each domain you have developers. Because your business model requires that neither
group of developers needs access to the other’s source code, you could create two global
groups, USA\Dev and India\Dev, and give the global groups permissions to different
source code shares.
Why Use Universal Groups?
Using universal groups extends this idea so that users in groups of different domains
may be able to access resources without affecting network traffi c because of global
catalog replication. By creating a universal group and adding global groups to it, you
can give users from different domains in the forest access to the same resource. For
instance, in the preceding scenario, a third group could be created for the developers,
Managing Groups 1219
Chapter 35
Please purchase PDF Split-Merge on www.verypdf.com to remove this watermark.
called UniDev. This would be a universal group to which you would add both global
groups, USA\Dev and India\Dev, and assign permissions to perhaps even a second
network share of source code that both groups of users must access. This is a good
strategy, because if you add new user accounts to the global groups, the changes are
not replicated to the global catalog and little if no impact to network traffi c is incurred.
However, be careful about changing memberships to universal groups, because those
changes are replicated across all links to other domain controllers confi gured with
global catalogs.
Creating a Group
You may create groups in the Users container or in a new OU that you have created in
the domain. To create a group, start Active Directory Users And Computers. Right-click
the Users container or the OU in which you want to place the group, point to New, and
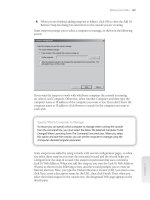
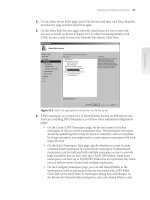
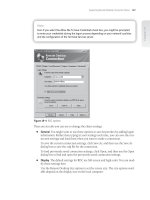
then select Group. This displays the New Object–Group dialog box shown in Figure
35-15. Type a group name, and then select the Group Scope and Group Type. Click OK
to create the group.
Figure 35-15 Creating a group.
Windows Server 2008 has three group scopes and two group types you can select from.
This allows you to create six different combinations of groups. You must be a member
of the Account Operators, Domain Admins, or Enterprise Admins group to create new
groups.
Note
The built-in accounts for Active Directory in Windows Server 2008 are located in two
places. The built-in domain local groups such as Administrators, Account Operators,
and Backup Operators are located in the Builtin container. Built-in global groups such as
Domain Admins and Enterprise Admins are located in the Users container.
Chapter 35
1220 Chapter 35 Managing Users, Groups, and Computers
Please purchase PDF Split-Merge on www.verypdf.com to remove this watermark.
At the command line, you can create groups using DSADD. For groups, AD path strings
describe the group’s location in the directory from the group name to the actual contain-
ers in which it is stored. You specify whether the group is a security group using -secgrp
yes or that a group is a distribution group using -secgrp no. You specify the scope of the
group using -scope u for universal, -scope g for global, and -scope l for domain local.
For example, if you want to create a global security group called SeattleServices
in the Services OU for the cpandl.com domain, the full path to this group object is
CN=SeattleServices,OU=Services,DC=cpandl,DC=com. When creating the group object
using DSADD, you must specify this path as follows:
dsadd group "CN=SeattleServices,OU=Services,DC=cpandl,DC=com" -secgrp yes -
scope g
For the full syntax and usage, type dsadd group /? at a command prompt. Although
quotation marks aren’t required in this example, I always use them to ensure that I don’t
forget them when they actually are needed, such as when name components contain
spaces.
The directory services commands can also be used to perform many group management
tasks. Using DSGET GROUP at a command prompt, you can:
Determine whether a group is a security group by typing dsget group GroupDN
-secgrp.
Determine group scope by typing dsget group GroupDN -scope.
Determine the members of a group by typing dsget group GroupDN -members
where GroupDN is the distinguished name of the group.
Determine the groups of which a group is a member by typing dsget group
GroupDN -memberof. The -expand option can be added to display the recur-
sively expanded list of groups of which a group is a member.
Using DSMOD GROUP at a command prompt, you can:
Change group scope using dsmod group GroupDN -scope u for universal,
-scope g for global, and -scope l for domain local.
Add members by typing dsmod group GroupDN -addmbr MemberDN where
GroupDN is the distinguished name of the group and MemberDN is the distin-
guished name of the account or group you want to add to the designated group.
Remove members by typing dsmod group GroupDN -rmmbr MemberDN.
Convert the group to a security group using dsmod group GroupDN -secgrp yes
or to a distribution group using dsmod group GroupDN -secgrp no.
SIDE OUT
Creating group accounts at the command line
At the command line, you can create groups using DSADD. For groups, AD path strings
describe the group’s location in the directory from the group name to the actual contain-
ers in which it is stored. You specify whether the group is a security group using -secgrp
yes or that a group is a distribution group using -secgrp no. You specify the scope of the
group using -scope u for universal, -scope g for global, and -scope l for domain local.
For example, if you want to create a global security group called SeattleServices
in the Services OU for the cpandl.com domain, the full path to this group object is
CN=SeattleServices,OU=Services,DC=cpandl,DC=com. When creating the group object
using DSADD, you must specify this path as follows:
dsadd group "CN=SeattleServices,OU=Services,DC=cpandl,DC=com" -secgrp yes -
scope g
For the full syntax and usage, type dsadd group /? at a command prompt. Although
quotation marks aren’t required in this example, I always use them to ensure that I don’t
forget them when they actually are needed, such as when name components contain
spaces.
The directory services commands can also be used to perform many group management
tasks. Using DSGET GROUP at a command prompt, you can:
Determine whether a group is a security group by typing dsget group GroupDN
-secgrp.
Determine group scope by typing dsget group GroupDN -scopeN .
Determine the members of a group by typing dsget group GroupDN -membersN
where GroupDN is the distinguished name of the group.N
Determine the groups of which a group is a member by typing dsget group
GroupDN -memberofN . The -expand option can be added to display the recur-
sively expanded list of groups of which a group is a member.
Using DSMOD GROUP at a command prompt, you can:
Change group scope using dsmod group GroupDN -scope uN for universal,
-scope g for global, and -scope l for domain local.
Add members by typing dsmod group GroupDN -addmbr N MemberDN whereN
GroupDN is the distinguished name of the group andN MemberDN is the distin-N
guished name of the account or group you want to add to the designated group.
Remove members by typing dsmod group GroupDN -rmmbr MemberDNN .
Convert the group to a security group using dsmod group GroupDN -secgrp yesN
or to a distribution group using dsmod group GroupDN -secgrp noN .
Managing Groups 1221
Chapter 35
Please purchase PDF Split-Merge on www.verypdf.com to remove this watermark.
Adding Members to Groups
The easiest way to add users to a group is to right-click the user in the details pane of
Active Directory Users And Computers, and then select Add To A Group. The Select
Groups dialog box appears and you can select the group of which the user is to become
a member. You can also get to the same dialog box by right-clicking on the user name,
selecting Properties, clicking the Member Of tab, and then clicking Add.
Note
To add multiple users to a group, select more than one user, using Shift+click or
Ctrl+click, and follow the same steps.
If you want to add both users and groups as members of a group, you can do this by
performing the following steps:
1. Double-click the group entry in Active Directory Users And Computers. This
opens the group’s Properties dialog box.
2. On the Members tab, click Add to add accounts to the group.
3. Use the Select Users, Contacts, Computers, Or Groups dialog box to choose
users, computers, and groups that should be members of the currently selected
group. Click OK.
4. Repeat steps 2 and 3 as necessary to add additional users, computers, and groups
as members.
5. Click OK.
Deleting a Group
Deleting a group is as simple as right-clicking the group name within Active Directory
Users And Computers, and then selecting Delete. You should be very careful when
deleting groups because, though it does not delete the user accounts contained by the
group, the permissions you may have assigned to the group are lost and cannot be
recovered by merely re-creating the group with the same name.
CAUTION
!
The permissions on groups are internally characterized within Active Directory by
unique SIDs that are allocated when the group is created. If you delete a group and then
re-create it, it will have a new SID and thus new permissions.
Note
To add multiple users to a group, select more than one user, using Shift+click or
Ctrl+click, and follow the same steps.
CU O
!
Chapter 35
1222 Chapter 35 Managing Users, Groups, and Computers
Please purchase PDF Split-Merge on www.verypdf.com to remove this watermark.
Modifying Groups
There are a number of modifi cations, property changes, and management procedures
you may want to apply to groups. You can change the scope, the members, and other
groups contained in the group; move a group; delegate management of a group; and
send mail to a group.
Finding a Group
When you have a substantial number of groups, you can use the Find function to locate
the one you need to manage. Just right-click the domain or OU, and then select Find. In
the Find Users, Contacts, And Groups dialog box, you can specify what type of object to
fi nd, change the starting point, or structure a search query from the available tabs. After
the query has run, many administrative or management functions can be performed on
the objects returned in the results window.
In Active Directory Users And Computers, you can reuse and save queries. This allows
you to fi nd groups quickly and repeatedly when you want to manage and modify them.
You can locate the Saved Queries folder in the default position at the top of the Active
Directory Users And Computers console tree (left pane). You cannot save queries using
the Find menu when you right-click a group. You can only save them using the Saved
Query procedure that is found in the uppermost part of the tree in Active Directory
Users And Computers and creating a new query.
Managing the Properties of Groups
When you double-click a group name in Active Directory Users And Computers, the
Group Properties dialog box appears. You can confi gure the following six areas or
functions:
General
You change the description or group e-mail address here. In addition,
you may be able to change the type of group or the scope of the group. When in
Windows Server 2003 or higher domain functional level, there are limitations on
changing group scope, as shown in Table 35-6.
Members
You can list, add, and remove group members.
Member Of
Lists the groups the current group is a member of. These can be
domain local groups or universal groups from the local domain or universal
groups from other domains in the current domain tree or forest.
Managed By
Add, clear, or modify the user account you want to make respon-
sible for managing this group.
SIDE OUT
Saved queries in Active Directory
In Active Directory Users And Computers, you can reuse and save queries. This allows
you to fi nd groups quickly and repeatedly when you want to manage and modify them.
You can locate the Saved Queries folder in the default position at the top of the Active
Directory Users And Computers console tree (left pane). You cannot save queries using
the Find menu when you right-click a group. You can only save them using the Saved
Query procedure that is found in the uppermost part of the tree in Active Directory
Users And Computers and creating a new query.
Managing Groups 1223
Chapter 35
Please purchase PDF Split-Merge on www.verypdf.com to remove this watermark.
Object
View the canonical name of the group object. This tab is visible only in
Advanced view. To access Advanced view, select Advanced Features from the View
menu in Active Directory Users And Computers.
Security
Used to confi gure advanced permissions for users and groups that can
access the group object in Active Directory. This tab is visible only in Advanced
view.
Table 35-6 Group Scope Conversions in Windows Server 2003 or Higher Domain
Functional Level
Scope of Group
Can Be Converted
to Universal
Can Be Converted to
Global
Can Be Converted to
Domain Local
Universal NA Yes Yes
Global Yes NA No
Domain local Yes No NA
Modifying Other Group Settings
You can modify other group settings using Active Directory Users And Computers. You
can perform the following tasks:
Move a group
To move a group, right-click it, and then select Move. The Move
dialog box appears, allowing you to select the container to which you want to
move the group. Alternatively, you can drag the group icon into a new container.
You can also select multiple groups to move by using Windows keyboard short-
cuts such as Ctrl, then selecting multiple groups, or using Shift and selecting the
fi rst and last group.
Rename a group
Right-click the group name, and then select Rename. Type the
new group name, and then press Enter. Multiple group selection is disabled for
this function.
Send mail to a group
Right-click the group name, and then select Send Mail. An
error will occur if no e-mail address has been confi gured on the General tab of
Group Properties. Otherwise, the default mail client will be used to open a new
mail message addressed to the group, which you can complete and send.
Note
Moving or renaming groups can alter the effective permissions of users and groups in
unpredictable ways. With this in mind, you might want to check the effective permissions
for member users and groups to ensure that the permissions are as expected.
Note
Moving or renaming groups can alter the effective permissions of users and groups in
unpredictable ways. With this in mind, you might want to check the effective permissions
for member users and groups to ensure that the permissions are as expected.
Chapter 35
1224 Chapter 35 Managing Users, Groups, and Computers
Please purchase PDF Split-Merge on www.verypdf.com to remove this watermark.
Managing Computer Accounts
Computer accounts are managed and confi gured using Active Directory Users And
Computers. By default, computer accounts are stored in the Computers container and
domain controller accounts are stored in the Domain Controllers container. Computer
accounts can also be stored in other containers, such as the OUs you’ve created. Com-
puters may be joined and removed from a domain using Computer Management or the
System tool in Control Panel.
Creating a Computer Account in Active Directory
When you create a new computer account in your domain, you must be a member of the
Account Operators, Domain Admins, or Enterprise Admins group in Active Directory.
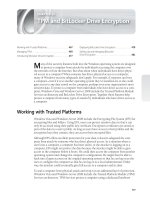
To create a new computer account, start Active Directory Users And Computers. Right-
click the container in which you want to create the new computer account, point to
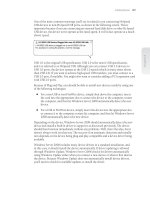
New, and then select Computer. This starts the New Object–Computer Wizard shown
in Figure 35-16.
Figure 35-16 Creating a computer account.
Type a computer name. By default, only members of Domain Admins can join com-
puters to the domain. To allow a different user or group to join the computer to the
domain, click Change, and then use the Select User Or Group dialog box to select
a user or group account that is authorized to join the computer to the domain. If
Windows NT systems can use this account, select the Assign This Computer Account
As A Pre–Windows 2000 Computer check box. Click Next twice, and then click Finish.
Managing Computer Accounts 1225
Chapter 35
Please purchase PDF Split-Merge on www.verypdf.com to remove this watermark.
Note
Creating a computer account does not join the computer to the domain. It merely cre-
ates the account to simplify the process of joining a domain. You can, however, create a
computer account when you join a computer to a domain.
You can create computer accounts using DSADD as well. To do this, you’ll need to know
the Active Directory service path string you want to use. For example, suppose you want
to create a computer account called CustServicePC27 in the Computers container for the
cpandl.com domain. The full path to this computer object is CN=CustServicePC27,
CN=Computers,DC=cpandl,DC=com. When creating the computer object using DSADD,
you must specify this path as follows:
dsadd computer "CN=CustServicePC27,CN=Computers,DC=cpandl,DC=com"
Here, CN= is used to specify the common name of an object and DC= is used to specify
a domain component. With Active Directory path strings, you will also see OU=, which is
used to specify the name of an organizational unit object. For the full syntax and usage,
type dsadd computer /? at a command prompt. Although quotation marks aren’t
required in this example, I always use them to ensure that I don’t forget them when they
actually are needed, such as when name components contain spaces.
The directory services commands can also be used to perform many computer man-
agement tasks. Use DSMOD COMPUTER to set properties, disable accounts, and reset
accounts. Use DSMOVE COMPUTER to move computer accounts to a new container or
OU. Use DSRM COMPUTER to remove the computer account.
Joining Computers to a Domain
When you join a computer to a domain, you must supply the credentials for creating
a new computer account in Active Directory. The new computer will be placed in the
default Computers container in Active Directory. Most of the time, there is a dialog
box for joining a computer to the domain when you install or set up Windows 2000 or
later for the fi rst time. You must be a member of the Administrators group on the local
computer to join it to the domain. Windows Server 2008 allows any authenticated user
to join workstations to the domain—up to a total of 10—providing that you’ve already
created the necessary computer accounts. To join a server to a domain, you must be a
member of the Account Operators, Domain Admins, or Enterprise Admins group.
Note
Creating a computer account does not join the computer to the domain. It merely cre-
ates the account to simplify the process of joining a domain. You can, however, create a
computer account when you join a computer to a domain.
SIDE OUT
Creating computer accounts at the command line
You can create computer accounts using DSADD as well. To do this, you’ll need to know
the Active Directory service path string you want to use. For example, suppose you want
to create a computer account called CustServicePC27 in the Computers container for the
cpandl.com domain. The full path to this computer object is CN=CustServicePC27,
CN=Computers,DC=cpandl,DC=com. When creating the computer object using DSADD,
you must specify this path as follows:
dsadd computer "CN=CustServicePC27,CN=Computers,DC=cpandl,DC=com"
Here, CN= is used to specify the common name of an object and DC= is used to specify
a domain component. With Active Directory path strings, you will also see OU=, which is
used to specify the name of an organizational unit object. For the full syntax and usage,
type dsadd computer /? at a command prompt. Although quotation marks aren’t
required in this example, I always use them to ensure that I don’t forget them when they
actually are needed, such as when name components contain spaces.
The directory services commands can also be used to perform many computer man-
agement tasks. Use DSMOD COMPUTER to set properties, disable accounts, and reset
accounts. Use DSMOVE COMPUTER to move computer accounts to a new container or
OU. Use DSRM COMPUTER to remove the computer account.
Chapter 35
1226 Chapter 35 Managing Users, Groups, and Computers
Please purchase PDF Split-Merge on www.verypdf.com to remove this watermark.
To join a server or workstation to a domain, follow these steps:
1. Click System And Maintenance\System in Control Panel. In the Computer Name,
Domain, And Workgroup Settings section, click Change Settings. This displays
the System Properties dialog box with the Computer Name tab selected.
2. On the Computer Name tab, click Change.
3. Select Domain and type the name of the domain to which the computer should
join. Click OK.
4. When prompted, type the name and password of a domain account that has
the permissions to create a computer account in Active Directory, or join the
computer to the domain, or both. Click OK.
5. The computer is joined to the domain, and a new computer account is created as
necessary. If the changes are successful, you’ll see a confi rmation dialog box.
TROUBLESHOOTING
The computer won’t join the domain
If there are problems joining the computer to the domain, there may be an existing com-
puter in the domain with the same name. In this case, you would change the computer
name and then repeat this procedure. The computer must also have Transmission Con-
trol Protocol/Internet Protocol (TCP/IP) properly confi gured. If you suspect a problem
with the TCP/IP confi guration, ping the loopback address 127.0.0.1 to ensure TCP/IP is
installed correctly and then check the confi guration settings by typing ipconfi g /all at
the command prompt.
Moving a Computer Account
A corporation may have organizational changes requiring you to move a computer
account. The computer account may be moved from one container to another. Plan and
test moving the computer account to ensure that possible confl icts in permissions or
rights don’t occur. You can use the Effective Permissions tool in planning mode to simu-
late moving computer accounts and to determine if there could be confl icts.
To move a computer account, you can drag and drop the computer object from one
container to another within the details pane of Active Directory Users And Computers.
Alternatively, you can right-click the computer account name, select Move, and then
select the container to which you want to move the account using the Move dialog box.
You cannot move computer accounts for domain controllers across domains. You must
fi rst demote the domain controller, then move the computer account.
OU S OO G
Managing Computer Accounts 1227
Chapter 35
Please purchase PDF Split-Merge on www.verypdf.com to remove this watermark.
Disabling a Computer Account
Security issues, such as malicious viral attacks or rogue user actions, may require you
to temporarily disable a computer account. Perhaps a critical software bug has caused
an individual computer to repeatedly try to receive authentication from a domain con-
troller. You disable a computer account to prevent it from authenticating until you fi x
the problem.
You disable a computer account by right-clicking it in Active Directory Users And Com-
puters and selecting Disable Account. This prevents the computer from logging on to
the domain but does not remove the related account from Active Directory.
Deleting a Computer Account
When you delete a computer account using Active Directory Users And Computers, you
cannot just re-create a new computer account with the same name and access. The SID
of the original computer account will be different from that of the new account.
To remove a computer account, right-click the computer account in Active Directory
Users And Computers, and then select Delete.
Managing a Computer Account
Managing a remote computer is a common task when troubleshooting server or work-
station problems. You see and confi gure computer management settings such as
shares, system settings, services and applications, and the event log of the remote com-
puter. Care should be taken when changing settings or restarting services on remote
machines.
Right-click the computer account name in Active Directory Users And Computers, and
then select Manage to bring up Computer Management for that computer.
Resetting a Computer Account
Computer accounts, like user accounts, have passwords. Unlike user account pass-
words, computer account passwords are managed automatically. Sometimes, however,
the password can get out of sync or there can be another issue that doesn’t allow the
computer account to be authenticated in the domain. If this happens, the computer
account can no longer access resources in the domain and you should reset the com-
puter account.
To reset a computer account, right-click the computer account name in Active Direc-
tory Users And Computers, and then select Reset Account. If you reset the computer
account, the computer must be removed from the domain (by placing it in a workgroup
or other domain) and then rejoined to the domain.
However, the Reset Account feature is not the best technique to use with member serv-
ers and domain controllers. With member servers and domain controllers, you should
Chapter 35
1228 Chapter 35 Managing Users, Groups, and Computers
Please purchase PDF Split-Merge on www.verypdf.com to remove this watermark.
use NETDOM RESETPWD. You can reset the computer account password of a member
server or domain controller by completing the following steps:
1. Log on locally to the computer. If you are resetting the password of a domain
controller, you must stop the Kerberos Key Distribution Center service and set its
startup type to Manual.
2. Open a command prompt. Type netdom resetpwd /s:ComputerName /ud:
domain\user /pd:* where ComputerName is the name of a domain controller in the
computer account’s logon domain, domain\user is the name of an administrator
account with the authority to change the computer account password, and * tells
NETDOM to prompt you for the account password before continuing.
3. When you enter your password, NETDOM will change the computer account
password locally and on the domain controller. The domain controller will then
distribute the password change to other domain controllers.
4. When NETDOM completes this task, restart the computer and verify that the
password has been successfully reset. If you reset a domain controller’s password,
restart the Kerberos Key Distribution Center service and set its startup type to
Automatic.
Confi guring Properties of Computer Accounts
As with users and groups, there are many confi guration tabs you can select when you
are modifying a computer account. Right-click the computer name in Active Directory
Users And Computers, and then select Properties. The following tabs are available:
Delegation
Allows you to confi gure delegation for the computer account as dis-
cussed in “Confi guring the Delegated Service or Computer Account” on page
1112. This tab is available only when the domain is operating in Windows Server
2003 or higher functional level.
General
Shows the computer’s name and role and allows you to set a description.
You confi gure the computer for delegation by selecting the Trust This Computer
For Delegation option.
Location
Allows you to set a location for the computer.
Managed By
Allows you to specify the person or group responsible for the
computer.
Member Of
Allows you to confi gure the group membership for the computer.
Object
Displays the canonical name of the user object with dates and Update
Sequence Numbers. This tab is visible only in Advanced view.
Operating System
Displays the operating system version and service pack used
by the computer.
Managing Computer Accounts 1229
Chapter 35
Please purchase PDF Split-Merge on www.verypdf.com to remove this watermark.
Remote Install
Allows you to set the unique identifi er (globally unique identifi er
[GUID]/universal unique identifi er [UUID]) and the remote installation server to
use for a managed computer. This tab is available only for a managed computer.
Security
Used to confi gure advanced permissions for users and groups that
can access this computer object in Active Directory. This tab is visible only in
Advanced view.
Dial-In
Used to set the computer’s dial-in or VPN access controls as well as call-
back, IP address, and routing options for dial-in or VPN or both.
As you can see, much of the data for computer account properties is informational. The
data you may need to change is probably on the Security tab, where you can add users
or groups to the account and change permissions for users and groups that already
exist or that you have added. You may also have to change the dial-in confi guration as
well as allow or deny dial-in access using the computer.
Troubleshooting Computer Accounts
As an administrator, you may see a variety of problems related to computer accounts.
When you are joining a computer to a domain, you may experience problems due to
incorrect network settings. The computer joining the domain must be able to communi-
cate with the domain controller in the domain. You can resolve connectivity problems
by confi guring the computer’s local area network connection settings appropriately for
the domain to which you are connecting. Be sure to check the IP address, default gate-
way, and DNS server settings.
Another common problem is related to insuffi cient permissions The user joining the
computer to the domain must have appropriate permissions in the domain. Be sure to
use an account with appropriate permissions to join the domain.
After a computer is joined to a domain, you sometimes may see problems with the
computer password or trust between the computer and the domain. Diagnosing
a password/trust problem is fairly straightforward. If you try to access or browse
resources in the domain and are prompted for a user name and password when you
normally are not, you may have a password/trust issue with the computer account. For
example, if you are trying to connect to a remote computer in Computer Management,
and you are repeatedly prompted for a user name and password where you weren’t pre-
viously, the computer account password should probably be reset.
You can verify a password/trust problem by checking the System event log. Look for an
error with event ID 3210 generated by the NETLOGON service. The related error mes-
sage should read as follows:
This computer could not authenticate with RESOURCENAME, a Windows domain controller
for domain DOMAINNAME, and therefore this computer might deny logon requests. This
inability to authenticate might be caused by another computer on the same network
using the same name or the password for this computer account is not recognized. If
this message appears again, contact your system administrator.
Chapter 35
1230 Chapter 35 Managing Users, Groups, and Computers
Please purchase PDF Split-Merge on www.verypdf.com to remove this watermark.
As part of the troubleshooting process, you should always check the status of the
account in Active Directory Users And Computers. A disabled account has a white circle
with a down arrow. A deleted account will no longer be listed, and you won’t be able to
search for and fi nd it in the directory. If a user was trying to connect to a resource on
a remote computer, the computer to which they are connecting should have a related
error or warning event in the event logs.
If the related computer account is disabled or deleted, you will be denied access to
remote resources when connecting to those resources from this computer. As an
example, if you are trying to access FileServer75 from CustServicePC83 you will be
denied access if the computer account is disabled or deleted. The system event log on
the remote computer (FileServer75) should log related NETLOGON errors specifi cally
related to the computer account, such as the following with event ID 5722:
The session setup from the computer CORPPC18 failed to authenticate. The name(s) of
the account(s) referenced in the security database is CORPPC18$. The following error
occurred: Access is denied.
With Kerberos authentication, a computer’s system time can affect authentication. If a
computer’s system time deviates outside the permitted norms set in group policy, the
computer will fail authentication.
If you are still experiencing problems, check the computer’s group membership and
the container in which it is located in Active Directory. Computer accounts, like user
accounts, can be made members of specifi c groups and are placed in a specifi c con-
tainer in Active Directory. The group membership of a computer determines many
permissions with regard to security and resource access. Changing a computer’s group
membership can signifi cantly affect security and resource access. The container in
which a computer is placed determines how Group Policy is applied to the computer.
Moving a computer to a different container or OU can signifi cantly affect the way policy
settings are applied.
Managing Computer Accounts 1231
Chapter 35
Please purchase PDF Split-Merge on www.verypdf.com to remove this watermark.
Please purchase PDF Split-Merge on www.verypdf.com to remove this watermark.
G
roup Policy is designed to simplify administration by allowing administrators to
confi gure user and computer settings in Active Directory Domain Services and
then have those policies automatically applied to computers and enforced for computer
and user accounts throughout an organization. Not only does this provide central man-
agement of computers, it also helps to automate key administrative tasks. Using Group
Policy, you can accomplish the following tasks:
Confi gure security policies for account lockout, passwords, Kerberos, and
auditing
Redirect special folders such as a user’s Documents folder to centrally managed
network shares
Lock down computer desktop confi gurations
Defi ne logon, logoff, shutdown, and startup scripts
Automate the installation of application software
Maintain Microsoft Internet Explorer and confi gure standard settings
Some of these features such as security policies and folder redirection have been dis-
cussed in previous chapters. Other features are discussed in this chapter. The focus of
this chapter, however, is on the management of Group Policy, which is the most chal-
lenging aspect of implementing Group Policy in an organization.
Understanding Group Policy . . . . . . . . . . . . . . . . . . . . 1234
Implementing Group Policy . . . . . . . . . . . . . . . . . . . . . 1238
Managing Group Policy Through Delegation . . . . . . . 1249
Managing Group Policy Inheritance
and Processing . . . . . . . . . . . . . . . . . . . . . . . . . . . . . . . . 1254
Using Scripts in Group Policy . . . . . . . . . . . . . . . . . . . . 1264
Applying Group Policy Through Security
Templates . . . . . . . . . . . . . . . . . . . . . . . . . . . . . . . . . . . . 1266
Maintaining and Troubleshooting Group Policy . . . . . 1268
CHAPTER 36
Managing Group Policy
1233
Please purchase PDF Split-Merge on www.verypdf.com to remove this watermark.
Note
Group Policy settings for Windows Server 2008 have changed considerably. Under the
Computer Confi guration and User Confi guration nodes, you fi nd two new nodes: Policies
and Preferences. Settings for general policies are listed under the Policies node. Settings
for general preferences are listed under the Preferences node. When referencing set-
tings under the Policies node, I’ll use shortcut references, such as User Confi guration\
Administrative Templates\Windows Components rather than User Confi guration\
Policies\Administrative Templates: Policy Defi nitions\Windows Components. This short-
cut reference tells you the policy setting being discussed is under User Confi guration
rather than Computer Confi guration and can be found under Administrative Templates\
Windows Components.
Understanding Group Policy
You can think of Group Policy as a set of rules that help you manage users and comput-
ers. Like any set of rules, Group Policy is effective only under certain conditions. You
can use Group Policy to manage servers running Microsoft Windows 2000 Server and
later as well as client workstations running Windows 2000 and later. You cannot use
Group Policy to manage Windows NT, Windows 95, Windows 98, or Windows Me.
Note
Like Active Directory, Group Policy has gone through several revisions. As a result of
these revisions, some policies work only with a version of the Windows operating system
that is compatible with a particular revision. For example, some group policies are com-
patible with Windows 2000, Windows XP Professional, Windows Vista, Windows Server
2003 and Windows Server 2008, while others are compatible only with Windows XP Pro-
fessional and Windows Server 2003 or with Windows Vista and Windows Server 2008.
You can check compatibility when you are editing individual policy settings.
Local and Active Directory Group Policy
Two types of group policies are available. The fi rst type is local group policy, which is
stored locally on individual computers in the %SystemRoot%\System32\GroupPolicy
folder and applies only to a particular computer. Every computer running Windows
2000 or later has one or more local group policies. For a computer in a workgroup,
local group policy is the only group policy available. A computer in a domain also has
a local group policy, but it is not the only group policy available, and this is where the
Note
Group Policy settings for Windows Server 2008 have changed considerably. Under the
Computer Confi guration and User Confi guration nodes, you fi nd two new nodes: Policies
and Preferences. Settings for general policies are listed under the Policies node. Settings
for general preferences are listed under the Preferences node. When referencing set-
tings under the Policies node, I’ll use shortcut references, such as User Confi guration\
Administrative Templates\Windows Components rather than User Confi guration\
Policies\Administrative Templates: Policy Defi nitions\Windows Components. This short-
cut reference tells you the policy setting being discussed is under User Confi guration
rather than Computer Confi guration and can be found under Administrative Templates\
Windows Components.
Note
Like Active Directory, Group Policy has gone through several revisions. As a result of
these revisions, some policies work only with a version of the Windows operating system
that is compatible with a particular revision. For example, some group policies are com-
patible with Windows 2000, Windows XP Professional, Windows Vista, Windows Server
2003 and Windows Server 2008, while others are compatible only with Windows XP Pro-
fessional and Windows Server 2003 or with Windows Vista and Windows Server 2008.
You can check compatibility when you are editing individual policy settings.
Chapter 36
1234 Chapter 36 Managing Group Policy
Please purchase PDF Split-Merge on www.verypdf.com to remove this watermark.
second type of group policy, called Active Directory group policy (or more commonly
just “group policy”), comes into the picture.
Active Directory group policy physical components called Group Policy Template (GPT)
are stored in the Sysvol folder. This folder is used by Active Directory for replicating
policies and is represented logically as an object called a Group Policy object (GPO). A
GPO is simply a container for the policies you confi gure and their settings that can be
linked to sites, domains, and organizational units (OUs) in your Active Directory struc-
ture. You can create multiple GPOs, and by linking those objects to different locations
in your Active Directory structure, you can apply the related policy settings to the users
and computers in those Active Directory containers.
When you create a domain, two Active Directory group policies are created:
Default Domain Controllers Policy GPO
A default GPO created for the Domain
Controllers OU and applicable to all domain controllers in a domain as long as
they are members of this OU.
Default Domain Policy GPO
A default GPO that is created for and linked to the
domain within Active Directory.
You can create additional GPOs as necessary and link them to the sites, domains, and
OUs you’ve created. Linking a GPO to Active Directory structure is how you apply
Group Policy. For example, you could create a GPO called Technology Policy and then
link it to the Technology OU. The policy then applies to that OU.
Group Policy Settings
Group Policy applies only to users and computers. Although groups can be used to
specify to which users a particular policy applies, the actual policies are applied only
to members of these groups. Group Policy settings are divided into two categories:
Computer Confi guration and User Confi guration. Computer Confi guration contains
settings that apply to computers. User Confi guration contains settings that apply to
user accounts.
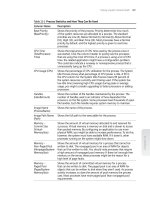
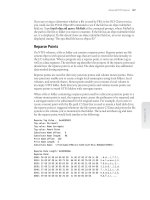
Figure 36-1 shows the Default Domain Policy for a computer. As you can see in the fi g-
ure, both Computer Confi guration–related and User Confi guration–related settings are
divided into three major classes, each of which contains several subclasses of settings:
Software Settings
Allow you to install software on computers and then maintain
it by installing patches or upgrades. You can also uninstall software.
Windows Settings
Allow you to manage key Windows settings for both com-
puters and users, including scripts and security. For users, you can also man-
age Remote Installation Services, folder redirection, and Internet Explorer
maintenance.
Administrative Templates
Allow you to control Registry settings that confi gure
the operating system, Windows components, and applications. Administrative
Templates are implemented for specifi c operating system versions.
Understanding Group Policy 1235
Chapter 36
Please purchase PDF Split-Merge on www.verypdf.com to remove this watermark.
Figure 36-1 The Default Domain Policy.
Group Policy Architecture
Within the Windows operating system, the components of Group Policy have sepa-
rate server and client implementations (see Figure 36-2). Each Group Policy client
has client-side extensions that are used to interpret and apply Group Policy settings.
The client-side extensions are implemented as dynamic-link libraries (DLLs) that are
installed with the operating system. The main DLL for processing Administrative Tem-
plates is Userenv.dll.
The Group Policy engine running on a client triggers the processing of policy when
one of two events occurs: either the system is started or a user logs on to the computer.
When a system is started and the network connection is initialized, computer policy
settings are applied.
Administrators and others delegated permissions in Group Policy can use the Group
Policy Management Editor to manage Group Policy. This snap-in for the Microsoft
Management Console (MMC) provides the three top-level classes (Software Settings,
Windows Settings, and Administrative Templates) that can be managed and makes use
of a number of extensions. These extensions provide the functionality that allows you
to confi gure various Group Policy settings. Some client-side extensions don’t have spe-
cifi c implementations on the server because they are Registry-based and can be confi g-
ured through Administrative Templates.
Chapter 36
1236 Chapter 36 Managing Group Policy
Please purchase PDF Split-Merge on www.verypdf.com to remove this watermark.